Barbell Collar Comparison & Resistance Band Dumbbell Setup
Compare barbell collars and clamps for heavy lifting, plus a complete setup walkthrough for anchoring a resistance band dumbbell hybrid system safely.

The Evolution of Hybrid Free Weight Training
As home and garage gyms continue to evolve in 2026, the line between traditional free weights and accommodating resistance has blurred. Lifters are no longer just stacking iron; they are engineering hybrid systems. One of the most effective, yet technically demanding, configurations is the resistance band dumbbell setup. This involves rigging Olympic loadable dumbbell handles with heavy-duty loop bands to create variable tension throughout the range of motion. However, the success and safety of this hybrid lift do not depend on the plates or the bands—it hinges entirely on the barbell collars and clamps used to secure the stack.
When lateral tension from a stretched band pulls against the sleeve of a dumbbell, standard spring collars fail catastrophically. To build a safe and effective accommodating resistance station, you must understand the mechanical nuances of collar types, material sciences, and proper installation sequencing. Below is a comprehensive technical comparison and installation walkthrough.
Barbell Collar and Clamp Types: A Technical Matrix
Not all collars are engineered to handle the multi-directional shear forces generated by elastic band tension. Here is how the primary collar categories perform when subjected to the extreme lateral pull of a resistance band dumbbell configuration.
| Collar Type | Top Model (2026) | Approx. Cost | Band Anchoring Security | Primary Failure Mode |
|---|---|---|---|---|
| Spring Collars | Rogue Spring Collars | $12 - $15 / pair | Poor (High Risk) | Weld-point fatigue; lateral slip under >40lbs tension |
| Clamp-Style (Aluminum) | Rogue HG 2.0 Collars | $25 - $30 / pair | Excellent | TPU lining degradation after years of heavy knurl friction |
| Lock-Jaw / Polymer | Lock-Jaw Pro V2 | $29 - $35 / pair | Very Good | Plastic housing hairline fractures from overtightening |
| Lever / Competition | Eleiko Olympic Training | $80 - $95 / pair | Fair (Slippery Profile) | Smooth outer profile offers no grip for exterior band loops |
Why Clamp-Style Dominates Hybrid Setups
For a resistance band dumbbell build, clamp-style collars featuring an aircraft-grade aluminum body and a high-durometer TPU (Thermoplastic Polyurethane) inner lining are the undisputed standard. According to biomechanical analyses on accommodating resistance published by Stronger by Science, the tension curve of a band can add upwards of 150 lbs of peak force at the top of a pressing movement. Clamp collars distribute this lateral force evenly across the sleeve, preventing the micro-slippage that causes plates to rattle and bands to snap back dangerously.
Complete Walkthrough: Rigging the Resistance Band Dumbbell
Setting up a secure accommodating dumbbell requires precision. If you are using 15-inch loadable Olympic dumbbell handles (such as those from Rogue or Rep Fitness), follow this exact installation sequence to ensure maximum safety and sleeve integrity.
⚠️ CRITICAL SAFETY WARNING: Never place the resistance band loop on the outside of the weight plates secured by a standard collar. The band will act as a wedge, prying the collar off the sleeve under tension. Always anchor the band directly against the inner collar of the dumbbell handle or use specialized band-peg add-ons.Step-by-Step Installation Sequence
- Anchor the Base: Secure the bottom loop of your 41-inch resistance band to a heavy landmine post, a dedicated band peg on your power rack, or step on it firmly with a non-slip shoe. For heavy dumbbell floor presses, anchoring to a low rack crossmember is ideal.
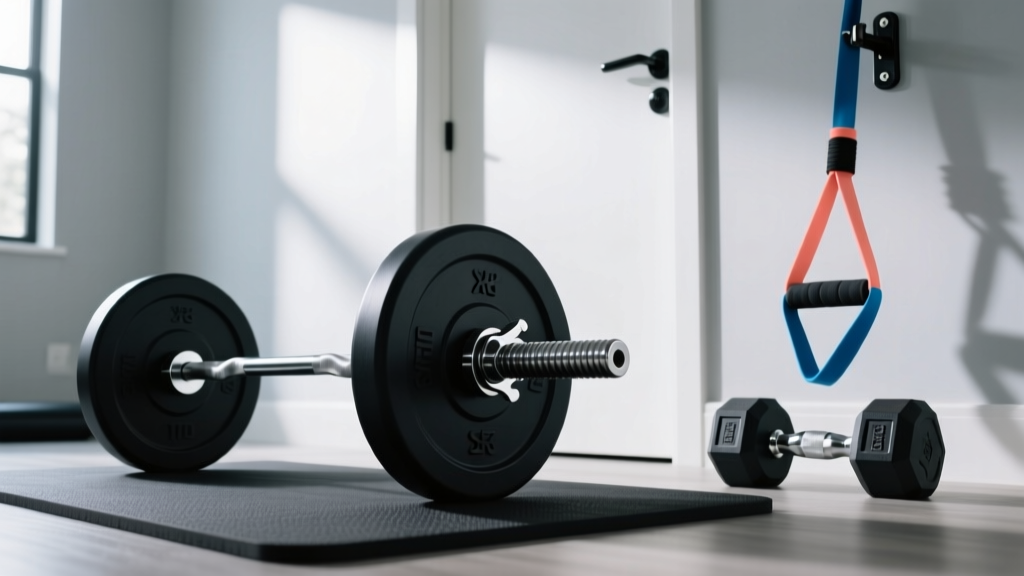
- Thread the Dumbbell Sleeve: Slide the top loop of the band directly onto the bare Olympic sleeve of the dumbbell handle. Push it all the way down until it rests flush against the inner machined lip of the handle.
- Load the Iron: Slide your calibrated or cast-iron bumper plates onto the sleeve, trapping the band loop between the inner handle lip and the first weight plate. This 'sandwich' method neutralizes lateral band pull.
- Apply the Clamp Collar: Open your aluminum clamp collar (e.g., Rogue HG 2.0). Place it as close to the outer edge of the loaded plate as possible, leaving exactly 1/8th of an inch of sleeve clearance to allow the TPU lining to bite into the steel.
- Engage and Lock: Squeeze the clamp handles together. You should hear a distinct 'click' as the locking mechanism engages. Give the collar a manual twist test—if the TPU lining is properly compressed against the zinc or chrome sleeve, it should not rotate.
- Repeat and Balance: Replicate the exact plate load and band tension on the second dumbbell. Asymmetrical tension in a resistance band dumbbell setup will severely compromise your rotator cuffs during pressing or rowing movements.
Material Science: TPU vs. Rubber in 2026
When shopping for clamps to secure your free weights and bands, pay strict attention to the inner lining material. Historically, collars used vulcanized rubber. However, rubber compresses permanently over time (compression set), leading to a loose fit on the 50mm Olympic sleeve.
Modern premium collars utilize TPU with a Shore hardness rating between 85A and 90A. TPU resists deformation, maintains its grip across varying garage gym temperatures (from freezing winters to humid summers), and resists tearing when dragged across knurled barbell sleeves. When building a high-tension resistance band dumbbell, this material grip is the only thing preventing a 100lb iron stack from sliding off the sleeve and crushing your foot.
Troubleshooting Common Setup Failures
Even with the right hardware, lifters encounter edge cases when integrating bands with loadable dumbbells. Here is how to troubleshoot the most frequent issues:
- Band Pinching and Fraying: If the band is trapped between iron plates, the sharp edges of cast iron can slice the latex over time. Solution: Use machined steel calibration plates or place a thin UHMW plastic washer between the band loop and the iron plate.
- Collar Rotation During Curls: During supinating dumbbell curls, the rotational torque can loosen lever collars. Solution: Switch exclusively to dual-latch clamp collars which lock via mechanical teeth rather than friction levers.
- Sleeve Length Limitations: A standard 15-inch dumbbell handle only offers about 6.5 inches of loadable sleeve space. Thick bumper plates plus a banded loop will quickly max out the sleeve. Solution: Utilize thin steel change plates (fractions) to maximize iron density without eating up sleeve real estate.
'The integration of elastic tension with free weights fundamentally alters the force-velocity curve of the lift. But the physics of the lift are entirely irrelevant if the mechanical linkages—your collars and anchors—cannot withstand the peak shear forces.' — Biomechanics of Accommodating Resistance, NSCA Guidelines.
Frequently Asked Questions
Can I use spring collars for light resistance band dumbbell work?
No. Even with light bands (e.g., 15-30 lbs of tension), the continuous lateral pull creates a creeping effect on spring collars. Over a set of 12 repetitions, the vibration and tension will cause the spring collar to slide outward, compromising the plate stack. Always use mechanical clamps.
Do I need specialized band-peg dumbbells?
While specialty dumbbells with integrated band pegs (like the XBANDS system) exist, they are expensive and limit your standard free weight utility. Using standard 2-inch Olympic loadable handles paired with high-quality clamp collars and the 'sandwich' band-loop method detailed above is the most versatile and cost-effective approach for a 2026 home gym.
How often should I inspect my bands and collars?
Inspect your latex bands for micro-tears and dry rot before every single session. For your collars, check the TPU lining for embedded metal shavings or excessive wear every six months. For more detailed maintenance protocols, refer to the Serious Steel Resistance Band Guide. Proper care ensures your hybrid setups remain safe and effective for years.
For further hardware recommendations and to browse the latest clamp technologies, check out the extensive inventory at Rogue Fitness Barbell Collars and Clamps. Building the ultimate resistance band dumbbell setup is an investment in your strength curve—do not let a $15 piece of hardware be the weak link in your training.
More gear to consider
All reviews
Loadable Dumbbells for Your 10 Minute Upper Body Dumbbell Workout
From Neoprene to 44 kg Dumbbells: A Beginner Home Guide
Collar Comparison & Short Head Bicep Exercises Dumbbell Gear
Pectoral Workout With Dumbbells: Rubber Hex vs Urethane Care Guide

Olympic Barbell Knurling: Fixing Grip From Cable Dumbbell Curls