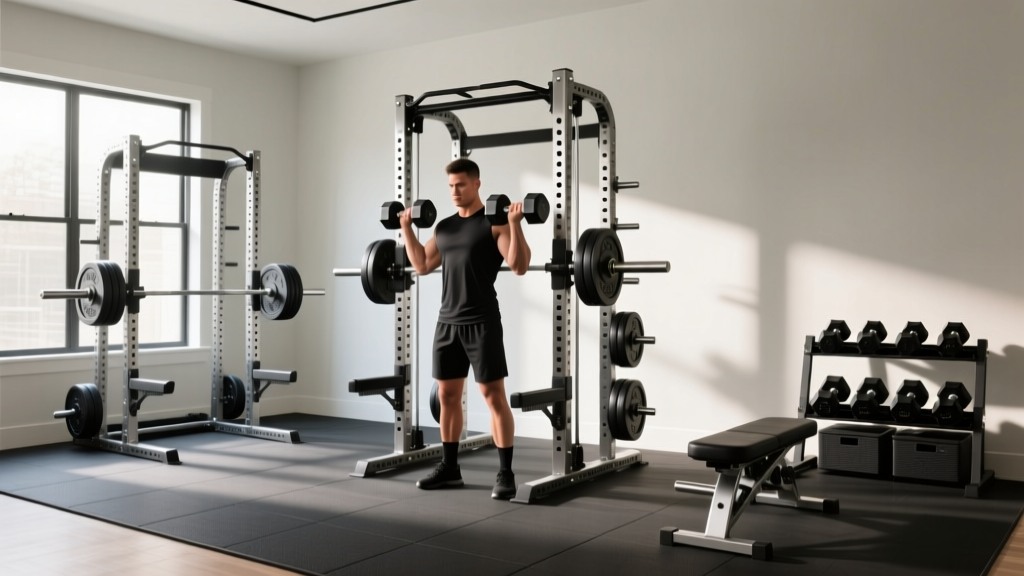
Power Rack vs Squat Rack vs Stand: Standing Dumbbell Curl Guide
Compare power rack vs squat rack vs squat stand setups. Our installation walkthrough optimizes floor space for heavy lifts and the standing dumbbell curl.

The Home Gym Anchor: Balancing Heavy Compounds and Isolation Space
When designing a home gym in 2026, the decision between a power rack, a squat rack (half rack), and minimalist squat stands dictates more than just your barbell safety. It fundamentally alters your floor plan, traffic flow, and the usable space for essential accessory movements. While most buyers focus solely on squatting and benching, a well-designed rig must also accommodate free-weight isolation work. A prime example is the standing dumbbell curl, an exercise that requires specific lateral clearance, elbow drift room, and flooring considerations that vary wildly depending on your chosen rack style.
This comprehensive setup and installation walkthrough will guide you through the physical assembly, spatial requirements, and biomechanical zone planning needed to integrate your heavy rig with your dumbbell accessory work seamlessly.
The Footprint Factor: Rack Dimensions vs. Accessory Clearance
Before unboxing hardware, you must map your space. According to extensive equipment testing by Garage Gym Reviews, the physical footprint of your rack determines where you can safely perform standing isolation movements without busting your knuckles on steel uprights.
Power Rack (Full Cage)
A standard full power rack, like the Rogue R-3 or Titan T-3, typically measures 49 inches wide by 34 to 49 inches deep. While this offers unparalleled safety for heavy squats, it creates a confined 'cage' environment. If you perform your standing dumbbell curl inside the cage to utilize the back-mounted mirror or stay on the protective matting, you are working with roughly 25 inches of clear lateral space between the uprights. This is sufficient for most lifters, but taller athletes with longer wingspans may find their elbows grazing the crossmembers during the supination phase of the curl.
Squat Rack (Half Rack)
Half racks, such as the REP PR-4000 Half Rack, feature a smaller depth (usually around 24 to 30 inches) but maintain a wide stance. This setup encourages you to step slightly forward or to the side of the uprights for accessory work, providing an open-air feel while keeping the heavy-duty safety spotter arms attached to the mainframe.
Squat Stands
Squat stands, like the Titan Fitness HD Squat Stands, consist of two independent uprights. They require the least amount of dedicated square footage but demand the most from your surrounding floor space. Because there is no enclosing cage, your standing dumbbell curl setup is pushed out into the open room, requiring you to extend your protective rubber matting beyond the immediate lifting zone.
Step-by-Step Installation Walkthrough
Proper installation ensures your rig can handle 1,000+ lb static loads while remaining perfectly plumb, which is critical if you are using rack-mounted cable attachments for variations of the curl later on.
Step 1: Subfloor Preparation and Matting
Never assemble a rack directly on bare concrete or hardwood without a buffer. For a permanent setup, lay down 3/4-inch thick vulcanized rubber horse stall mats. As noted in the GGR Flooring Guide, vulcanized rubber provides the necessary shock absorption for dropped weights and creates a level, high-traction surface. For the standing dumbbell curl, a high-traction surface is vital; the exercise generates subtle anterior-posterior sway, and slipping on a smooth floor can lead to lower back compensation.
Step 2: Assembling the Uprights and Crossmembers
- Stage the Hardware: Separate your 5/8-inch or 1-inch diameter Grade 5 bolts, washers, and nylon-insert lock nuts. Do not fully tighten any bolts during the initial framing.
- Build the Side Panels: Assemble the left and right side panels (uprights connected by horizontal crossmembers) on the floor first. Use a rubber mallet to seat the crossmembers into the laser-cut holes.
- Raise and Connect: With a partner, stand the side panels up and connect them using the front and rear top stabilizers.
- Plumb and Square: Use a 4-foot carpenter's level on the front uprights. Measure the diagonal distance from the top-left corner to the bottom-right corner, and compare it to the opposite diagonal. If the measurements match, your rack is perfectly square.
- Torque Down: Once square, use a torque wrench to tighten all hardware to the manufacturer's specifications (typically 60-80 ft-lbs for 5/8-inch hardware). Re-torque after 30 days of use, as steel settles under load.
Step 3: Anchoring and Safety Spotter Placement
If you are using squat stands, you must bolt them to a wooden platform or use heavily weighted rear storage pegs to prevent forward tipping during barbell racking. For power racks, lag bolting into concrete using 3/8-inch wedge anchors is the gold standard. Position your safety spotter arms at mid-sternum height for squats, but ensure they can be easily removed or flipped up so they do not obstruct your hip or elbow path when stepping into the rack to perform your standing dumbbell curl.
Comparative Matrix: Rack Types for the Complete Routine
| Feature | Full Power Rack | Squat Rack (Half Rack) | Squat Stands |
|---|---|---|---|
| Average Footprint | 49' W x 49' D (16.7 sq ft) | 48' W x 24' D (8 sq ft) | 23' W x 19' D (per stand) |
| 2026 Avg. Price Range | $900 - $1,600 | $600 - $1,100 | $250 - $450 |
| Standing Dumbbell Curl Zone | Confined (Inside cage) | Semi-Open (Front/Side) | Fully Open (Anywhere) |
| Best For | Heavy solo lifting, full attachments | Balance of safety and open space | Small apartments, max open floor |
Biomechanics and Spatial Planning for the Standing Dumbbell Curl
Why dedicate so much thought to rack placement for a bicep exercise? The biomechanics of the standing dumbbell curl dictate that the lifter must maintain a fixed elbow position while allowing for a natural supination arc (rotating the palm upward as the weight rises).
Expert Insight: The Supination Arc
During a strict standing dumbbell curl, the dumbbell head travels outward slightly as the forearm supinates. If you are standing dead-center inside a 49-inch wide power rack, holding 40lb hex dumbbells, your lateral clearance is roughly 12 inches per side. If you drift even slightly off-center during a heavy set, the steel uprights will interrupt the movement path, forcing you to break form or risk dropping the weight. Solution: Stand slightly off-center inside the rack, or step entirely outside the half-rack/squat stands to allow for unrestricted lateral drift.
Common Installation Mistakes to Avoid
- Ignoring the 'Pull-Up Bar Overhang': Many power racks feature a multi-grip pull-up bar that extends 6 to 12 inches beyond the front uprights. If you place your rack flush against a wall, you will lose the ability to do standing exercises near the front of the rig without hitting your head.
- Using Standard Washers Instead of Flange Nuts: Vibrations from dropping barbells will slowly back out standard nuts. Always use nylon-insert lock nuts or flange nuts on your crossmembers.
- Uneven Matting Seams: If your rubber mats do not meet perfectly flush, the slight height difference can cause a micro-stumble during the eccentric (lowering) phase of the standing dumbbell curl, where balance is most precarious.
Final Verdict: Matching Your Rig to Your Routine
The choice between a power rack, squat rack, and squat stands ultimately comes down to your available square footage and your tolerance for spatial constraints. If your programming relies heavily on heavy barbell compounds with occasional accessory work, a half squat rack offers the perfect 2026 compromise: it provides the safety spotter arms needed for solo benching and squatting, while leaving the front and sides completely open for unrestricted standing dumbbell curls, lateral raises, and kettlebell swings.
Take the time to measure your clearance, torque your hardware correctly, and respect the biomechanical space your isolation movements require. A properly installed rig is not just a place to store a barbell; it is the foundational blueprint for your entire training ecosystem.
More gear to consider
All reviews
Adjustable Dumbbell Review: Fix Your Dumbbell Chest Workout Routine

Loadable Dumbbells for Low Dumbbell Flyes: Space-Saving Guide
Best Adjustable Dumbbells for Muscle Gain: 2026 Head-to-Head
Olympic vs Standard Weight Plates: Upgrading Past Plastic Dumbbells

Power Rack vs Squat Stand: Space for Dumbbell Box Step Overs?
