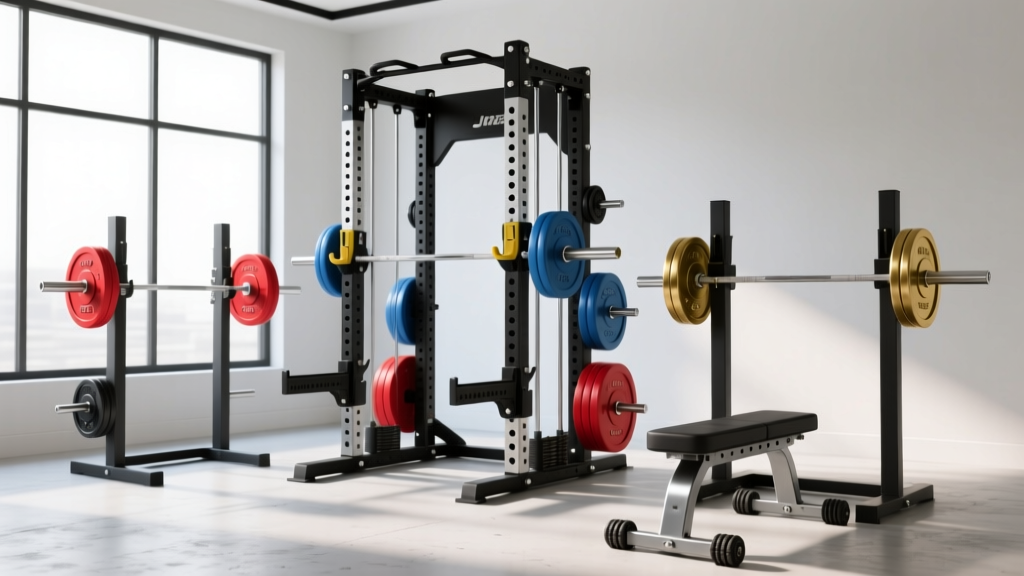
Power Rack vs Squat Rack vs Squat Stand: Beyond the 10 kg Dumbbell
Outgrown your 10 kg dumbbell? Follow our step-by-step guide to choosing the right power rack, squat rack, or squat stand for your home gym.

Step 1: Recognizing the Limits of the 10 kg Dumbbell
When you first begin your fitness journey, a single 10 kg dumbbell is a fantastic tool. It is perfect for learning the mechanics of the goblet squat, mastering the unilateral dumbbell press, and building foundational core stability. However, human physiology adapts quickly. Within a few months of consistent training, your lower body will inevitably outgrow the 10 kg dumbbell. You will find yourself performing 20-rep sets just to feel a stimulus, shifting your training from strength and hypertrophy into pure muscular endurance.
To continue making progress, you must transition to barbell training. But unlike dumbbells, you cannot simply pick a loaded barbell up from the floor and place it on your back for a heavy squat. You need a dedicated structure to safely unrack and rerack the weight, and more importantly, to catch the bar if you fail a rep. This brings us to the most critical equipment decision in your home gym build: choosing between a squat stand, a squat rack (half rack), and a full power rack.
In this step-by-step guide, we will break down the exact specifications, 2026 market pricing, and safety considerations for each option so you can build a gym that matches your current strength and future goals.
Step 2: Evaluating the Squat Stand (The Minimalist Approach)
A squat stand consists of two independent uprights with adjustable J-cups to hold the barbell. They are the most space-efficient and budget-friendly option on the market.
Specifications and Market Standards
In 2026, the baseline for a safe, high-quality squat stand is 11-gauge steel with a minimum 1,000 lb weight capacity. Budget models often use 14-gauge steel and 2x2 inch uprights, which can wobble dangerously when you are re-racking a heavy barbell. Premium models, like the Rogue SML-1 Monster Lite Squat Stand, utilize 3x3 inch 11-gauge steel and feature a folded footprint of just 4 inches by 21 inches when not in use.
⚠️ Critical Safety Warning: Squat stands have a high center of gravity and a narrow base. According to BarBend's home gym safety guidelines, independent squat stands must either be bolted directly into concrete or heavily sandbagged at the base. Failing to anchor them can result in the stands tipping forward during a failed squat, leading to catastrophic injury.Pros and Cons
- Pros: Lowest price point ($250–$400); minimal floor footprint; unobstructed movement for Olympic lifts; easy to fold away in multi-use rooms.
- Pros: Ideal for garages with low ceilings or tight spatial constraints.
- Cons: No built-in safety spotter arms (must be purchased separately and require a stabilizer crossbar); lacks attachment points for cable pulleys or lat pulldowns; requires strict anchoring.
Step 3: Evaluating the Squat Rack / Half Rack (The Middleweight)
The squat rack, commonly referred to as a half rack, bridges the gap between the minimalist stand and the full cage. It typically features four uprights: two in the front to hold the barbell, and two in the rear connected by a heavy-duty crossmember for stability and weight storage.
Specifications and Market Standards
Half racks provide a vastly superior safety profile compared to squat stands because the rear uprights allow for long, cantilevered safety spotter arms that extend outside the footprint of the rack. If you fail a squat, you can simply drop the bar forward or backward onto these arms. A top-tier example in the current market is the Titan Fitness T-2 Series Half Rack, which retails around $450 and features 2x3 uprights with 1-inch hole spacing.
When shopping for a half rack, pay close attention to the hole spacing. Standard 2-inch spacing is fine for squats, but if you plan to bench press, you need 'Westside' 1-inch spacing in the bench zone to ensure you can set the J-cups at the exact height required for your arm length.
Pros and Cons
- Pros: Excellent stability without enclosing the lifter; built-in weight plate storage on the rear uprights acts as a counterbalance; supports heavy safety spotter arms.
- Cons: Larger footprint than squat stands (typically 48x48 inches); limits the use of resistance bands and advanced attachment ecosystems compared to full cages.
Step 4: Evaluating the Power Rack (The Fortress)
The power rack (or power cage) is a fully enclosed four-post or six-post steel structure. It is the undisputed gold standard for home and commercial gyms, offering maximum safety and unparalleled modularity.
Specifications and Market Standards
The modern power rack ecosystem in 2026 is dominated by the 3x3 inch upright with 5/8-inch hardware holes. This standard, popularized by elite brands and now widely available from importers like REP Fitness and Bells of Steel, allows you to mix and match attachments—from monolifts to cable towers—across different brands. The REP Fitness PR-4000 Power Rack (starting around $699) exemplifies this, offering 1,000 lb capacity, laser-cut numbering, and UHMW plastic-lined J-cups to protect your barbell knurling.
'Investing in a 3x3 power rack with 5/8-inch holes future-proofs your gym. The attachment ecosystem for this specific dimension has exploded, meaning you will never be locked into a single proprietary brand for your accessories.' — Garage Gym Reviews Equipment Analysis
Pros and Cons
- Pros: Ultimate safety (interior safety straps or pin-pipe catchers); massive attachment compatibility (lat pulldowns, dip stations, belt squat attachments); acts as a structural anchor for gymnastic rings and TRX bands.
- Cons: Highest price point ($600–$1,500+); requires a massive footprint (minimum 48x48 inches, plus 30 inches of clearance on all sides for loading plates); heavy and difficult to move once assembled.
Step 5: The 2026 Home Gym Comparison Matrix
To help you visualize the differences, refer to the comparison table below. This matrix assumes you are upgrading from basic free weights and need a reliable, safe setup for barbell compound movements.
| Feature | Squat Stand | Half Rack | Power Rack |
|---|---|---|---|
| Avg. Price (2026) | $250 - $400 | $400 - $650 | $650 - $1,200+ |
| Footprint | ~24" x 24" (Foldable) | ~48" x 48" | ~48" x 48" (or 53" depth) |
| Safety Catchers | Straps (Requires Crossbar) | Long Cantilever Arms | Interior Pins or Straps |
| Attachment Ecosystem | Very Low | Moderate | Extremely High |
| Ideal For | Apartments / Tight Spaces | Garage Gyms / Olympic Lifting | Dedicated Home Gyms / Powerlifting |
Step 6: Factoring in Ceiling Height and Floor Anchoring
Before pulling the trigger on a purchase, you must measure your physical space. Standard power racks are typically 84 inches (7 feet) tall, allowing for pull-ups without your head hitting the ceiling. However, if you are building a gym in a basement with drop ceilings or an attic space, you will need to source a 'short' rack, which usually stands at 72 inches. Keep in mind that a 72-inch rack limits the ability to perform standard pull-ups unless you use a low-profile lat pulldown attachment.
Anchoring Protocols
- Concrete Floors: Use 3/8-inch wedge anchors or sleeve anchors to bolt the base plates directly into the concrete. This is mandatory for squat stands and highly recommended for half racks.
- Wood Subfloors / Carpet: You cannot use wedge anchors. Instead, you must bolt the rack to the wooden joists beneath the subfloor using lag screws, or build a raised wooden platform and bolt the rack to the platform's frame. Alternatively, purchase a rack with a rear weight storage horn; loading 400+ lbs of iron plates on the back of a half rack or power rack provides sufficient counterbalance to prevent tipping without bolting.
Step 7: Making Your Final Decision
Transitioning from a simple 10 kg dumbbell routine to a barbell-centric program is a massive milestone in your lifting career. Your choice of rack should reflect your environment and your ambition.
- Choose the Squat Stand if: You are training in a spare bedroom or apartment, you strictly perform Olympic weightlifting where a cage would impede your bar path, and you are willing to rigorously anchor the base.
- Choose the Half Rack if: You want the stability of four uprights and the safety of long spotter arms, but you want to keep the front of the rack open for dynamic movements and muscle-ups.
- Choose the Power Rack if: You have a dedicated garage or basement space, you train alone without a spotter, and you want the flexibility to add cable pulleys, monolifts, and safety straps as your strength progresses over the next decade.
By investing in the right steel infrastructure today, you ensure that the only limit to your progress is your own effort, not the safety of your equipment.
More gear to consider
All reviews
Mastering Full Body Weight Training With Dumbbells: Loadable Picks

Olympic vs Standard Plates: Beyond the Dumbbell Ab Workout
Walking With Dumbbells Workout: Hex vs Urethane Space Guide

Bumper vs Iron Plates: Dumbbell Bench Braced Wrist Extension Trends

Women's Dumbbell Workout Routine PDF Free Download: Time for a Rack?
