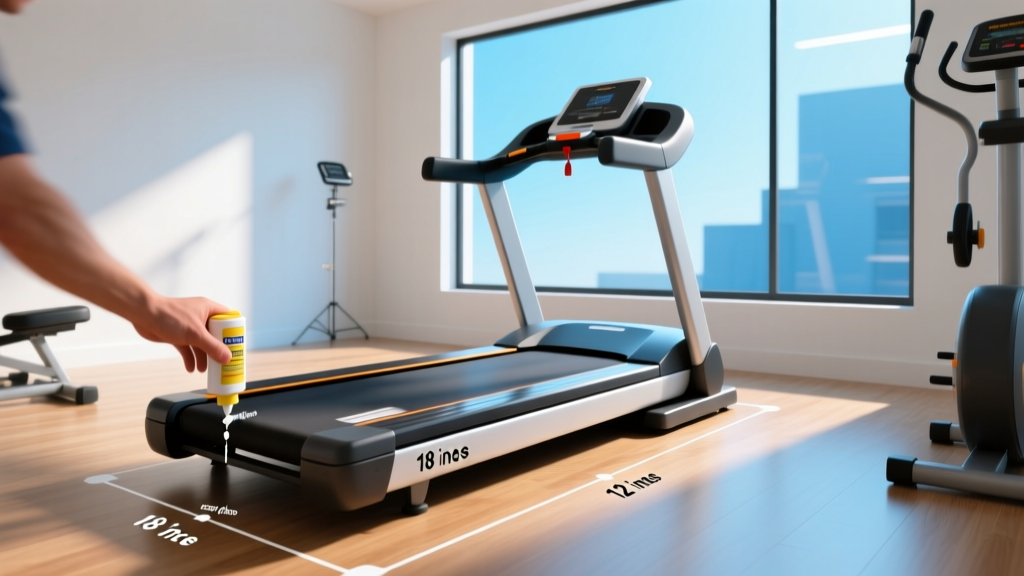
Original Treadmill Space Layouts & In-Place Belt Lubrication Guide
Optimize your home gym layout for an original treadmill. Learn in-place belt maintenance, lubrication clearances, and tensioning without moving the machine.

The Spatial Geometry of In-Place Treadmill Maintenance
Modern home gym design in 2026 is increasingly focused on micro-layouts and multi-purpose rooms. When optimizing a compact space, every square inch matters. However, maximizing the lifespan of your original treadmill requires balancing spatial efficiency with mechanical accessibility. Many home gym owners make the critical mistake of pushing their cardio equipment flush against walls or into tight corners, only to realize that routine belt maintenance and lubrication require moving a 200-pound machine.
Moving a heavy treadmill risks damaging your flooring, straining the machine's internal wiring, and throwing the deck alignment out of calibration. The solution is designing a 'maintenance corridor' within your spatial layout. By understanding the exact clearances required for in-place belt access, you can keep your original treadmill running smoothly without ever needing to drag it out of its designated footprint.
According to safety and accessibility guidelines highlighted by the Consumer Product Safety Commission (CPSC), spatial planning must account for both user safety and mechanical servicing. Below is the definitive clearance matrix for optimizing your layout.
| Zone | Minimum Clearance | Maintenance Purpose |
|---|---|---|
| Rear Deck | 24 inches | Emergency dismount safety & motor hood access |
| Right Side (Dominant) | 14 inches | Belt lubrication access & tension bolt adjustment |
| Left Side | 6 inches | Power cord routing & basic dusting |
| Overhead | 12 inches above user | Ceiling fan clearance & heat dissipation |
Selecting the Correct Lubricant for OEM Decks
The friction coefficient between the walking belt and the wooden or composite deck is the single most important variable in treadmill longevity. If you are maintaining the belt on your original treadmill, you must use the correct chemical formulation. In 2026, the industry standard for 95% of residential and commercial decks is 100% pure silicone oil.
CRITICAL WARNING: Never use WD-40, 3-in-One oil, or household lubricants on a treadmill belt. These petroleum-based products will instantly degrade the rubber backing of the belt, causing it to stretch, crack, and ultimately destroy the deck. Furthermore, avoid PTFE (Teflon) sprays unless explicitly mandated by a vintage manufacturer, as they can leave a residue that attracts micro-dust in enclosed home gyms.High-quality 100% silicone treadmill lubricants, such as those offered by Horizon Fitness or WalkingPad, typically cost between $10 and $15 for a 4-ounce bottle with an extended reach applicator wand. This wand is crucial for tight space layouts, allowing you to apply the oil deep under the belt from the 14-inch side corridor without lifting the heavy edges of the track.
Step-by-Step In-Place Belt Tensioning and Lubrication
Proper layout design allows you to perform the following maintenance sequence entirely in place. You will need a microfiber cloth, a bottle of 100% silicone lubricant, and the correct Allen wrench (usually 5mm or 6mm, depending on whether you own a Life Fitness, Sole, or NordicTrack model).
- Prep the Surface: Wipe down the exposed edges of the belt and deck with a dry microfiber cloth to remove accumulated dust and pet hair, which act as abrasives.
- Loosen the Rear Roller: Insert your Allen wrench into the left and right rear adjustment bolts. Turn each bolt counter-clockwise by exactly two full rotations. This creates enough slack to lift the belt edge without unseating the front roller.
- Apply the Silicone: Insert the applicator wand under the center of the belt. Squeeze approximately 0.5 ounces (half a standard bottle) in a zig-zag pattern from the front roller to the rear. Repeat on the opposite side.
- Restore Tension: Tighten both rear bolts clockwise by the exact same number of turns you loosened them. Pro Tip: If the belt drifts to the right during testing, tighten the right bolt by a quarter-turn (90 degrees) and loosen the left by a quarter-turn.
- Distribute the Lubricant: Power on the treadmill and set the speed to 3.0 MPH. Let it run for 5 minutes. The friction and movement will evenly distribute the silicone across the entire deck surface.
Electrical Layout: The Hidden Cost of Friction
Space optimization is not just about physical dimensions; it also encompasses electrical layout. A dry, unlubricated treadmill belt drastically increases the friction coefficient against the deck. This forces the drive motor to work significantly harder to maintain speed, causing the amp draw to spike.
While a well-lubricated treadmill running at 5 MPH might draw 4 to 6 amps, a severely dry belt can push the motor to draw 14 to 18 amps under the same load. If your original treadmill is plugged into a shared 15-amp residential circuit—common in older spare bedrooms or basement layouts—this spike will instantly trip the breaker. Furthermore, sustained high-amp draw generates excessive heat in the motor windings, degrading the internal insulation and shortening the lifespan of your machine.
As noted in equipment setup guides by Consumer Reports, dedicated 20-amp circuits are highly recommended for high-end cardio equipment. When planning your layout, ensure your treadmill is not sharing an outlet with space heaters, air conditioners, or high-draw entertainment systems.
The Danger of Over-Lubrication in Tight Spaces
More is not better when it comes to silicone application. Applying more than 1 ounce per session leads to 'blowout.' As the belt moves at high speeds, centrifugal force sprays the excess silicone out from under the deck. In a tightly optimized room, this aerosolized silicone will coat your adjacent walls, baseboards, and flooring, creating a slick, dust-attracting hazard that is incredibly difficult to clean off matte paint.
Frequently Asked Questions
How often should I lubricate my original treadmill belt?
For standard residential use (under 10 hours per week), lubricate every 3 months or every 130 miles. If your home gym is in a climate-controlled room with low humidity, you may stretch this to 6 months. High-humidity environments or heavy daily use require monthly applications.
Can I tell if the belt needs lubrication without taking the hood off?
Yes. Reach your hand under the walking belt near the center of the deck. If your fingers come away completely dry, it is time to lubricate. If they feel slightly oily or slick, the current lubrication level is sufficient.
What if my treadmill deck is warped or grooved?
No amount of lubrication will fix a physically damaged deck. If you feel deep grooves with your hand, or if the belt consistently slips even after proper tensioning, the phenolic coating on the deck has worn through. In this scenario, you must replace both the deck and the belt simultaneously to protect the motor and control board.
More gear to consider
All reviews
Elliptical vs Treadmill: 2026 Trends and Falling From Treadmill Data

Interval Treadmill Motors: 2026 HP vs CHP Comparison

Curved vs Motorized: The Ultimate 15 Minute HIIT Treadmill Guide

Disassembling NordicTrack Treadmill? Why Spin & Upright Bikes Win

Folding Treadmill Review & Care: Sydney Sweeney Treadmill Video
