Neoprene Female Dumbbells: Complete Home Gym Setup
Master your home gym setup with our complete walkthrough for neoprene female dumbbells. Learn space planning, racking, and maintenance for lasting use.

When building a dedicated home workout space, selecting the right free weights is only half the battle; properly setting up, storing, and maintaining them is what ultimately creates a functional, long-lasting fitness environment. For many beginners and home-gym enthusiasts searching for 'female dumbbells,' the goal is to find lightweight, ergonomically gripped, neoprene-coated weights that accommodate smaller hand spans and suit high-repetition toning, yoga-Pilates hybrids, or rehabilitation routines. While modern strength coaches rightly reject gendered equipment labels, the physical characteristics of these specific neoprene dumbbells make them exceptional for targeted home gym setups.
This comprehensive setup and installation walkthrough will guide you through unboxing, spatial planning, racking installation, and long-term maintenance for neoprene-coated dumbbells in your home gym. By the end of this guide, you will have a professional-grade, space-optimized free weight zone ready for 2026 and beyond.
Decoding the Neoprene Dumbbell Market
Historically, fitness retailers marketed lighter, pastel-colored neoprene weights as 'female dumbbells.' Today, the industry recognizes these simply as lightweight neoprene hex dumbbells. They typically range from 2 lbs to 20 lbs per hand and feature a solid cast-iron core encased in a soft, textured neoprene shell. The neoprene coating provides three distinct advantages for home use:
- Floor Protection: The rubberized exterior prevents scuffing on hardwood or laminate floors during drop-sets or floor-based exercises.
- Acoustic Dampening: Neoprene significantly reduces the 'clank' of metal-on-metal or metal-on-floor, making them ideal for apartment dwellers.
- Ergonomic Grip: The coating allows for a slightly thicker, more forgiving handle that reduces grip fatigue during high-rep lateral raises or tricep extensions.
According to guidelines from the American Council on Exercise (ACE), having accessible, comfortable, and appropriately scaled weights at home drastically increases adherence to daily movement and resistance training protocols.
Phase 1: Unboxing and Quality Inspection Walkthrough
Before you install your new dumbbells into your workout zone, a thorough inspection is required. Neoprene manufacturing involves casting iron and dipping it into liquid synthetic rubber. Flaws in this process can lead to premature failure.
The 3-Point Inspection Checklist
- The Seam Test: Run your thumb along the seam where the neoprene meets the metal handle. If you feel sharp burrs or notice the rubber pulling away from the steel, reject the pair. Sweat will seep into these micro-tears, causing the iron core to rust from the inside out and eventually split the coating.
- The Odor Check: High-quality neoprene has a mild, distinct rubber scent that dissipates within 48 hours of unboxing. If the dumbbells emit a harsh, chemical, or 'burning tire' odor, they are likely coated in cheap PVC or low-grade recycled rubber off-gassing volatile organic compounds (VOCs). Return them immediately and ventilate the room.
- Weight Variance: While commercial urethane dumbbells are calibrated to a 2% tolerance, budget neoprene dumbbells can have a 5% to 10% variance. Use a standard digital bathroom scale to weigh a 10 lb dumbbell. If it reads 9.2 lbs or 11 lbs, note this discrepancy for your progressive overload tracking.
Phase 2: Space Planning and Floor Preparation
Installing a free-weight zone requires more than just tossing a mat on the floor. You must calculate the 'swing radius' required for unilateral and bilateral movements.
The 36-Square-Foot Rule
For safe execution of exercises like dumbbell snatches, Turkish get-ups, or wide lateral raises, the National Strength and Conditioning Association (NSCA) recommends a minimum clearance of 6 feet by 6 feet (36 square feet) per user. Ensure this zone is free of ceiling fan blades, low-hanging light fixtures, and fragile furniture.
Flooring Installation
Even though neoprene is forgiving, repetitive impact will eventually damage standard subflooring or scratch hardwood. Install 3/8-inch or 1/2-inch thick interlocking EVA foam tiles or vulcanized rubber horse-stall mats.
Pro-Tip: If you are placing your setup over a carpeted room, lay down a sheet of 6-mil polyethylene plastic vapor barrier beneath the rubber mats. This prevents the rubber backing from trapping moisture against the carpet pad, which can lead to mold growth in humid climates.
Phase 3: Racking and Storage Installation
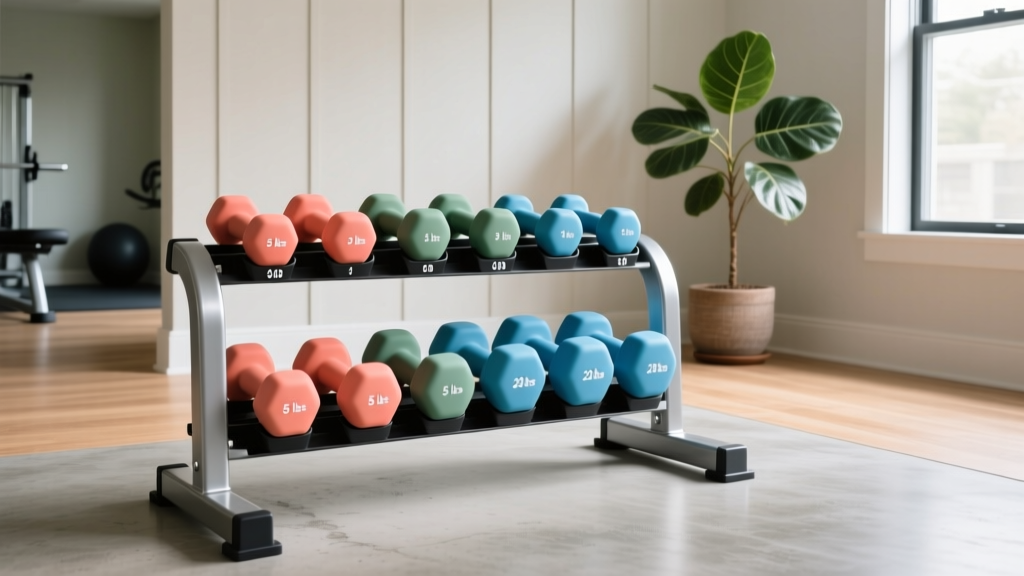
Leaving neoprene dumbbells scattered on the floor is a tripping hazard and degrades the equipment. Because neoprene dumbbells are generally lighter and smaller than their cast-iron counterparts, they require specific racking solutions. Standard commercial Olympic dumbbell racks are often too deep and widely spaced for lightweight neoprene sets.
| Rack Type | Best For | Footprint | Estimated Cost (2026) | Installation Notes |
|---|---|---|---|---|
| A-Frame Tiered Rack | Small apartments, 3-5 pairs | 1.5 sq ft | $45 - $75 | No assembly required; place against a wall to prevent tipping. |
| Horizontal 3-Tier Rack | Full sets (5-20 lbs), dedicated rooms | 6 sq ft | $120 - $180 | Bolt to wall studs using L-brackets if children or pets are present. |
| Vertical Dumbbell Tree | Corner spaces, single pairs | 2 sq ft | $60 - $90 | Ensure the base is weighted; neoprene hex heads can slide off angled pegs if bumped. |
Installation Step-by-Step: Wall-Mounted Tiered Racks
If you opt for a horizontal wall-mounted rack to save floor space, follow these installation steps:
- Locate Studs: Use a magnetic or electronic stud finder to locate two wooden or metal wall studs spaced 16 inches apart.
- Mark and Level: Hold the rack bracket against the wall at a height of 24 inches from the floor (ideal for picking up weights with a neutral spine). Use a torpedo level to ensure it is perfectly horizontal.
- Drill Pilot Holes: Drill 1/8-inch pilot holes directly into the center of the studs through the bracket's mounting holes.
- Secure with Lag Screws: Drive 2-inch hex lag screws through the bracket into the studs using a socket wrench. Do not use standard drywall anchors; a fully loaded neoprene dumbbell rack can easily exceed 150 lbs, which will rip standard anchors out of the drywall.
Phase 4: Neoprene Maintenance and Longevity Protocol
Neoprene is highly durable, but it is susceptible to chemical degradation and UV damage. Improper cleaning is the number one reason home-gym neoprene dumbbells become sticky, discolored, or prone to tearing.
Warning: Never use bleach, ammonia, or alcohol-based sanitizers on neoprene dumbbells. These harsh chemicals break down the polymer chains in the synthetic rubber, causing the surface to turn white, chalky, and eventually crumble.
The Weekly Cleaning Routine
To maintain the grip texture and hygiene of your dumbbells without damaging the coating, implement this simple protocol:
- Step 1: Mix a solution of warm water and a few drops of mild, pH-neutral dish soap (like Dawn or Castile soap) in a spray bottle.
- Step 2: Lightly mist a microfiber cloth with the solution (do not spray the dumbbell directly, as liquid can pool in the handle seams).
- Step 3: Wipe down the neoprene heads and the metal handles to remove sweat, sebum, and dead skin cells.
- Step 4: Use a dry towel to buff the handles immediately to prevent rust on the chrome or bare steel grips.
Environmental Controls
According to exercise science resources like ExRx.net, maintaining a consistent environment is key to equipment longevity. Keep your neoprene dumbbells out of direct sunlight. UV rays will fade the pastel colors and cause the rubber to become brittle over time. If your home gym is in a garage or basement, run a dehumidifier to keep ambient humidity below 50%, preventing the internal cast-iron core from rusting and expanding, which causes the neoprene shell to split.
Final Thoughts on Your Home Gym Setup
Setting up a dedicated space for lightweight, neoprene-coated dumbbells is an investment in your daily health and mobility. By moving past outdated marketing terms and focusing on the functional benefits of neoprene—acoustic dampening, floor protection, and ergonomic gripping—you can create a highly efficient workout zone. Follow this walkthrough to inspect your gear, optimize your 36-square-foot clearance, securely install your racking, and maintain the rubber coating. With proper setup and care, your neoprene dumbbell station will remain a pristine, functional cornerstone of your home gym for years to come.
More gear to consider
All reviews
2026 Trends: Urethane vs Rubber Hex for the Dumbbell Floor Fly
Bowflex 552 Dumbbells Recall Fears: Rubber Hex vs Urethane Value

Compact Gyms: Bumper vs Iron Plates & Best Dumbbell Lat Exercises

2026 Olympic Barbell Knurling Guide & Dumbbell Marches

Barbell Setup Guide: Knurling, Weight & Are Dumbbell Squats Effective?