How to Use a Manual Treadmill Properly: Layouts & Belt Maintenance
Learn how to use a manual treadmill properly in small spaces. Discover layout clearances, belt alignment tricks, and lubrication steps for compact home gyms.

The Intersection of Spatial Layout and Belt Longevity
As urban home gyms continue to shrink in 2026, manual treadmills have surged in popularity. Without a bulky motor housing, these machines offer a smaller footprint and zero electricity draw. However, understanding how to use a manual treadmill properly extends far beyond your running stride or foot-strike mechanics; it fundamentally involves how you position, clear, and maintain the machine within your spatial layout. When a manual treadmill is shoved into a tight corner or an alcove to save space, the restricted airflow and proximity to walls create a microenvironment that accelerates belt degradation, dust ingestion, and tracking failure.
In this guide, we bridge the gap between space optimization and mechanical upkeep. We will explore the exact spatial clearances required to perform critical belt maintenance, the divergent lubrication needs of curved versus flat manual treadmills, and how to troubleshoot belt drift caused by the architectural realities of small-room layouts.
The Spatial Physics of Manual Treadmill Belt Wear
When optimizing a room for cardio equipment, the instinct is to push the treadmill as close to the wall as possible. For manual treadmills, this is a critical error. The belt of a manual treadmill acts as a continuous conveyor. When the rear roller is positioned less than 12 inches from a wall or heavy drapery, it creates a vortex that pulls ambient dust, pet dander, and drywall debris directly into the rear roller bearing and underneath the belt deck.
According to equipment maintenance standards outlined by resources like Treadmill Doctor, microscopic debris trapped between the belt and the deck acts like sandpaper. On flat-deck manual models (such as the popular Sunny Health & Fitness SF-T723016, priced around $249), this friction generates excessive heat, melting the factory-applied silicone and causing the belt to seize or snap. Furthermore, manual treadmills lack the automated tensioning systems of motorized counterparts; the physical flex of the frame under a 180 lb runner requires spatial clearance so the rear roller does not scrape baseboard molding during heavy sprints.
Clearance Matrix: Designing for Maintenance Access
Knowing how to use a manual treadmill properly in a compact apartment means designing a layout that allows you to actually service the machine. You cannot adjust a rear roller alignment bolt if your drywall is blocking your wrench. Below is the minimum spatial clearance matrix required for small-space home gyms to ensure unobstructed belt maintenance.
| Zone | Minimum Clearance | Maintenance Rationale |
|---|---|---|
| Rear (Wall) | 36 inches | Allows full arm extension to use a 3/4-inch socket wrench on rear roller adjustment bolts while kneeling. |
| Left / Right Sides | 24 inches | Provides physical space to lift the belt edge and slide the lubricant applicator wand under the deck. |
| Front (Obstacles) | 18 inches | Prevents front-roller impact damage if the treadmill shifts forward during high-resistance sled pushes. |
| Overhead | 84 inches | Ensures safe mounting/dismounting and allows vertical clearance if the folding manual model is tipped for storage. |
Expert Warning: The Curved vs. Flat Lubrication Divergence
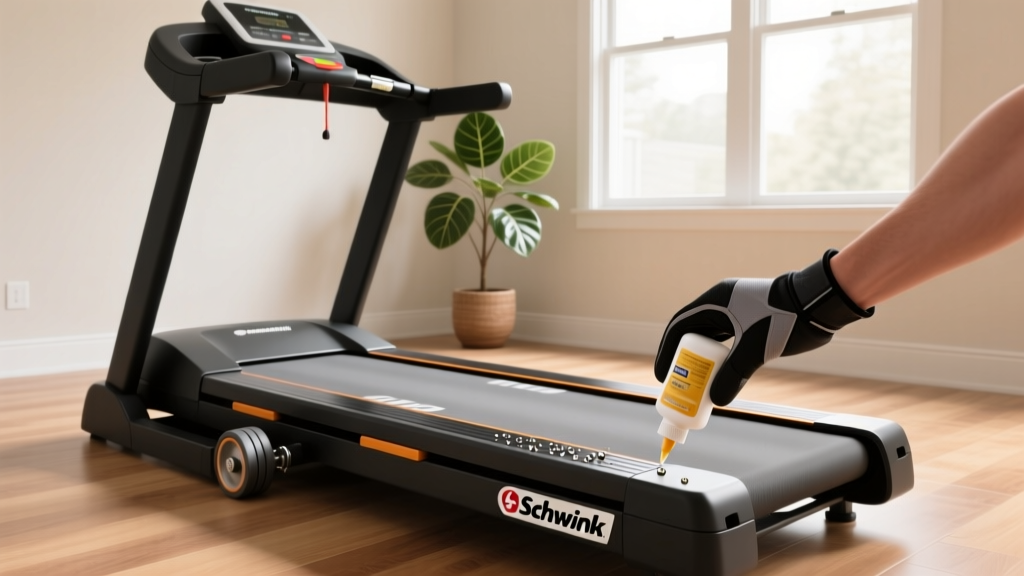
Before applying any product to your machine, you must identify your belt type. High-end curved manual treadmills (like the $3,499 AssaultRunner Elite or the $12,500 Technogym Skillmill) use vulcanized rubber slats riding on sealed ball bearings. You must never use liquid silicone under a curved slat belt. Curved belts require PTFE (Teflon) spray or white lithium grease applied exclusively to the side-guide pivot bearings every six months. Flat manual treadmills with a traditional phenolic or MDF deck, however, require 100% liquid silicone applied directly between the belt and the deck.
Step-by-Step Belt Lubrication in Restricted Layouts
If your spatial layout only permits the minimum 24-inch side clearance, performing a proper lubrication cycle on a flat-deck manual treadmill requires a specific technique to avoid making a mess on your flooring or walls.
- Release Tension: Use your 3/4-inch wrench to turn the rear roller bolts counter-clockwise (exactly 3 full turns on each side) to loosen the belt. Mark the bolt stem with a Sharpie to ensure you re-tighten it to the exact same tension later.
- The Lift-and-Slide Method: Stand on the non-wall side of the treadmill. Reach under the center of the belt and lift it approximately 2 inches. Do not pull the belt toward the wall side, as this will scrape the wall with your knuckles.
- Apply 100% Silicone: Using a liquid silicone solution (avoid aerosols, which overspray onto the running surface and cause slipping), apply exactly 15ml in a zig-zag pattern from the center toward the edges. Spot On or Impresa brands (approx. $14 per bottle) include a long wand ideal for tight spaces.
- Distribute the Lubricant: Re-tension the belt to your Sharpie marks. Walk on the manual treadmill at a slow pace for 3 to 5 minutes. Because there is no motor to drive the belt, your physical walking is required to spread the silicone evenly across the deck.
Corner Placement and the 'Belt Drift' Phenomenon
Space optimization often dictates placing cardio equipment in the corner of a room. However, residential floors are rarely perfectly level, and corners are where structural settling and concrete sloping are most pronounced. If a manual treadmill is placed on a slope greater than 1/8 inch over a 3-foot span, the belt will continuously drift toward the lower side, eventually shredding the edge against the frame rail.
Pro-Tip from the NSCA: The National Strength and Conditioning Association (NSCA) emphasizes that facility layout must account for floor tolerances to prevent equipment-induced biomechanical asymmetries. An unlevel manual treadmill forces the runner to push harder on one leg, altering gait and accelerating unilateral joint fatigue.
To fix this in a tight corner layout, do not rely on the treadmill's built-in plastic leveling feet—they lack the precision required. Instead, purchase a set of stainless steel machinist shims (ranging from 0.05 to 0.10 inches thick, available at hardware stores for under $10). Place a 48-inch digital level across the treadmill deck. Slide the steel shims under the lower-side leveling feet until the deck is perfectly true in both the X and Y axes. This single spatial adjustment will eliminate 90% of manual treadmill belt drift issues.
The Storage Trap: Vertical Folding and Belt Tension
Many compact manual walking pads and flat treadmills advertise 'vertical folding' for under-bed or closet storage. While this is a triumph of space optimization, it is a nightmare for belt longevity if done incorrectly. When a manual treadmill is stored vertically for weeks at a time, gravity pulls the heavy rubber belt downward, stretching the woven polyester backing unevenly. When you return the machine to a horizontal layout, the belt will be loose at the top and tight at the bottom, causing immediate tracking failure.
The Layout Solution: If your space requires vertical storage, you must loosen the rear roller tension bolts by 5 full turns before standing the treadmill on its end. This relieves the gravitational stress on the belt backing. When you return the machine to your workout layout, re-tension the bolts and perform the 5-minute walking distribution cycle before attempting a full run.
Conclusion: Space as a Maintenance Tool
Mastering how to use a manual treadmill properly means recognizing that the machine does not exist in a vacuum; it interacts dynamically with the physical boundaries of your room. By respecting the 36-inch rear clearance for wrench access, managing dust ingestion in tight alcoves, and using precision shims to counteract corner floor slopes, you transform your spatial layout from a constraint into a proactive maintenance tool. Whether you are running on a premium curved slat model or a budget-friendly flat deck, giving your machine the physical space it needs to breathe and be serviced is the ultimate key to long-term cardio consistency.
More gear to consider
All reviews
9 Incline on Treadmill: Is It Good? 2026 Workout Guide

Stair Climber Guide: Difference Between Walking Pad and Treadmill
What Treadmills Does Orangetheory Use? Air Bike Maintenance Guide
Horizon 7.0 AT Treadmill Specs & Noise Level Setup Guide

Motorless Treadmill vs Walking Pad: Step-by-Step Guide