
Cable Crossover Installation Walkthrough & Seated Machine Chest Press
Master your home gym with our complete cable crossover installation walkthrough, including space requirements and seated machine chest press comparisons.

Pre-Installation: Spatial and Structural Prerequisites
Building a high-performance home gym in 2026 requires meticulous planning, especially when integrating multi-planar cable systems. Unlike a standard seated machine chest press, which typically operates on a single fixed plane and requires a footprint of roughly 60 by 50 inches, a dedicated cable crossover machine demands significantly more spatial awareness. For this walkthrough, we are using the industry-standard Rogue RM-6 Monster Cable Crossover as our reference model, though these principles apply to most dual-pulley functional trainers and crossovers on the market.
Before unboxing, verify your ceiling height and floor load capacity. The RM-6 stands at 90 inches tall and spans 108 inches wide. You must maintain a minimum 12-inch clearance from the ceiling to allow for top-carriage adjustments and cable routing. Furthermore, a fully loaded dual-stack crossover can exceed 1,200 pounds. Install the unit over a reinforced concrete slab or a dedicated platform featuring 3/4-inch vulcanized rubber matting to distribute the static load and dampen acoustic vibration during heavy drop-sets.
⚠️ Structural Warning: Never anchor a freestanding cable crossover to drywall or standard wooden wall studs. The lateral tension generated during heavy chest flyes and unilateral presses can exceed 300 pounds of sheer force, which will easily rip standard toggle bolts from drywall. If wall-anchoring is required for stability, you must lag-bolt directly into structural studs or concrete using 3/8-inch x 3-inch structural screws.Unboxing and Hardware Inventory
Cable crossovers are notorious for arriving in multiple heavy crates. Expect at least four distinct boxes: the main uprights, the weight stacks, the cross-members, and the hardware/pulley kit. Before turning a single wrench, lay out all hardware and cross-reference it with the manufacturer's manifest. Missing a single M10 x 30mm hex bolt can halt assembly at the most frustrating stage. Group your fasteners into labeled magnetic trays to prevent loss on the gym floor.
Phase 1: Base and Upright Assembly
Begin by assembling the base cross-members on the floor. Do not fully tighten the bolts during this phase; leave them at roughly 70% torque. This 'finger-tight' approach allows the steel frame to flex and align as you stand the uprights up. Once the left and right 11-gauge steel uprights are bolted to the base and the top cross-member is secured, use a 48-inch machinist level to ensure the frame is perfectly plumb. Only after confirming the frame is square should you use a torque wrench to tighten all structural bolts to the manufacturer's specified foot-pounds (typically 60-80 ft-lbs for M12 hardware).
Phase 2: Pulley Routing and Aircraft Cable Threading
This is the most critical and error-prone phase of the installation. High-end crossovers utilize 3/16-inch nylon-coated aircraft cables rated for over 2,000 pounds of tensile strength. Routing these cables incorrectly will cause premature fraying and catastrophic failure under load.
- Anchor the Cable: Secure the swaged end of the cable to the bottom of the weight stack carriage using the provided retention pin.
- Bottom Diverter: Route the cable down and under the bottom diverter pulley. Ensure the cable sits deep inside the pulley groove, not riding on the edge.
- Vertical Ascent: Pull the cable straight up to the top floating pulley. Pro Tip: Use a piece of painter's tape to temporarily hold the cable in the pulley grooves while you work on the next section to prevent it from slipping out.
- Carriage Routing: Thread the cable through the adjustable top carriage pulleys and down to the selectorized weight stack.
According to biomechanical analyses from ExRx.net, the continuous tension provided by properly routed cable systems is superior for pectoral isolation compared to free weights, making flawless cable installation paramount for safety and performance.
Phase 3: Weight Stack Alignment and Tensioning
Once the cables are routed, slide the weight plates onto the guide rods. Apply a light coat of PTFE (Teflon) dry lubricant to the stainless steel guide rods to eliminate the 'stiction' that causes weight stacks to jerk during the eccentric phase of a chest press. Attach the cable to the top of the weight stack and adjust the tensioning bolt at the carriage until there is zero slack when the pin is removed, but the stack is not lifting off the resting pad.
Biomechanics & Footprint: Cable Crossover vs. Seated Machine Chest Press
When designing a chest-training station, lifters often debate between installing a massive cable crossover or opting for a dedicated seated machine chest press. While the seated machine chest press (like the Life Fitness Signature Series) offers unparalleled stability for moving absolute maximum loads, the cable crossover provides unmatched versatility for hypertrophy and functional movement patterns.
| Feature | Cable Crossover (e.g., Rogue RM-6) | Seated Machine Chest Press |
|---|---|---|
| Footprint | 108' W x 49' D (Requires open center) | 60' W x 50' D (Can be wall-adjacent) |
| Assembly Time | 6-8 Hours (2 People) | 2-3 Hours (1-2 People) |
| Chest Activation | Multi-planar (Flyes, Presses, Crossovers) | Fixed Sagittal Plane (Converging Press) |
| Average 2026 Cost | $4,500 - $7,200 | $2,800 - $4,500 |
| Core Stabilization | High (Standing movements) | Low (Seated, back-supported) |
For pure mass building and safe failure training without a spotter, the seated machine chest press remains a staple. However, for comprehensive pectoral development—specifically targeting the sternal and clavicular heads through varied adduction angles—the cable crossover is irreplaceable. The ACE Fitness Exercise Library frequently highlights cable crossovers for their ability to maintain constant tension on the pectoralis major throughout the entire range of motion, a biomechanical advantage that fixed-path seated machines struggle to replicate at the peak contraction point.
Calibration and First-Use Testing
Before loading the stacks for your first working set, perform a full range-of-motion test on both the high and low pulleys. Pull the handles to simulate a heavy chest fly. Listen closely to the pulleys. A high-quality system with sealed cartridge bearings should be nearly silent. If you hear a rhythmic clicking or grinding, the cable is likely riding on the lip of the pulley rather than seated in the groove. Release the tension, re-seat the cable, and re-test.
Expert Troubleshooting: Friction and Slack
Even with meticulous installation, environmental factors in a garage or basement gym can affect machine performance over time.
- Cable Slack: If you notice a 1-inch delay before the weight stack engages at the start of a repetition, your cables have stretched. This is normal for new nylon-coated cables. Use the inline turnbuckle tensioners located near the top carriages to dial in the slack. Turn clockwise in half-inch increments until the engagement is immediate.
- Stack Friction: If the weight stack drops sluggishly during the eccentric phase of a chest press, humidity may be causing micro-corrosion on the guide rods. Wipe the rods down with a microfiber cloth and reapply a silicone-based dry lubricant. Avoid wet oils like WD-40, which attract dust and create an abrasive paste that will destroy the linear bearings.
- Carriage Wobble: If the adjustable pulley carriage rattles on the upright, tighten the Delrin wear pads located on the back of the carriage bracket using a 5mm Allen key. These are designed to be sacrificial and will need replacement every 3-5 years depending on usage volume.
By following this rigorous installation and calibration protocol, your cable crossover will provide a safe, smooth, and biomechanically optimal platform for chest training, effectively bridging the gap between free-weight versatility and the targeted isolation traditionally reserved for the seated machine chest press.
More gear to consider
All reviews
Ultimate Smart Guide: Evidence-Based Selection, Sizing, and Integration of Smart Chest-Worn Wearables for Health, Fitness, and Clinical Use

Budget Breakdown: How to Use Chest Press Machine & Pec Deck
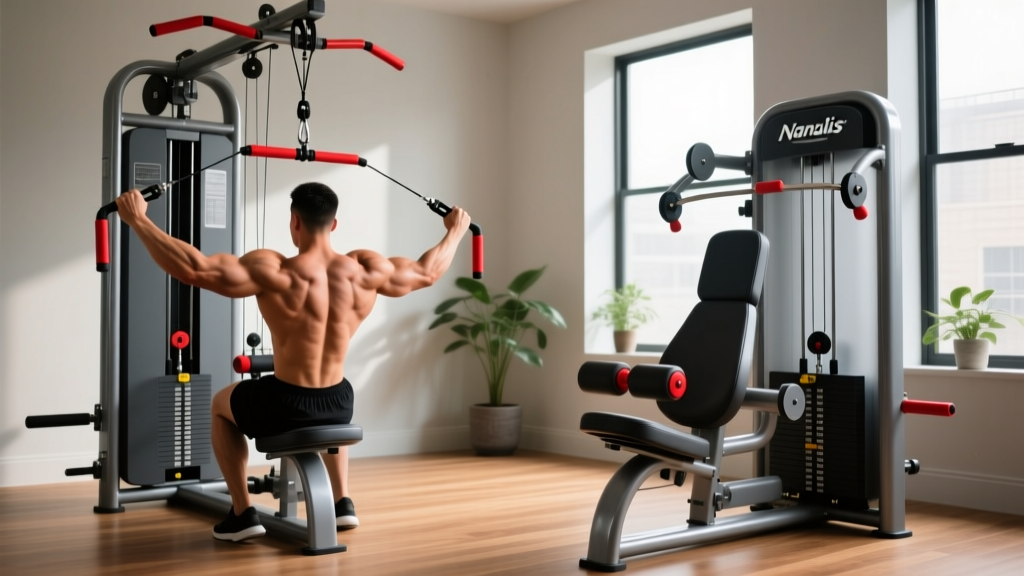
Cable Crossover vs Nautilus Chest Press Machine: 2026 Guide

Home Chest Press Machine 2026: Incline, Decline & Flat Bench Trends

Fixing Common Chest Press Cable Machine Mistakes in Your Home Gym
