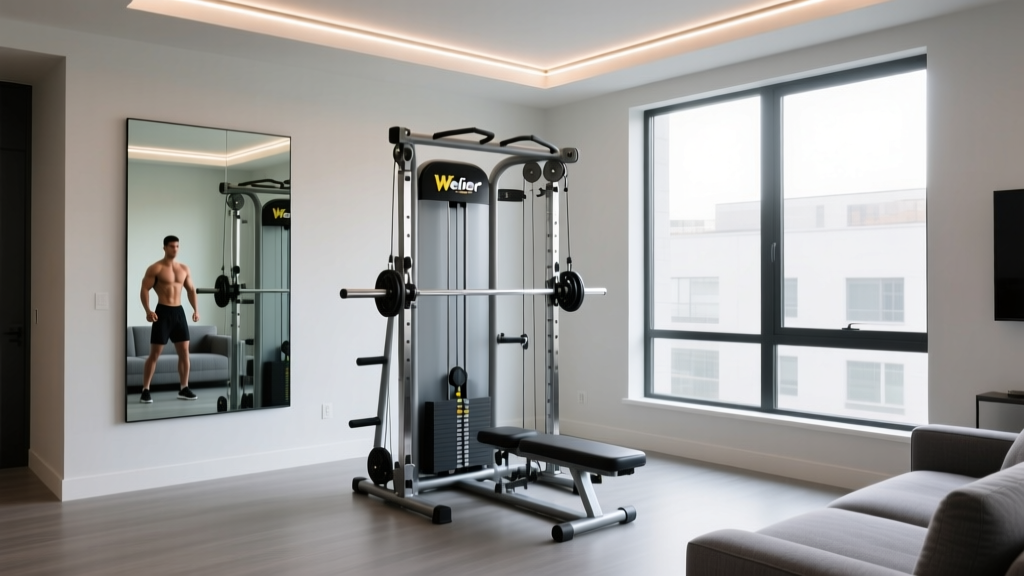
Weider Pro 4950 Home Gym: Best Mirrors and Lighting Compared
Compare the best mirror kits and LED lighting setups to eliminate shadows and maximize space around your Weider Pro 4950 home gym.

Designing a home gym around a massive, multi-station cable machine requires far more than just measuring floor space. When you are building out a setup centered around the Weider Pro 4950 home gym, you are dealing with a towering piece of equipment that typically stands over 84 inches tall and spans nearly 6 feet in width. This sheer physical footprint creates unique optical challenges: harsh overhead shadows during lat pulldowns, blind spots during low-cable rows, and the constant risk of swinging weight stacks colliding with fragile wall treatments.
In this comprehensive head-to-head comparison, we break down the best mirror materials and lighting configurations specifically optimized for the Weider Pro 4950. We will evaluate optical clarity, impact resistance, shadow mitigation, and exact placement measurements to ensure your form is visible and your space is safe.
The Spatial Reality: Why the Weider Pro 4950 Demands Custom Planning
Unlike a simple power rack or a single bench, the Weider Pro 4950 features dual weight stacks, a high-pulley lat tower, and a low-pulley rowing station. According to space guidelines from the American Council on Exercise (ACE), you must maintain a minimum clearance of 2 to 3 feet on all sides of moving cable paths. This means your mirrors cannot simply cover the wall directly behind the machine; they must be strategically placed on the lateral (side) walls to allow you to monitor your spinal alignment during cable crossovers and unilateral movements without the machine's frame blocking your reflection.
⚠️ Critical Safety Warning: Cable Snap Zones
Steel aircraft cables under high tension can snap or derail from their pulleys. If a mirror is placed directly in the 'snap zone' (the linear path of the cable from the weight stack to the user), a broken cable can shatter standard glass, turning a mechanical failure into a severe laceration hazard. Always map your cable vectors before mounting glass.
Head-to-Head Mirror Comparison: Traditional Glass vs. Shatterproof Acrylic
When outfitting the walls flanking your Weider Pro 4950, you have two primary material choices. Below is a direct comparison of 1/4-inch traditional gym glass versus 1/4-inch shatterproof acrylic (PETG/Polycarbonate blends).
| Feature | 1/4" Traditional Gym Glass | Shatterproof Acrylic Mirror |
|---|---|---|
| Optical Clarity | Perfect, zero distortion at any angle. | Prone to 'funhouse' warping if the wall is not perfectly plumb. |
| Impact Resistance | Low. Will shatter if struck by a weight stack pin or dumbbell. | Extremely High. Will dent or scratch, but will not shatter. |
| Weight per 4x6 Panel | ~115 lbs (Requires heavy-duty J-channel and mastic). | ~35 lbs (Can be mounted with heavy-duty adhesive strips). |
| Cost (Approx.) | $8 - $12 per sq. ft. (Plus professional installation). | $15 - $22 per sq. ft. (DIY friendly). |
| Best Placement for 4950 | Front-facing walls, far from the lateral cable paths. | Directly adjacent to the weight stacks and pulley towers. |
The Verdict on Mirrors
For the immediate perimeter of the Weider Pro 4950, shatterproof acrylic is the superior choice. The proximity to the dual weight stacks means that dropped selectorized pins or swinging attachments pose a constant threat. However, if you are placing a large mirror on the wall directly opposite the machine (10+ feet away) to check your overall posture, traditional glass provides the distortion-free feedback necessary for heavy compound lifts.
Lighting Showdown: Overhead LED Panels vs. Directional Track Lighting
Lighting a room dominated by an 84-inch-tall cable machine is notoriously difficult. The overhead towers of the Weider Pro 4950 will block standard ceiling fixtures, casting deep, unflattering shadows across your face and torso when you sit at the lat pulldown or leg extension stations. To understand the best approach, we must look at the Illuminating Engineering Society (IES) guidelines, which recommend a minimum of 50 foot-candles (approx. 500 lux) for active gym spaces to ensure safety and visual acuity.
Option A: 4000K Flush-Mount LED Flat Panels
Modern 2x4 foot LED panels (4000K neutral white, CRI > 90) provide a broad, diffuse wash of light.
- Pros: Eliminates almost all shadows cast by the 4950's towers. High CRI (Color Rendering Index) allows you to accurately see muscle vascularity and skin flush.
- Cons: Lacks the dramatic, directional 'downlighting' that accentuates muscle striations and definition in photos.
- Installation Note: Must be flush-mounted. Hanging pendant lights will collide with the high-pulley cable path during wide-grip lat pulldowns.
Option B: 5000K Directional Track Lighting
Track lighting allows you to aim individual gimbal heads at specific angles, bouncing light off the side mirrors and onto the user.
- Pros: Creates high-contrast shadows that highlight muscle definition. Highly customizable if you move the machine.
- Cons: High risk of glare. If a light head is angled poorly, it will reflect directly off your lateral mirrors into your eyes while you are doing supine exercises (like low-cable crunches).
- Installation Note: Track rails must be mounted at least 18 inches away from the outermost edge of the 4950's frame to prevent the user's head from striking the fixture during upright rows.
💡 The Hybrid Solution (Expert Recommendation)
Do not choose just one. Install 4000K LED flat panels for the general ambient room lighting to ensure safe navigation and eliminate the deep shadows caused by the Weider Pro 4950's dual towers. Then, install a single directional track light on the wall opposite the mirrors, angled downward at 45 degrees, to provide the aesthetic, high-contrast lighting needed for progress photos and detailed form checking.
Step-by-Step Placement & Clearance Framework
To finalize your setup, follow this exact installation sequence to ensure your mirrors and lighting work in harmony with the machine's biomechanics.
- Map the Machine Footprint: Assemble the Weider Pro 4950 first. Measure exactly 36 inches out from the furthest extending weight stack on both the left and right sides. Mark these lines on the floor with painter's tape. This is your 'No Mirror Glass Zone'.
- Determine Mirror Height: Standard gym mirrors start 16 inches off the floor to clear baseboards and rolling dumbbells. However, because the 4950's low pulley requires you to sit on the floor for seated rows, mount your lateral acrylic mirrors starting just 6 inches off the floor so you can monitor your lumbar spine while seated.
- Set the Lighting Grid: Position your primary overhead LED panels directly over the user's seating area (the bench pad), not over the weight stacks. Placing lights over the weight stacks wastes lumens and creates glare on the metallic guide rods.
- The Glare Test: Before permanently wiring your directional track lights, use a temporary work light. Lie back on the 4950's bench pad for a chest press and look toward the mirrors. Adjust the track heads until the reflection of the bulb is entirely outside your peripheral vision.
Final Thoughts on Optimizing Your Space
Integrating the Weider Pro 4950 home gym into a basement or garage requires respecting the machine's massive physical presence. By prioritizing shatterproof acrylic on the lateral walls, utilizing high-CRI diffuse LED panels to combat tower shadows, and strictly enforcing a 36-inch safety perimeter, you transform a cramped equipment corner into a professional-grade training environment. Proper lighting and mirror placement are not just aesthetic upgrades; they are critical biomechanical tools that allow you to self-correct form, prevent injury, and maximize the utility of your cable system.
More gear to consider
All reviews
How to Design a Home Gymnastics Gym: Floor Plans & Setup Guide
Building a Gold Gym Home Gym Setup Under $500: Value Analysis

2026 Garage Gym Setup: Flooring, Ventilation & Home Gym Wall Color

No-Damage Strength Training Home Gym: 2026 Rental Trends

Centr Home Gym Costco Setup: Strength Configuration & Care
