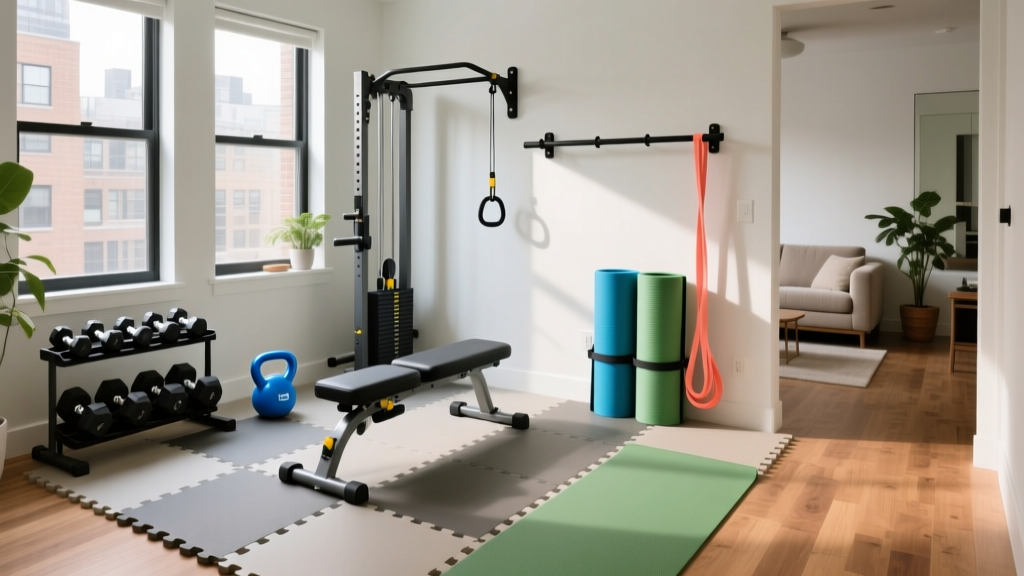
How to Design a Home Made Gym: Step-by-Step Layout Guide
Learn how to design a home made gym with our step-by-step layout guide. Optimize space, choose flooring, and arrange equipment for maximum efficiency.

The Blueprint for a Functional Home Made Gym
Building a home made gym is one of the highest-ROI investments you can make for your long-term health, but simply buying a squat rack and dumping it in the corner of your garage is a recipe for frustration and injury. Proper design and layout optimization dictate whether your space becomes a sanctuary for progressive overload or a cluttered storage room you avoid. According to facility design guidelines published by the National Strength and Conditioning Association (NSCA), traffic flow, equipment clearance, and environmental controls are just as critical as the iron itself.
This beginner-friendly, step-by-step guide will walk you through the exact measurements, material specifications, and spatial frameworks required to design a highly efficient home made gym in 2026, whether you are converting a 10x10 spare bedroom, a two-car garage, or a basement.
Step 1: Space Assessment and 'Barbell Math'
Before you purchase a single piece of equipment, you must understand the non-negotiable spatial requirements of free-weight training. The most common beginner mistake is measuring the footprint of the equipment rather than its operational clearance.
The 116-Inch Rule
A standard Olympic barbell is 84 inches (7 feet) long. When you load 45-pound bumper plates on each side, the plates add roughly 8 inches of width per side. This brings your total functional width to 100 inches. However, you need a minimum of 8 inches of walking clearance on each side to safely load and unload plates without scraping your drywall. This means your absolute minimum width for a barbell-centric home made gym is 116 inches (9.6 feet).
Ceiling Height Constraints
Standard residential ceilings are 8 feet (96 inches) high. If you are 6 feet tall and perform an overhead press, the barbell will travel to roughly 82 inches. If you use a standard 90-inch power rack (like the widely used Rogue SML-2 90" Monster Lite), you will have only 6 inches of clearance between the top of the rack and your ceiling. Always measure your exact ceiling height and subtract 4 inches for flooring and overhead clearance before ordering a rack. If your ceiling is under 94 inches, opt for an 80-inch short rack and perform pull-ups outside or use a lat pulldown attachment.
Step 2: Flooring and Foundation Engineering
Do not use interlocking 8mm EVA foam tiles for a home made gym. They compress under heavy loads, destabilizing your stance during squats and deadlifts, and they tear easily when dropping dumbbells. The American Council on Exercise (ACE) emphasizes that a stable, shock-absorbing base is critical for joint health and equipment longevity.
Pro Tip: The 3/4" Vulcanized StandardFor 2026, the gold standard for home gym flooring remains 3/4-inch (19mm) vulcanized rubber mats. A standard 4x6 foot horse stall mat weighs approximately 100 lbs and costs between $65 and $85. For a 10x10 foot lifting zone, purchase four 4x6 mats and cut them to fit using a utility knife and a straight edge. This provides a 240-square-foot, high-density foundation that will protect your concrete slab from 500+ lb deadlift drops.
Step 3: Zoning and Equipment Placement Matrix
A well-designed home made gym utilizes 'zoning' to separate high-traffic lifting areas from recovery and cardio zones. Never place your dumbbell rack directly in the walking path between your power rack and your bench.
Operational Clearance Matrix
Use the table below to map out your floor plan. These dimensions include the equipment footprint plus the necessary safety margins for human movement and plate loading.
| Equipment Type | Physical Footprint | Required Operational Zone | Placement Strategy |
|---|---|---|---|
| Power Rack (e.g., Rogue RM-3 Fortis) | 48" W x 48" D | 116" W x 84" D | Centered on back wall, never in a corner |
| Adjustable Bench (e.g., Rep AB-3100 2.0) | 50" L x 22" W | 70" L x 40" W | Stored at a 45-degree angle when not in use |
| 3-Tier Dumbbell Rack (5-50 lbs) | 42" W x 24" D | 42" W x 48" D | Against a side wall, away from barbell path |
| Rowing Machine (e.g., Concept2 RowErg) | 95" L x 24" W | 105" L x 36" W | Cardio zone; can be stood upright to save space |
Step 4: Environmental Controls (Lighting, Air, and Mirrors)
The sensory environment of your home made gym directly impacts your central nervous system arousal and workout quality. Basements and garages often fail in three key areas: lux levels, humidity, and mirror safety.
Lighting and Lux Levels
Standard garage lighting often sits around 150-200 lux, which can induce lethargy. For a high-intensity training environment, aim for 400 to 500 lux at floor level. Install 4000K to 5000K (daylight spectrum) LED shop lights. Avoid placing lights directly above the bench press or squat rack where they will shine directly into your eyes during the lift; instead, cross-illuminate from the side walls.
Humidity and Rust Prevention
If your home made gym is in a basement or an uninsulated garage, humidity is the enemy of your equipment's knurling and bearings. Bare steel and even zinc-coated barbells will develop surface rust if the relative humidity (RH) consistently exceeds 55%.
- Target RH: Maintain 40% to 50% relative humidity.
- Solution: Invest in a 30-pint to 50-pint Energy Star certified dehumidifier with a continuous drain hose routed to a floor drain or sump pump.
- Maintenance: Wipe down barbell shafts with a nylon brush and a light coat of 3-in-One oil or mineral spirits once a month.
Mirror Placement and Safety
Mirrors are essential for checking form, but they are frequently installed incorrectly. Never place a mirror directly behind your power rack or deadlift platform. A slipped barbell or a backward step can easily shatter standard glass, creating a severe laceration hazard.
Safety Warning: If you must use glass, specify 1/4-inch thick mirrors with a safety backing film, mounted using J-channels and mirror mastic adhesive rather than double-sided tape. For maximum safety, opt for shatterproof acrylic or polycarbonate mirror sheets, which have become highly optically clear and affordable in recent years.Place mirrors on the side walls or at a 45-degree angle to the front of the rack to allow for multi-angle form checks without compromising the primary lifting corridor.
Step 5: The 'Dead Zone' Audit
Before finalizing your layout, perform a 'Dead Zone' audit. Walk through a mock workout in your empty space.
- Simulate loading plates: Do you have to twist your body or step off the rubber matting to grab a 45lb plate from storage?
- Simulate a failed lift: If you dump a barbell forward during a bench press, is there a wall or a dumbbell rack immediately in the crash zone?
- Simulate transitions: When moving from the squat rack to the pull-up bar, are you crossing through the cardio zone where a bike pedal might be protruding?
Final Thoughts on Layout Optimization
Designing a home made gym is an exercise in spatial geometry and ergonomic foresight. By respecting the 116-inch barbell rule, investing in 3/4-inch vulcanized rubber, and strictly managing your environmental controls, you create a space that actively encourages consistency. Refer to the Rogue Fitness Rack Specifications for exact footprint dimensions before purchasing, map your floor plan with painter's tape on the concrete, and build a space that serves your training for decades to come.
More gear to consider
All reviews
Basement Home Gym Installation: Mirror & Lighting Budget Guide

Couples' Setup: Home Gym Essentials on a Budget for Shared Spaces

Modern Home Gym Design: Best Mirrors & Lighting Compared

Shared Home Gym Weights Setup: A Step-by-Step Couple's Guide
The Best Gold's Gym Home Gym Machines for Couples & Shared Use