Complete Home Gym Setup: Racking Your 17.5 Dumbbells
Master the complete setup and installation walkthrough for 17.5 neoprene dumbbells. Learn racking, spatial planning, and prep for your home gym.

The 17.5 lb Bridge Weight: Why It Matters
Most commercial and home gym dumbbell sets increment in 5 lb jumps. For isolation movements, jumping from 15 lbs to 20 lbs represents a massive 33.3% increase in load, often leading to form breakdown or joint strain. Sourcing a pair of 17.5 dumbbells (specifically neoprene-coated hex models) provides a critical 16.6% micro-loading bridge. This guide covers the complete unboxing, chemical preparation, racking installation, and spatial setup required to seamlessly integrate this specialized transitional weight into your home gym environment in 2026.
Phase 1: Unboxing and Neoprene Surface Preparation
Neoprene (polychloroprene) is a synthetic rubber favored for home gyms due to its floor-friendly impact absorption and ergonomic grip. However, straight out of the factory, 17.5 lb neoprene dumbbells require a specific preparation protocol before they are ready for use or racking.
1. Off-Gassing and VOC Mitigation
During the vulcanization and molding process, neoprene dumbbells are treated with chemical release agents. When you unbox your 17.5 dumbbells, you will likely notice a distinct 'new tire' or chemical odor. These are Volatile Organic Compounds (VOCs). Do not immediately place them in a poorly ventilated home gym or bedroom.
- Step 1: Remove all plastic shrink-wrap and cardboard packaging immediately to allow airflow.
- Step 2: Place the dumbbells in a well-ventilated area (like a garage or covered patio) out of direct sunlight for 48 to 72 hours.
- Step 3: Avoid using ozone generators directly on the rubber, as this accelerates the oxidation and drying of the neoprene surface.
2. Removing Factory Mold Release Agents
To ensure a secure grip during sweaty workouts, the oily factory residue must be stripped. Mix a solution of 70% isopropyl alcohol and water (1:1 ratio). Using a lint-free microfiber cloth, vigorously wipe down the hex heads and the handle. Avoid submerging the dumbbells or using harsh degreasers like bleach or ammonia, which will break down the chloroprene bonds and cause the coating to peel prematurely.
Phase 2: Selecting the Right Rack for Odd-Increment Weights
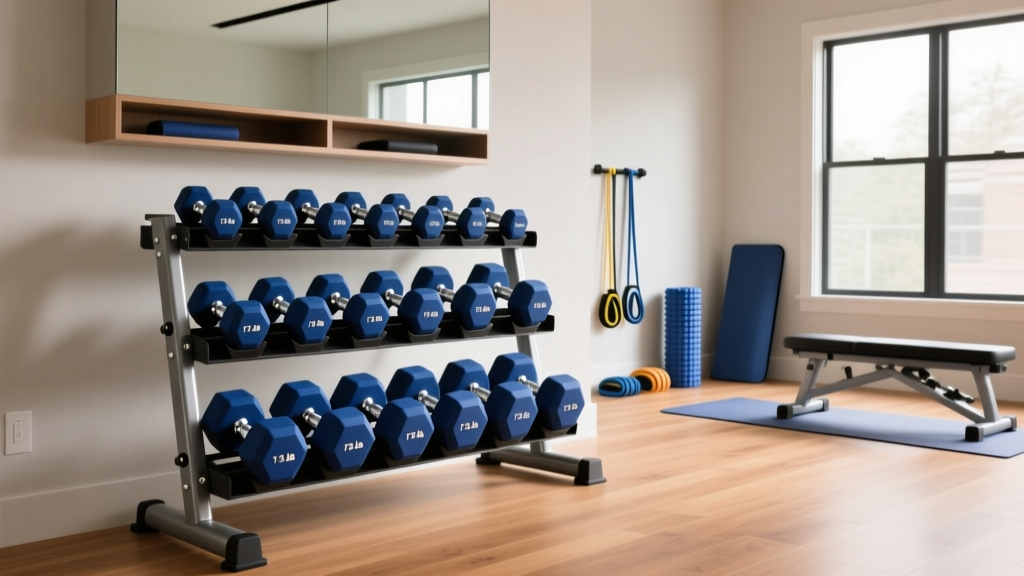
The primary challenge with integrating 17.5 dumbbells into a home gym is storage. Standard 3-tier or 5-tier A-frame racks are pre-spaced for 5 lb increments (e.g., 10, 15, 20, 25). A 17.5 lb dumbbell will not fit cleanly into these designated slots without crowding the 15 lb or 20 lb pairs, which can damage the neoprene coating over time through friction.
| Rack Type | Compatibility with 17.5 lb | Pros | Cons |
|---|---|---|---|
| Standard A-Frame | Poor | Affordable, small footprint | Fixed spacing causes neoprene friction |
| Continuous Rail Wall Rack | Excellent | Custom spacing, saves floor space | Requires stud mounting, permanent install |
| 6-Tier Horizontal Stand | Good | Holds full odd-number sets | Expensive, large footprint |
For the ultimate home gym setup, we highly recommend installing a continuous horizontal wall-mount rail rack. This allows you to dictate the exact spacing between your 15 lb, 17.5 lb, and 20 lb neoprene dumbbells, ensuring zero coating degradation.
Phase 3: Step-by-Step Wall Rack Installation Walkthrough
Installing a wall-mounted rack for heavy rubber-coated dumbbells requires precise structural anchoring. A pair of 17.5 dumbbells weighs 35 lbs, and a fully loaded rail can easily exceed 200 lbs. Drywall anchors will fail catastrophically under this dynamic load.
Tools Required
- Stud finder (magnetic or electronic)
- 4-foot carpenter's level
- Power drill with a 7/32-inch drill bit (for pilot holes)
- Socket wrench with a 7/16-inch socket
- 1/4-inch x 3-inch hex lag screws (minimum 4)
Installation Steps
- Locate and Mark Studs: Standard US residential framing places studs 16 inches on-center. Use your stud finder to locate at least three consecutive studs where you want the rack. Mark the exact center of each stud with a pencil.
- Level the Rail: Hold the continuous rack rail against the wall at your desired height (typically 36 to 42 inches from the floor for ergonomic retrieval). Place your 4-foot level on top of the rail and adjust until the bubble is perfectly centered. Mark the drill holes through the rail's mounting brackets onto your stud lines.
- Drill Pilot Holes: Using the 7/32-inch drill bit, drill a pilot hole into the center of each stud mark to a depth of 2.5 inches. Expert Tip: Wrap a piece of painter's tape around your drill bit at the 2.5-inch mark to ensure you don't drill too deep and compromise the stud's integrity.
- Secure the Lag Screws: Align the rack brackets with the pilot holes. Insert the 1/4-inch x 3-inch lag screws with washers. Using your socket wrench, drive the screws into the studs until the bracket is flush and immovable against the drywall. Do not overtighten to the point of crushing the drywall, which can cause the bracket to warp.
- Load Testing: Before placing your 17.5 dumbbells on the rack, hang your body weight (or a known heavy load) from the center of the rail to verify structural stability.
Phase 4: Spatial Setup and Drop Zone Configuration
While neoprene is floor-friendly, repeated dropping of 17.5 lb hex dumbbells on hardwood or laminate will eventually cause structural damage to your subfloor. According to the Centers for Disease Control and Prevention (CDC), maintaining a safe, hazard-free home environment is crucial for long-term physical activity adherence.
Spatial Clearance Matrix:For exercises utilizing 17.5 lb dumbbells (such as walking lunges, renegade rows, or thrusters), ensure a minimum clear drop zone of 6 feet by 6 feet. Outfit this zone with 3/8-inch thick vulcanized rubber stall mats. The hex shape of the neoprene dumbbell prevents rolling, but the rubber mat absorbs the acoustic shock and protects both the dumbbell's coating and your floor joists.
Phase 5: Programming the 17.5 lb Bridge Weight
Why go through the trouble of setting up a specialized 17.5 lb dumbbell? The answer lies in biomechanics and the principle of progressive overload. The Mayo Clinic's strength training guidelines emphasize that gradual, incremental increases in resistance are vital for muscle adaptation without overloading tendons and ligaments.
Targeted Applications for the 17.5 lb Load
The 17.5 lb neoprene dumbbell is not meant for heavy compound lifts like goblet squats. It is a precision tool for intermediate lifters targeting smaller muscle groups:
- Lateral Raises (Deltoids): The lateral head of the shoulder is a small muscle. Jumping from 15 to 20 lbs often forces the lifter to use momentum (swinging). The 17.5 lb weight allows for strict, time-under-tension isolation.
- Tricep Kickbacks & Extensions: The triceps brachii responds exceptionally well to micro-loading. The 17.5 lb weight bridges the gap where 15 lbs becomes too easy for 12 reps, but 20 lbs causes elbow joint pain.
- Rotator Cuff Rehabilitation: For physical therapy and pre-hab routines, the 2.5 lb increment difference provided by the 17.5 lb dumbbell is often the exact threshold needed to stimulate the supraspinatus and infraspinatus without impingement.
'The most common mistake in home gym programming is forcing a 5 lb jump on isolation movements. The connective tissue in the shoulder adapts much slower than the muscle belly. Utilizing transitional weights like the 17.5 lb dumbbell is a hallmark of intelligent, longevity-focused training.' — National Strength and Conditioning Association (NSCA) Training Principles.
Phase 6: Long-Term Neoprene Care and Inspection
Once your 17.5 dumbbells are racked and integrated into your routine, ongoing maintenance is required to maximize the lifespan of the neoprene coating.
Preventing UV and Ozone Degradation
Neoprene is highly susceptible to UV radiation. If your home gym is in a sunroom or near a south-facing window, prolonged exposure to direct sunlight will cause the neoprene to fade, chalk, and eventually split at the seams where the rubber meets the metal handle. Install UV-blocking window films or position your rack away from direct light paths.
Monthly Seam Inspections
Every 30 days, inspect the perimeter where the neoprene coating wraps around the cast iron core. Look for micro-tears or separation. If you notice the rubber pulling away, apply a thin layer of flexible, waterproof rubber sealant (such as Shoe Goo or a marine-grade silicone) to the seam to prevent moisture from entering and rusting the internal iron core. Rust expansion will ultimately shatter the neoprene shell from the inside out.
Final Walkthrough Checklist
Before executing your first workout with your newly installed setup, verify the following:
- Factory oils have been stripped with isopropyl alcohol.
- The continuous wall rack is anchored securely into wooden or metal studs (never drywall alone).
- The 17.5 lb dumbbells are spaced at least 1.5 inches apart from adjacent weights on the rail to prevent coating friction.
- A 3/8-inch rubber drop zone is established for dynamic movements.
By treating the integration of your 17.5 dumbbells as a deliberate installation project rather than an afterthought, you ensure a safer, more efficient, and highly optimized home gym environment tailored for precise progressive overload.
More gear to consider
All reviews
Grip Troubleshooting: Beyond the Dumbbell Supinated Curl GIF to Olympic Barbell Knurling

EZ Bar vs Straight Bar: Budget & Good Chest Exercises with Dumbbells
Setup Guide: Upper Back Dumbbell Exercises Using Neoprene Weights

Barbell Collar and Clamp Comparison: Deadlift Dumbbell

Turn Dumbbells Into a Barbell: Bumper Plate vs Iron Plate Guide
