Setup: Dumbbell Bench Press for Beginners & Olympic vs Standard Plates
Master your home gym setup. Learn the dumbbell bench press for beginners and our complete walkthrough on choosing Olympic vs standard weight plates.

The Ultimate Home Gym Station Walkthrough
Building a functional, long-lasting home gym requires more than just buying equipment; it demands a strategic approach to spatial planning, biomechanical setup, and equipment compatibility. Whether you are currently mastering the dumbbell bench press for beginners or preparing to load up a barbell for heavy powerlifting, the foundation of your pressing station dictates your safety and progress. Many novices make the critical error of purchasing a mismatched rack, bench, and weight plate system, only to realize their gear cannot support their evolving strength levels.
This comprehensive setup and installation walkthrough bridges the gap between beginner dumbbell routines and advanced barbell training. We will cover the exact spatial requirements for your bench, dive deep into the metallurgical and practical differences between Olympic and standard weight plates, and provide a step-by-step installation guide for integrating your plate storage into your power rack footprint.
Phase 1: Bench Placement and Dumbbell Station Setup
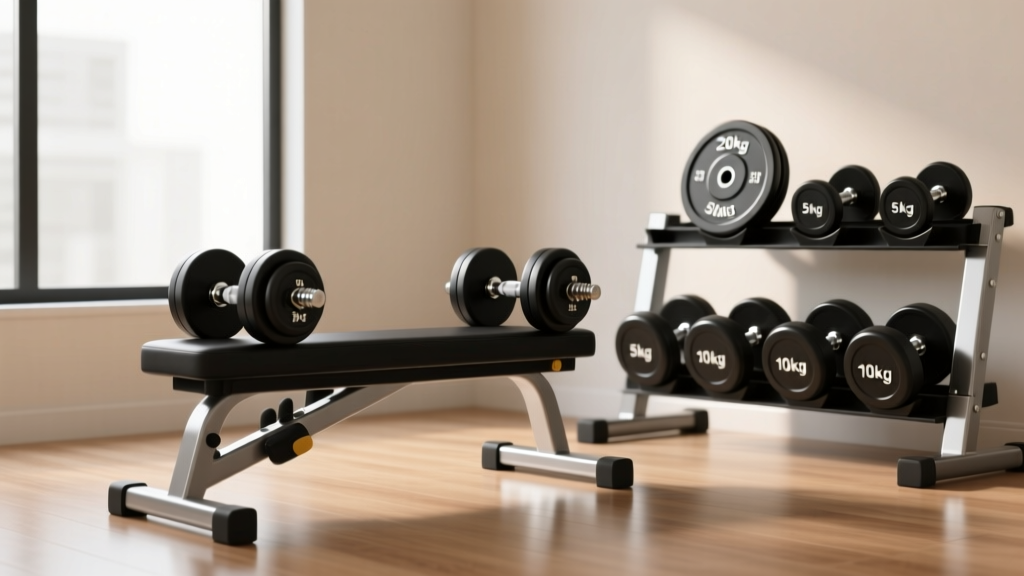
Before you ever unrack a barbell, your pressing foundation is built with dumbbells. Setting up your bench correctly for the dumbbell bench press for beginners ensures optimal shoulder mechanics and prevents impingement.
Optimal Bench Specifications
According to the National Strength and Conditioning Association (NSCA), a proper flat bench should have a height of exactly 17 to 18 inches (the IPF competition standard is 17.7 inches). This height allows your feet to plant firmly into the floor, creating the necessary leg drive to stabilize your torso. The bench pad width should be between 11.5 and 12.5 inches; anything wider restricts scapular retraction, while anything narrower compromises stability.
Beginner Spatial Tip
When mapping out your floor plan, ensure you have at least 3.5 feet of lateral clearance on both sides of the bench. During the negative phase of the dumbbell bench press for beginners, your elbows will drop below the plane of the bench. If your power rack uprights or plate trees are too close, you risk striking your elbows against steel, leading to severe joint trauma or dropped weights.
Phase 2: The Core Dilemma — Standard vs. Olympic Plates
As your strength outgrows adjustable dumbbells, you will transition to barbell work. This is where the most consequential purchasing decision in your gym's lifecycle occurs: choosing between standard and Olympic weight plates. As detailed in BarBend's comprehensive guide on weight plate differences, this choice dictates the type of barbell, rack attachments, and storage solutions you can use.
Standard Weight Plates (1-Inch Diameter)
Standard plates feature a 1-inch (25.4mm) center hole and are typically paired with lightweight, economy barbells. While they are cheaper upfront, they suffer from severe mechanical limitations. Standard bars usually have shorter sleeves (around 12 inches), meaning you can only fit about 150 to 200 lbs of plates per side before running out of real estate. Furthermore, standard bars are often made from low-grade steel with a tensile strength below 50,000 PSI, making them prone to permanent bending under heavy loads.
Olympic Weight Plates (2-Inch Diameter)
Olympic plates feature a 50mm (approx. 2-inch) center hole and are the undisputed standard for commercial and serious home gyms. They are designed to pair with Olympic barbells, which boast 16.3-inch sleeves and tensile strengths ranging from 165,000 to over 200,000 PSI. Olympic plates come in various materials, from raw cast iron to calibrated steel and rubber bumper plates, accommodating everything from heavy bench pressing to Olympic weightlifting drops.
Comparison Matrix: Standard vs. Olympic
| Feature | Standard Plates (1-Inch) | Olympic Plates (2-Inch) |
|---|---|---|
| Center Hole Diameter | 25.4mm (1 Inch) | 50mm (2 Inches) |
| Barbell Sleeve Length | ~12 Inches (Max ~250 lbs total) | 16.3 Inches (Max 600+ lbs total) |
| Barbell Tensile Strength | Low (< 50,000 PSI) | High (165,000 - 215,000 PSI) |
| Plate Material Options | Cast Iron, Cement/Plastic | Cast Iron, Rubber Bumper, Urethane, Calibrated Steel |
| Resale Value & Longevity | Poor (High degradation) | Excellent (Lifetime durability) |
Phase 3: Budgeting and 2026 Market Pricing
Understanding the financial commitment is crucial for your installation walkthrough. As of early 2026, global supply chain stabilizations have slightly reduced the cost of raw materials, but shipping heavy steel remains a premium expense.
- Standard Cast Iron: Typically costs between $1.00 and $1.50 per pound. While cheap, the hidden cost is the inevitable need to upgrade your entire barbell and rack attachment ecosystem once you surpass a 225 lb bench press.
- Olympic Cast Iron: Averages $1.75 to $2.50 per pound. This is the most cost-effective route for traditional powerlifting and bench press setups where dropping the weight from overhead is not required.
- Olympic Rubber Bumper Plates: Ranges from $2.50 to $4.00 per pound. Essential if your home gym lacks specialized shock-absorbing flooring, as they protect both your subfloor and the barbell knurling.
- Calibrated Steel Plates: The premium tier, costing $5.00 to $8.00+ per pound. These are extremely thin, allowing you to load over 800 lbs onto a single Olympic sleeve, though they are overkill for 95% of home gym owners.
'The biggest mistake new home gym owners make is buying a standard weight set from a big-box store to save $150, only to spend $800 a year later replacing the bar, rack adapters, and plates with Olympic gear. Buy Olympic from day one, even if you start with just the bar and a pair of 10 lb plates.'
Phase 4: Rack Installation and Plate Storage Integration
With your Olympic plates selected, the next step in the walkthrough is integrating them into your power rack or squat stand footprint. Proper installation ensures safety during heavy lifts and keeps your training space organized.
- Anchor the Uprights: If using a bolt-down power rack (like the Titan T3 or Rogue SML-2), mark your concrete floor using a hammer drill with a 3/8-inch masonry bit. Secure the base plates using wedge anchors, ensuring the rack is perfectly level before tightening to 80 ft-lbs of torque.
- Install Safety Spotter Arms: For the bench press, install sandwich-style spotter arms or pin-pipe safeties just 1 to 2 inches below your chest's maximum expansion point. This allows you to fail a rep safely without the bar crushing your sternum.
- Mount Plate Storage Pegs: Attach Olympic storage pegs to the rear crossmembers or side gussets of the rack. Crucial Edge Case: Always load the heaviest plates (45s and 35s) on the lowest pegs to lower the rack's center of gravity. If you are using a fold-away wall-mounted rack, never store plates on the rack itself, as the dynamic load will shear the wall bolts.
- Organize by Increment: Use specialized fraction plate holders or smaller upper pegs for your 2.5 lb and 5 lb plates. Losing track of micro-plates is a common frustration that stalls progressive overload.
Troubleshooting and Edge Cases
Even with a perfect installation, lifters frequently encounter mechanical edge cases when transitioning from dumbbells to barbells.
The 'Wobble' Effect on Standard Bars
If you ignored the advice above and purchased standard plates, you will quickly notice the 'wobble' effect. Standard bars lack the rotational bushings or needle bearings found in Olympic bars. When you bench press, the torque from your wrists transfers directly into the rigid, low-grade steel sleeve, causing the plates to shake violently. This destabilizes the lift and increases the risk of a pec tear.
Sleeve Length and Collar Clearance
When loading Olympic bumper plates, remember that the inner metal hub of a 45 lb bumper plate is wider than a standard cast iron plate. If you are using thick competition bumpers, you may only fit four plates per side before running out of room for your spring or lockjaw collars. Always factor in 2 inches of sleeve space for collars when calculating your max load capacity.
Protecting Your Barbell Finish
If you are using cast iron Olympic plates on a zinc or black oxide-coated barbell, the repeated friction of loading and unloading will strip the finish off the sleeves over time. To combat this, apply a light coat of 3-in-One oil to the sleeves monthly, or invest in Urethane-coated plates which feature smoother, beveled inner hubs that glide onto the sleeve without scraping the metal.
Final Walkthrough Checklist
Before you begin your next training cycle, verify your setup against this final checklist:
- Bench height is set between 17 and 18 inches.
- Lateral clearance is at least 3.5 feet for dumbbell movements.
- Rack safeties are set 1-2 inches below chest height for the bench press.
- Olympic plates are stored with the heaviest weights on the lowest pegs.
- Barbell sleeves are cleaned and lightly lubricated to prevent rust and scraping.
By meticulously planning your spatial layout and investing in the Olympic plate ecosystem from the start, you create a training environment that supports everything from the foundational dumbbell bench press for beginners to elite-level barbell pressing. For more detailed reviews on specific rack models and plate brands, consult trusted industry resources like Garage Gym Reviews to ensure your 2026 purchases align with your long-term strength goals.
More gear to consider
All reviews
Power Rack vs Squat Rack vs Stand: Dumbbell Only Leg Workout Guide
Beyond Dumbbell Squats on Shoulders: Rack Setup & Comparison

EZ vs Straight Bar Trends: Evolving the Dumbbell Curl Exercise
Fix Your One Handed Dumbbell Row: Neoprene Dumbbell Guide

Top Picks for Wrist Workouts With Dumbbells: Rubber Hex vs Urethane
