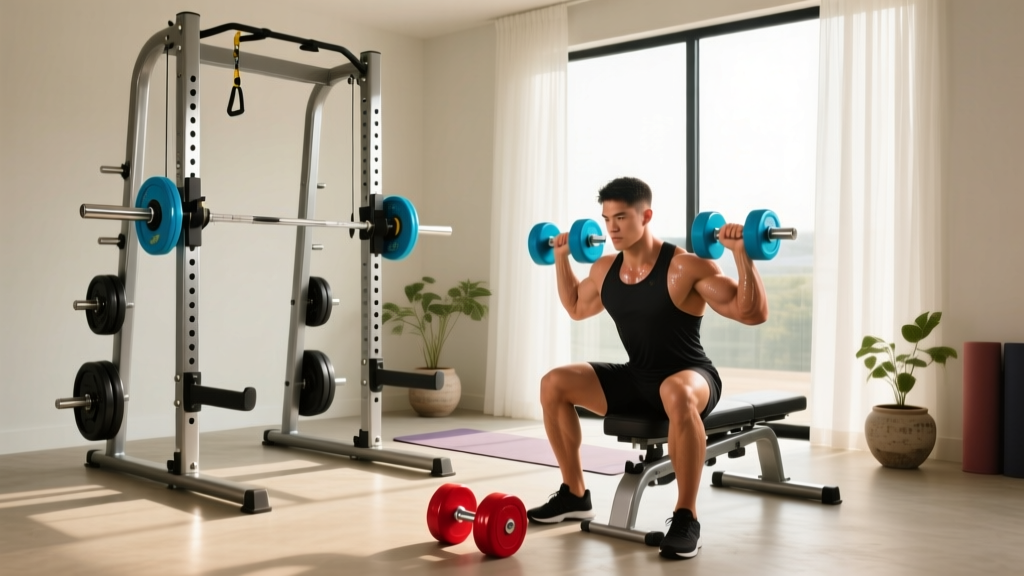
Power Rack vs Squat Stand: Setup for Rear Delt Dumbbell Workouts
Compare power racks, squat racks, and stands. Follow our setup walkthrough to optimize your home gym rig for heavy lifts and rear delt dumbbell workouts.

When outfitting a home gym in 2026, the debate between a power rack, a half squat rack, and independent squat stands ultimately comes down to footprint, budget, and accessory versatility. While heavy squats and bench presses dictate the baseline safety requirements, your rig's true value is often revealed during isolation movements. Specifically, executing strict, chest-supported rear delt dumbbell workouts requires a rack configuration that can safely brace an incline bench and anchor resistance bands without compromising structural integrity. In this complete setup and installation walkthrough, we will break down the structural differences between these three rig types and guide you through the exact installation process to maximize both heavy lifting safety and accessory utility.
Structural Showdown: Power Rack vs. Squat Rack vs. Squat Stand
Before unboxing any hardware, you must understand the biomechanical and spatial limitations of each rig type. According to BarBend's structural rack analysis, the primary differentiator is the presence of rear crossmembers and safety enclosure, which directly impacts how you can set up specialized accessory stations.
| Feature | Power Rack (e.g., Rep PR-5000 V2) | Half Squat Rack (e.g., Titan T-3) | Squat Stands (e.g., Rogue S-2) |
|---|---|---|---|
| Footprint | 48" x 48" (Standard) | 48" x 24" (Compact) | 24" x 24" (Minimalist) |
| Upright Steel | 3x3" 11-Gauge | 3x3" 11-Gauge | 2x2" or 3x3" 11-Gauge |
| Weight Capacity | 1,000 - 1,200 lbs | 800 - 1,100 lbs | 600 - 800 lbs |
| Bench Bracing | Excellent (4-point enclosure) | Good (Rear crossmember) | Poor (Independent stands) |
| Accessory Utility | Superior for rear delt setups | Moderate (Band peg capable) | Basic (Squat/OHP only) |
Phase 1: Floor Prep and Spatial Planning
A common failure mode in home gym installations is ignoring the subfloor before assembly. If you are bolting down a power rack, you need a minimum of 3 inches of solid concrete clearance to accommodate 1/2-inch wedge anchors. If you are renting or cannot drill, you must rely on friction and weight.
- The Matting Base: Lay down 3/4-inch thick vulcanized rubber horse stall mats. As noted in BarBend's flooring and anchoring guide, thinner puzzle mats will compress under the load of a loaded barbell, causing the rack to shift and the bolts to shear over time.
- Clearance Mapping: Standard power racks measure 90 inches tall. If your ceiling is exactly 8 feet (96 inches), you will have only 6 inches of clearance for pull-ups and overhead presses. Always measure from the floor to the lowest ceiling obstruction (like garage door tracks) before finalizing your rig placement.
Phase 2: Frame Assembly and Torque Specifications
Whether you are building a 4-post power rack or a 2-post squat stand, the sequence of assembly dictates the final squareness of the rig. Do not fully tighten any bolts until the entire frame is erected and squared.
- Base Assembly: Connect the front and rear crossmembers to the base plates. Insert all 5/8-inch or 1-inch hardware (depending on your brand's hole sizing) but leave them finger-tight.
- Upright Erection: Stand the uprights vertically. If you are using a 3x3" 11-gauge system, ensure the laser-cut numbers are facing inward for easy J-cup alignment.
- Top Crossmembers: Secure the top stabilizers. This is where you will mount your multi-grip pull-up bar.
- Squaring the Frame: Use a framing square to ensure all corners are exactly 90 degrees. Measure diagonally from the front-left upright to the rear-right upright; the measurement must perfectly match the opposite diagonal.
- Final Torque: Using a torque wrench, tighten all structural bolts. For standard 5/8-inch hardware on 11-gauge steel, aim for 90-100 ft-lbs of torque. Use nylon-insert lock nuts (nyloc nuts) on all non-shear bolts to prevent vibration loosening.
Phase 3: Optimizing Your Rig for Rear Delt Dumbbell Workouts
Why does the choice of rack matter for isolation movements? The rear deltoids are notoriously difficult to isolate without lower-back momentum taking over. The gold standard for rear delt dumbbell workouts is the chest-supported incline row or the incline rear delt fly.
According to biomechanics experts featured in Garage Gym Reviews, a power rack or half-rack allows you to create a makeshift chest-supported station, whereas squat stands completely fail in this regard.
The 'Pin-and-Brace' Setup Method
To execute strict rear delt dumbbell workouts without buying a specialized $400 T-bar row machine, use your rack's safety straps or pin-pipe safeties:
- Step 1: Set your adjustable bench to a 30-degree or 45-degree incline.
- Step 2: Place the bench inside the power rack, facing inward.
- Step 3: Position the safety spotter arms at a height that perfectly catches the bottom edge of the bench's backrest.
- Step 4: Push the bench forward until the top of the backrest wedges securely against the rear uprights or a designated crossmember.
This setup completely neutralizes the lower back, forcing the posterior deltoids to do 100% of the work during dumbbell rows and reverse flies. Independent squat stands cannot offer this bracing point, forcing you to rely on bent-over variations that invite spinal flexion and momentum cheating.
Band Anchoring for High-Rep Rear Delt Burnouts
For band pull-aparts and face pulls—a staple finisher for any rear delt dumbbell workout routine—you need a secure, low-level anchor point. Power racks feature bottom crossmembers or dedicated band peg holes at the base. Loop a 1/4-inch or 1/2-inch resistance band through the lowest hole on the upright (usually the 3rd or 4th hole from the floor). This provides a horizontal resistance vector that perfectly targets the rhomboids and rear delts without pulling you off balance.
"The mark of a truly versatile home gym isn't just its ability to hold 500 pounds on a barbell; it's the ability to seamlessly transition into strict, momentum-free isolation work using the rig's existing geometry."
Troubleshooting Common Installation Failures
Even with meticulous planning, home gym owners frequently encounter hardware and alignment issues. Here is how to diagnose and fix the most common setup failures:
1. Wobbly Uprights on Unanchored Rigs
If you opted not to bolt your squat rack to the concrete, lateral wobble during re-racking is a major safety hazard. The Fix: Add weight storage horns to the rear uprights and load them with heavy bumper plates. The added mass lowers the center of gravity and acts as a ballast, stabilizing the rig during dynamic movements.
2. J-Cups Refusing to Seat Flush
If your J-cups are binding or scraping the UHMW plastic liners, your uprights are likely twisted out of parallel. The Fix: Loosen the top crossmember bolts by two full turns. Use a rubber mallet to gently tap the uprights into alignment until the J-cups slide in smoothly, then re-torque the crossmembers.
3. Hardware Stripping During Assembly
Using an impact driver on high-tensile steel bolts often strips the threads or snaps the bolt head. The Fix: Always start threading by hand to prevent cross-threading. Finish tightening with a standard ratchet or torque wrench. If a bolt strips, replace it immediately with a Grade 8 equivalent from a local hardware store; never use Grade 5 hardware for structural rack joints.
Expert Verdict and Final Tightening
When designing a comprehensive training space, the power rack remains the undisputed king of versatility. While squat stands save space and budget, they severely limit your ability to safely perform chest-supported rear delt dumbbell workouts and heavy accessory lifts. By following this exact installation walkthrough—prioritizing floor prep, precise torque specs, and intelligent bench bracing—you will build a rig that safely supports your heaviest squats while providing the perfect geometry for targeted hypertrophy work. Always perform a 50% load test on all safeties and J-cups before committing to your working sets.
More gear to consider
All reviews
Olympic vs Standard Plates Setup & Dumbbell Exercises for Glutes

Treadmill or Exercise Bike for Weight Loss: Stationary Bike Care
Top Adjustable Dumbbells for the Seated Dumbbell Curl: Setup Guide
Arm Workouts With Dumbbells: Urethane vs Rubber Hex 2026 Trends
Barbell Knurling: Rogue vs Titan & Supinated Dumbbell Biceps Curl