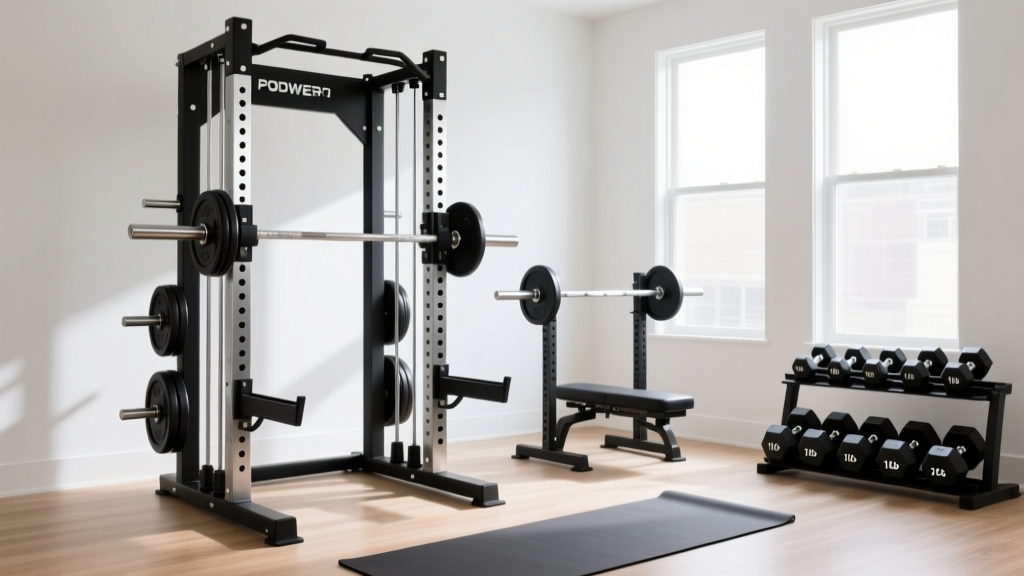
Power Rack vs Squat Stand Setup for Bodyweight and Dumbbell Workout
Compare power racks, squat racks, and stands for your bodyweight and dumbbell workout. Includes step-by-step setup, space planning, and 2026 pricing.

The Hybrid Home Gym Dilemma: Merging Barbell, Dumbbell, and Calisthenics
As home fitness evolves in 2026, the modern garage gym is no longer just a place for heavy barbell squats. Today’s athletes demand a versatile station that supports heavy lifting, isolation movements, and high-intensity calisthenics. If your primary routine is a bodyweight and dumbbell workout supplemented by barbell basics, choosing the right containment structure is critical. The debate of power rack vs squat rack vs squat stand goes far beyond price tags; it dictates your spatial efficiency, safety margins, and equipment longevity.
2026 Market Insight: The Rise of Hybrid Training
According to recent home gym industry analyses, over 64% of garage gym owners now prioritize multi-modal equipment. A rack must safely withstand the dynamic, multi-directional forces of kipping pull-ups (bodyweight) while providing ample interior clearance for heavy dumbbell bench presses and goblet squats.
Comparison Matrix: Power Rack vs. Squat Rack vs. Squat Stand
Before breaking out the wrenches, you must select the chassis that fits your floor plan and training style. Below is a structural and financial breakdown of the three primary categories, using 2026 benchmark models.
| Feature | Power Rack (Rep PR-4000) | Squat Rack (Rogue S-2) | Squat Stand (Titan T-2) |
|---|---|---|---|
| Footprint | 47" x 47" (Standard) | 49" x 43" | 48" x 48" |
| Weight Capacity | 1,000 lbs | 1,000 lbs | 800 lbs |
| Bodyweight Suitability | Excellent (Fully enclosed, stable for kipping) | Moderate (Open top, requires bolting for pull-ups) | Poor (High tipping risk during dynamic movements) |
| Dumbbell Clearance | High (Available in 24", 30", 41" depths) | High (Open design allows wide dumbbell presses) | High (Minimal obstruction) |
| 2026 Avg. Price | $699 - $850 | $745 - $815 | $349 - $399 |
Source: Pricing and specifications verified via Rogue Fitness S-2 Specs and manufacturer catalogs.
Phase 1: Subfloor Assessment and Spatial Mapping
Installation begins before a single bolt is turned. The structural integrity of your rack relies entirely on the subfloor beneath it. When performing a bodyweight and dumbbell workout, you are frequently dropping heavy dumbbells or generating lateral force during plyometrics.
Concrete vs. Wood Subfloors
- Concrete Slabs: The gold standard. You will need a rotary hammer drill and 1/2" x 3-3/4" wedge anchors. Edge Case: If your concrete is older than 30 years, drill a test hole first to check for spalling or crumbling. If the concrete is soft, use epoxy anchors (like Simpson SET-3G) instead of mechanical wedge anchors.
- Wood Joists (Plywood Subfloors): Never use standard lag bolts directly into plywood; they will rip out under the dynamic load of muscle-ups or heavy dumbbell drops. You must locate the floor joists using a stud finder and use 3/8" structural lag screws (minimum 4" length) driven directly into the joists. Alternatively, build a reinforced 3/4" OSB platform bolted to the joists, then bolt the rack to the platform.
Phase 2: Step-by-Step Installation Walkthrough
Whether you choose a power rack or a squat stand, the assembly sequence dictates the final squareness of the unit. A twisted rack will cause UHMW plastic J-cups to bind and wear prematurely.
- Stage the Hardware: Unbox and separate all 3x3" uprights, crossmembers, and gussets. Verify the hole spacing (most modern racks use 5/8" holes with 1" or 2" Westside spacing in the bench zone).
- Build the Base First: Connect the front and rear uprights using the lowest crossmembers. Crucial: Only hand-tighten the bolts at this stage. Leave them with about 1/4" of play.
- Erect the Uprights: Stand the base up and attach the vertical uprights. Again, hand-tighten only.
- Install Top Crossmembers and Pull-Up Bars: Secure the top frame. If you are installing a multi-grip pull-up bar for your bodyweight routines, ensure the gusset plates are facing inward for maximum shear strength.
- Square and Torque: Measure diagonally from the top-left corner to the bottom-right corner, and vice versa. The measurements must be identical. Once squared, use a torque wrench to tighten all Grade 5 or Grade 8 hardware. For 1/2" bolts, torque to approximately 60-75 ft-lbs. For 5/8" bolts, torque to 90-110 ft-lbs.
- Anchor to the Floor: Mark your anchor holes through the base plates. Drill, vacuum out the concrete dust (essential for wedge anchor grip), and hammer the anchors in. Torque the anchor nuts until the washer is fully compressed.
Expert Warning: According to safety guidelines outlined by the National Strength and Conditioning Association (NSCA), failure to secure squat stands to the floor during dynamic bodyweight movements (like kipping pull-ups) is a leading cause of home gym injuries. The center of gravity shifts dangerously high when an athlete hangs from the pull-up bar of an unanchored stand.
Phase 3: Rigging for Your Bodyweight and Dumbbell Workout
Once the frame is secure, the way you rig the accessories determines the flow of your hybrid workouts.
Optimizing Interior Clearance
If your bodyweight and dumbbell workout includes heavy dumbbell floor presses, Bulgarian split squats, or renegade rows, interior space is paramount. If you opted for a Power Rack (like the Rep PR-4000), you must choose the correct depth. A 24" depth is sufficient for squatting and pressing, but if you plan to use an adjustable bench inside the rack for dumbbell incline presses, you need a minimum 30" depth to prevent your elbows from striking the rear uprights during the eccentric phase of the movement.
J-Cup and Spotter Arm Placement
- UHMW Plastic Liners: Ensure your J-cups have intact UHMW (Ultra-High-Molecular-Weight) polyethylene liners. This protects your barbell knurling and dampens the acoustic shock of re-racking.
- Spotter Arms for Dumbbells: While spotter arms are designed for barbells, they serve a secondary purpose in dumbbell training. Set the safety straps or pin-pipe spotters just below the bottom range of motion of your dumbbell bench press. This allows you to safely push to failure without a spotter, a critical safety protocol for solo home gym sessions as noted by Garage Gym Reviews.
Edge Cases and Real-World Failure Modes
Even with perfect installation, hybrid training introduces unique wear-and-tear scenarios that pure powerlifters rarely encounter.
Troubleshooting Common Issues
- Hardware Loosening: The lateral vibration from dropping heavy dumbbells onto rubber mats can cause un-secured nuts to back out over time. Fix: Apply medium-strength blue threadlocker (e.g., Loctite 242) to all crossmember bolts during assembly. Re-torque all bolts every 6 months.
- Pull-Up Bar Slippage: On some budget squat racks, the pull-up bar is held in place by friction or single-shear bolts. High-rep bodyweight workouts can cause the bar to rotate. Fix: Upgrade to a pinned or welded pull-up bar assembly, or drill a secondary set-screw hole to lock the bar in place.
- Mat Compression: Using thin (1/4") puzzle mats under a rack will cause the anchors to bear uneven loads as the mat compresses under heavy dumbbell drops. Fix: Always use 3/4" thick vulcanized rubber horse stall mats to distribute impact forces evenly across the concrete slab.
Final Verdict: Which Rack Wins for Hybrid Training?
If your programming is strictly a bodyweight and dumbbell workout with only occasional barbell use, a Squat Rack (like the Rogue S-2) offers the best compromise. It provides the open-air freedom needed for wide dumbbell movements and lateral lunges, while still offering a stable, bolt-down pull-up bar for calisthenics.
However, if your bodyweight routines involve high-impact kipping, muscle-ups, or you plan to integrate heavy barbell squats into your regimen as you progress, the Power Rack is the undisputed king of safety and versatility. Squat stands should be relegated to temporary setups or purely static barbell pressing; they simply cannot handle the multi-directional physics of modern hybrid training without posing a severe tipping hazard.
Invest in the footprint, anchor it properly, and your rack will serve as the unshakeable foundation of your home gym for decades to come.
More gear to consider
All reviews
EZ Curl Bar vs Straight Bar and Standing Overhead Dumbbell Presses

Setup Guide: Neoprene Gear for High Intensity Dumbbell Workouts
Maintaining Dumbbell Racks for Heavy Alternating Dumbbell Row Workouts
EZ Bar vs Straight Bar: 2026 Trends & Incline Dumbbell Press Benefits
Squat Stand vs Power Rack Setup: Space for the Dumbbell Upward Row
