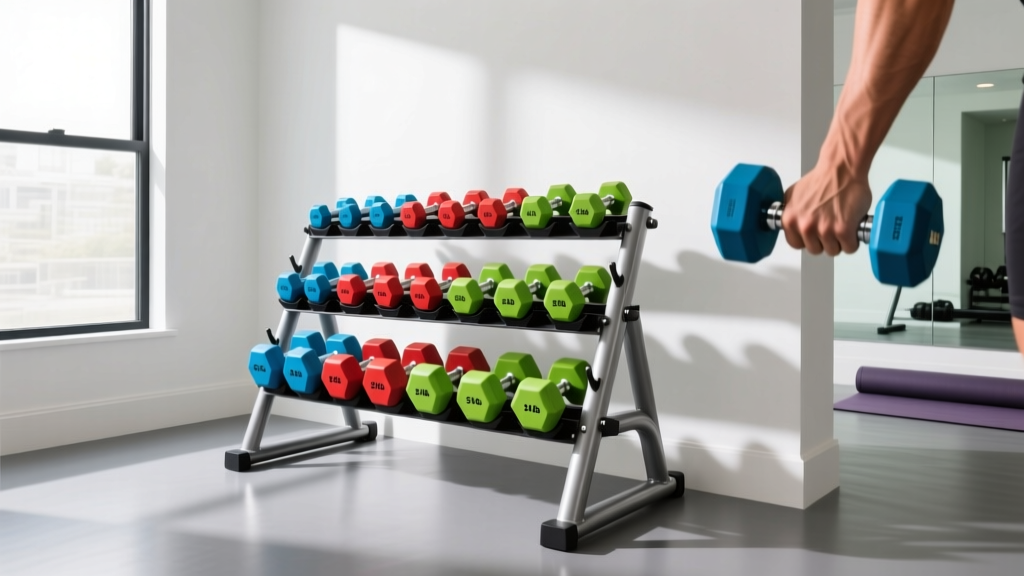
Designing the Perfect Rack for a Full Upper Body Dumbbell Workout
Optimize your home gym layout for a seamless full upper body dumbbell workout. Compare top racks, space-saving storage, and ergonomic placement strategies.

The Intersection of Storage and Workflow in Home Gym Design
When executing a high-density full upper body dumbbell workout, the last thing you want is to break your heart rate zone because you tripped over a stray 25-pound hex dumbbell or wasted 45 seconds searching for the right weight pair. In the realm of space optimization and layout design, your dumbbell rack is not just a storage unit; it is the central hub of your training ecosystem. A poorly planned storage layout creates physical bottlenecks and mental friction, directly degrading the quality of your supersets and drop sets.
According to the American Council on Exercise (ACE), efficient equipment placement is critical for maintaining safe movement patterns and maximizing limited square footage in home gyms. This guide breaks down the exact spatial requirements, rack models, and layout blueprints needed to support a seamless, professional-grade upper body training environment in 2026.
The Ergonomics of Dumbbell Storage: The 'Strike Zone'
To optimize your space for a full upper body dumbbell workout, you must understand the biomechanics of weight retrieval. The primary goal of rack placement is to keep the majority of your working weights within the "strike zone"—the area between your waist and your shoulders.
Minimizing Lower Back Fatigue
Upper body workouts require frequent weight changes. If your heavier dumbbells (35 lbs and above) are stored on the bottom tier of a low-profile rack, you will repeatedly perform unbraced, asymmetrical hinges to retrieve them. Over a 45-minute session, this cumulative lower back fatigue can compromise your core stability during standing overhead presses or single-arm rows.
- Top Tier (Shoulder Height): Reserve for light isolation weights (5–20 lbs) used for lateral raises, rear delt flyes, and tricep kickbacks.
- Middle Tier (Waist/Chest Height): The prime real estate. Store your primary compound movement weights (25–50 lbs) here for bench presses, rows, and shoulder presses.
- Bottom Tier (Knee/Low): Strictly for heavy dumbbells (55+ lbs) or kettlebells, which should be lifted using a proper hip-hinge or squat mechanic.
2026 Market Analysis: Top Racks for Compact Spaces
The fitness equipment market has evolved significantly, with manufacturers prioritizing verticality and high-density footprints. Below is a comparative analysis of the top-tier dumbbell racks that balance stability, capacity, and spatial efficiency.
| Rack Model | Footprint (L x W) | Max Capacity | 2026 Price Range | Best Use Case |
|---|---|---|---|---|
| Rogue A-Frame Dumbbell Rack | 29" x 29" | 500 lbs (5-50 lb pairs) | $395 - $425 | Ultra-compact spaces; corner placement |
| Titan Fitness 3-Tier Dumbbell Rack | 43" x 32" | 1,000 lbs | $249 - $279 | Heavy commercial-grade home gyms |
| Rep Fitness 3-Tier Rack (V2) | 44" x 24" | 800 lbs | $179 - $199 | Linear wall placements; budget-conscious |
Deep Dive: The Rogue A-Frame Advantage
For those running a full upper body dumbbell workout in a multi-purpose room (like a garage or spare bedroom), the Rogue A-Frame is a spatial marvel. Its 29x29-inch footprint occupies less than 6 square feet of floor space. The angled design naturally presents the dumbbell handles toward the user, reducing wrist extension when gripping the weights. However, it is limited to 50-pound pairs, which may require an upgrade if your dumbbell chest press strength exceeds that threshold.
The Adjustable Dumbbell Route: Maximizing Floor Space
If your primary constraint is square footage, abandoning fixed dumbbells for an adjustable set is the ultimate space optimization strategy. A full set of fixed rubber hex dumbbells from 5 to 50 lbs requires roughly 17 linear feet of rack space. Adjustable dumbbells condense this into a 2-square-foot footprint.
Nuobell vs. PowerBlock: Storage Docks Compared
When integrating adjustable dumbbells into your layout, the storage dock dictates your workflow.
- Nuobell 80lb Set + Stand: The Nuobell mimics the exact form factor of a traditional dumbbell. The proprietary stand elevates the cradles to roughly 28 inches, placing the handles perfectly in the waist-level strike zone. Total cost in 2026 hovers around $650 for the set and stand. The drawback is the fragile internal mechanism; dropping them during a heavy set of dumbbell lunges is a known failure mode.
- PowerBlock Elite USA + Tower Stand: The blocky, cage-like design of PowerBlocks is virtually indestructible, making them ideal for heavy drop sets. The Tower Stand stores the blocks vertically, taking up an astonishing 12" x 12" floor footprint. However, the vertical retrieval requires a slight learning curve to grip the internal handle blindly during fast-paced supersets.
Expert Insight: If you utilize adjustable dumbbells for your upper body workouts, always position the storage dock behind the head of your adjustable bench. This allows you to reach back and re-rack the weights safely after a heavy set of floor presses or bench presses without having to stand up or twist your spine under load.
Step-by-Step Layout Blueprint for a 10x10 Room
Designing the physical layout of your gym requires adhering to safety clearances. The ExRx.net Weight Room Layout Guidelines emphasize that inadequate clearance around storage units is a leading cause of home gym injuries and equipment damage. Here is a proven blueprint for a standard 10x10 foot space optimized for upper body training.
1. The Anchor Point (Wall Placement)
Place your 3-tier dumbbell rack flat against the longest unbroken wall. Ensure there is a minimum of 24 inches of lateral clearance on both sides of the rack. This allows you to step sideways to grab a heavier pair without backing into your bench or mirror.
2. The Bench Trajectory
Position your adjustable FID (Flat/Incline/Decline) bench exactly 36 to 48 inches directly in front of the rack. This specific distance allows you to pick up a heavy pair of dumbbells, take one step back, and safely sit on the bench to perform a dumbbell clean-and-press to the starting position.
3. Mirror and Lighting Alignment
Mount a shatterproof gym mirror on the wall adjacent to the bench (not behind the rack). When performing unilateral movements like single-arm dumbbell rows or chest-supported rear delt flyes, you need a lateral line of sight to check for spinal alignment and shoulder symmetry.
⚠️ Safety Callout: The Drop ZoneNever place your dumbbell rack in the "drop zone" of your bench. When performing heavy incline presses or skull crushers to failure, you will inevitably need to drop the dumbbells to the floor. Ensure a 4-foot semi-circle around the sides of your bench is completely clear of rack legs and weight plates.
Frequently Asked Questions
How much weight capacity do I actually need for an upper body rack?
For a dedicated upper body setup, a rack holding pairs from 5 lbs to 50 lbs is sufficient for 90% of lifters. This totals 550 lbs of iron. A rack rated for 800+ lbs (like the Titan 3-Tier) provides a necessary safety buffer, preventing the steel uprights from bowing over years of heavy loading and unloading.
Should I use rubber hex or urethane dumbbells for my rack?
Urethane is vastly superior for indoor home gyms. Rubber hex dumbbells off-gas a strong chemical odor that can linger in a poorly ventilated 10x10 room for months. Urethane is odorless, more resistant to UV degradation from nearby windows, and features a dead-bounce drop profile that protects your flooring and the rack's steel trays.
Can I mount a dumbbell rack directly to drywall?
No. Wall-mounted dumbbell shelves (which hold 2-3 pairs of light weights) must be anchored directly into wooden or metal wall studs using heavy-duty lag screws. Drywall anchors will inevitably fail under the dynamic load of retrieving and replacing a 20 lb dumbbell, posing a severe crushing hazard.
Final Thoughts on Workflow Optimization
A successful full upper body dumbbell workout relies on momentum, time-under-tension, and seamless transitions between exercises. By investing in a spatially efficient rack, respecting the ergonomic strike zone, and adhering to strict clearance measurements, you transform your home gym from a cluttered storage closet into a high-performance training facility. Evaluate your current footprint, measure your clearances, and upgrade your storage layout to match your training intensity.
More gear to consider
All reviews
Upgrading From Wood Dumbbells: Olympic Barbell Knurling Mistakes

Olympic vs Standard: Which Muscle Must Contract to Lift the Dumbbell?

Bumper vs Iron Plates: Space Layouts & Leg Day Workout With Dumbbells

EZ Curl Bar vs Straight Bar: Trends Beyond the 1000 lb Dumbbell Myth

Olympic vs Standard Plate Setup & Dumbbell Exercises for Seniors with Pictures
