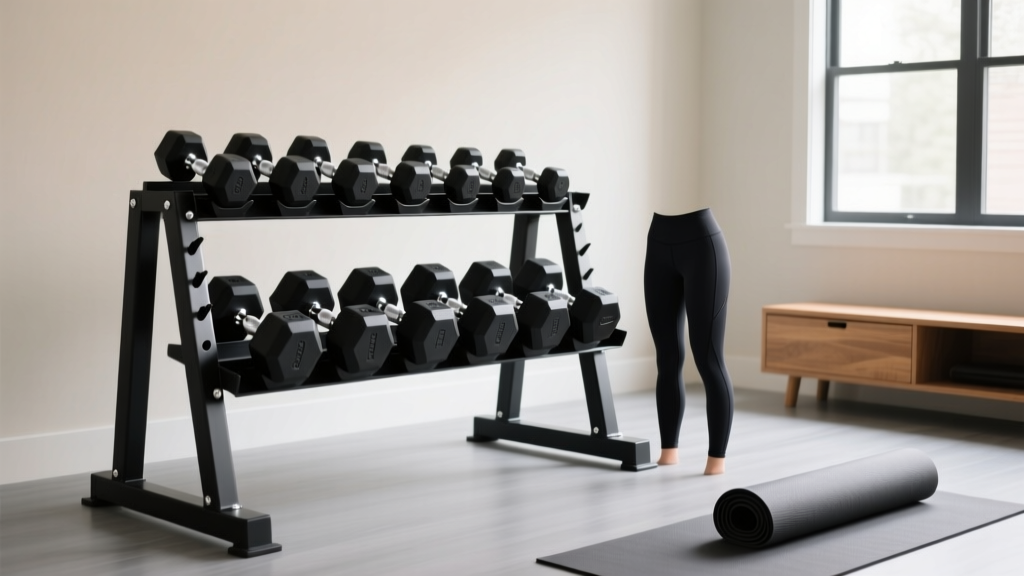
Dumbbell Rack Care for Your Inner Thigh Dumbbell Workout
Learn essential dumbbell rack maintenance and storage strategies to keep your gear safe, organized, and ready for any intense inner thigh dumbbell workout.

When designing a targeted lower-body routine, the focus is often entirely on the exercises themselves. However, the environment and equipment storage you rely on can make or break your session. A well-executed inner thigh dumbbell workout requires seamless transitions between heavy compound movements, like dumbbell sumo squats, and lighter isolation exercises, such as lying adductor squeezes. If your dumbbell rack is disorganized, structurally compromised, or poorly maintained, you risk injury, equipment degradation, and a disrupted training flow.
As of 2026, commercial and home gym equipment standards have evolved, but the fundamental physics of steel fatigue and material wear remain unchanged. This guide dives deep into the maintenance, ergonomic organization, and longevity care of dumbbell racks, specifically tailored to support the rigorous demands of adductor and lower-body training.
The Biomechanics of Storage: Ergonomics for Adductor Training
The inner thigh (adductor) muscle group responds best to a mix of heavy, deep-stretch movements and high-rep isolation work. The dumbbell sumo squat is a cornerstone of this training, often requiring lifters to handle heavy loads ranging from 50 to 100+ pounds. The way your rack stores and presents these heavy dumbbells directly impacts your spinal health.
Optimizing Rack Tier Heights
Picking up a 70-pound dumbbell from the floor or a poorly positioned bottom shelf forces excessive lumbar flexion, increasing the risk of a herniated disc before your workout even begins. According to facility safety guidelines highlighted by the National Strength and Conditioning Association (NSCA), equipment layout must minimize awkward lifting postures.
- Bottom Tier (Heavy Bells 50-100 lbs): Should sit at least 18 to 24 inches off the floor. This allows you to hinge at the hips with a neutral spine when retrieving heavy weights for sumo squats or goblet squats.
- Middle Tier (Moderate Bells 25-45 lbs): Ideal for lateral lunges and step-ups. Positioned at roughly waist height (36 inches) for easy grabbing during supersets.
- Top Tier (Light Bells 5-20 lbs): Perfect for lying floor squeezes or adductor pulses. Keeps lighter, frequently grabbed pairs out of the bending zone.
Never treat a heavy dumbbell pickup like a deadlift if the rack shelf is too low. If your rack's bottom tier is flush with the floor (common in cheap A-frame models), you are forced to round your back. Upgrade to a 3-tier horizontal rack with elevated bottom shelves to protect your lumbar spine.
Hardware and Structural Integrity: Preventing Rack Failure
Heavy lower-body training means heavy dumbbells are constantly being loaded and unloaded, often with less care than Olympic barbells. The repetitive impact of dropping a 80-pound hex dumbbell onto a steel shelf generates micro-vibrations that slowly back out hardware and stress welds.
Upgrading and Maintaining Fasteners
Many budget racks (priced under $150) ship with low-grade zinc-plated bolts that strip easily and lack tension retention. To ensure your rack survives years of heavy inner thigh dumbbell workout sessions, perform the following hardware upgrades and maintenance:
- Replace with Grade 8 Bolts: Swap out factory bolts for Grade 8 steel carriage bolts. They offer a tensile strength of 150,000 PSI, compared to the 74,000 PSI of standard Grade 2 bolts.
- Use Nyloc Nuts: Replace standard hex nuts with nylon insert lock nuts (nyloc nuts). The nylon collar creates friction that prevents the nut from vibrating loose under the impact of dropped weights.
- Apply Threadlocker: For bolts that cannot be swapped, apply a medium-strength threadlocker (like Loctite 242 Blue) to the threads. Avoid Red Loctite, as it requires heat to remove and makes future maintenance impossible.
- Torque Specifications: Tighten all structural bolts to 40-50 ft-lbs using a torque wrench. Overtightening can warp thinner 11-gauge steel tubing.
Inspecting Welds for Micro-Fractures
The intersection where the shelf support bracket meets the vertical upright is the highest stress point on a dumbbell rack. Once a quarter, wipe down these joints with a degreaser and inspect them with a bright LED flashlight. Look for hairline cracks in the weld bead or rust blooming from the seam, which indicates internal oxidation and structural failure. If you spot a fracture, cease using that tier immediately. Industry reports from Club Industry consistently cite poor weld inspection as a leading cause of commercial gym equipment liability claims.
Material Interactions: Protecting Dumbbells and Rack Shelves
The coating on your dumbbells interacts directly with the steel or rubber-lined shelves of your rack. Understanding this interaction is vital for the longevity of both the storage solution and the free weights.
| Dumbbell Material | Rack Interaction & Wear | Maintenance Solution |
|---|---|---|
| Virgin Urethane | Highly durable, dense, and does not off-gas. Causes minimal shelf wear but can chip if dropped on bare steel edges. | Install adhesive high-density EVA foam strips on shelf lips to absorb impact and prevent urethane chipping. |
| Recycled Rubber | Prone to off-gassing and degrading over time. Leaves black scuff marks on steel racks and can become sticky in humid environments. | Clean rubber bells monthly with a mild dish soap solution. Wipe down rack shelves weekly to prevent rubber residue buildup. |
| Neoprene / Vinyl | Soft coating tears easily when dragged across bare metal rack shelves, exposing the inner cast iron to rust. | Never drag these bells. Lift and place them. Line shelves with rubber matting to protect the soft coating. |
Data-Driven Maintenance Schedule
To ensure your equipment meets the ASTM International standards for fitness equipment safety and longevity, adhere to this strict maintenance cadence. This schedule is specifically calibrated for home and boutique gyms where heavy, dynamic movements are frequent.
- Weekly: Wipe down steel shelves with a microfiber cloth and a pH-neutral cleaner to remove sweat and chalk. Inspect shelf lips for sharp burrs that could tear dumbbell coatings.
- Monthly: Check all visible fasteners with a socket wrench. Re-torque any bolt that has backed out by more than 1mm. Lubricate any adjustable rack mechanisms (like sliding tier brackets) with a dry PTFE spray.
- Bi-Annually: Perform a full structural audit. Use a digital level to ensure the rack has not settled unevenly into your gym flooring. Inspect all weld seams with a flashlight.
- Annually: Touch up any scratched powder coating on the rack with matching enamel paint to prevent surface rust from penetrating the steel tubing.
Optimizing Your Space for Supersets and Drop Sets
An effective inner thigh dumbbell workout often utilizes advanced intensity techniques like drop sets or supersets to fully fatigue the adductor magnus, longus, and brevis muscles. Your rack organization should facilitate, not hinder, these techniques.
The 'Proximity Principle' for Drop Sets
When performing sumo squat drop sets, you need to move from a heavy pair (e.g., 60 lbs) to a moderate pair (e.g., 40 lbs) to a light pair (e.g., 20 lbs) with less than 10 seconds of rest in between. If these weights are scattered across different tiers or opposite sides of the rack, your cardiovascular system recovers, and the metabolic stimulus of the drop set is lost.
Pro-Tip: The Vertical Column StrategyOrganize your dumbbells in vertical columns rather than strictly horizontal weight tiers. Place the 60lb, 40lb, and 20lb dumbbells in the same vertical plane on your 3-tier rack. This allows you to step back from your sumo squat, reach up or down, and instantly grab the next weight in the drop set without walking across the gym floor.
Expert Troubleshooting: Wobbly Racks and Squeaky Shelves
Even premium racks, like the REP Fitness 3-Tier Dumbbell Rack or the Rogue A-Frame, can develop issues over time. Here is how to troubleshoot the most common storage problems.
Fixing the 'Wobble' on Rubber Gym Mats
If your rack wobbles when you rack a heavy dumbbell, the issue is rarely the rack itself; it is the flooring. Thick rubber horse stall mats (3/4-inch) compress unevenly under the concentrated point-load of a rack's feet. The Fix: Do not simply tighten the bolts to pull the frame together, as this will bend the steel. Instead, lift the rack, place rigid steel shim stock or high-density UHMW plastic shims under the specific foot that is hovering, and then lower the rack. This provides a solid, non-compressible base.
Eliminating Squeaky Shelves
A high-pitched squeak when racking weights is caused by metal-on-metal friction or loose tolerances between the dumbbell handle and the shelf cradle. If your rack uses angled shelf rails, apply a thin strip of adhesive felt or skate grip tape to the inside of the cradle. This dampens the sound, protects the dumbbell handle's knurling or chrome finish, and stops the vibration that contributes to hardware loosening.
Conclusion
A dumbbell rack is not merely a piece of furniture; it is the foundational anchor of your training space. By applying rigorous maintenance protocols, upgrading sub-par hardware, and organizing your storage to match the biomechanical demands of your routine, you extend the life of your equipment and protect your body from unnecessary strain. Whether you are loading up for a heavy set of sumo squats or reaching for lighter bells to finish an intense inner thigh dumbbell workout, a well-maintained rack ensures that your focus remains exactly where it belongs: on the muscle, not the metal.
More gear to consider
All reviews
Olympic Barbell Guide: Knurling & 2 Arm Seated Dumbbell Extension
Barbell Collar Types: Secure Gear for Single Leg Dumbbell RDLs

Bumper Plate vs Iron Plate Maintenance & Dumbbell Connector Care
Olympic Barbell Guide for a Chest Workout Without Dumbbells
Maximize Space: The Dumbbell Deadlift Using Loadable Plate Handles
