Power vs Squat Rack vs Stand: Good Exercises for Arms with Dumbbells
Compare power racks, squat racks, and stands for your 2026 home gym. Plus, a beginner guide to good exercises for arms with dumbbells for upper-body gains.

Decoding the Rack: Power Rack vs. Squat Rack vs. Squat Stand
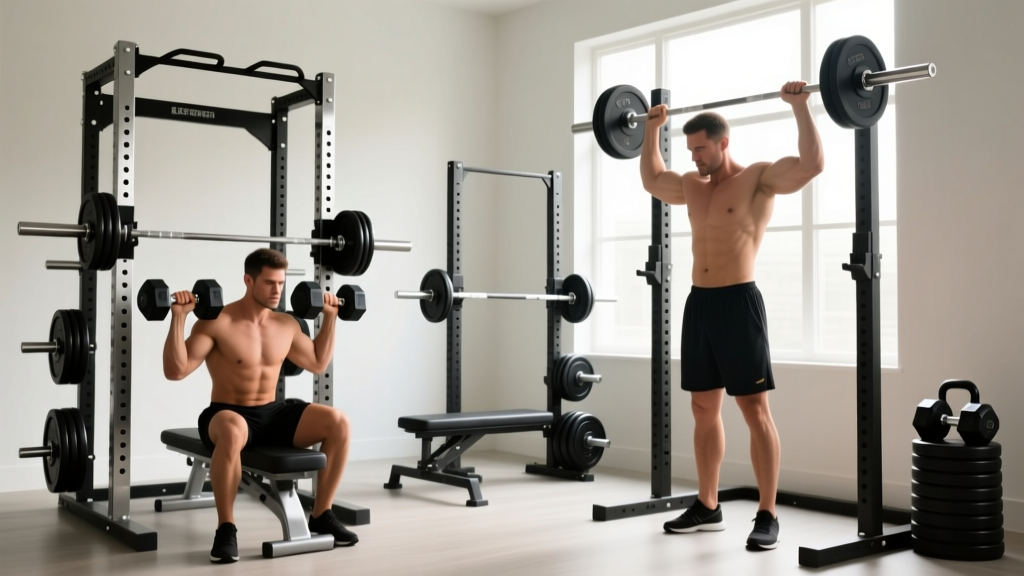
Building a functional home gym in 2026 requires navigating a saturated market of strength equipment. For beginners, the most common bottleneck is choosing the right squatting infrastructure. Do you need a full cage, a half rack, or a pair of open stands? Furthermore, while racks are primarily designed for barbell movements, a complete upper-body physique requires isolation work. This guide breaks down the structural differences between the big three rack types and transitions into a beginner-friendly protocol featuring good exercises for arms with dumbbells to maximize your new equipment.
Expert Insight: According to the National Strength and Conditioning Association (NSCA), combining heavy bilateral compound movements (like barbell squats in a rack) with unilateral isolation exercises (like dumbbell arm work) is critical for correcting muscular imbalances and preventing joint overuse injuries.1. The Power Rack (Full Cage)
A power rack consists of four vertical uprights connected by horizontal crossmembers, creating a "cage." This is the gold standard for safety and versatility.
- Top 2026 Model: Rep Fitness PR-1100 Home Gym Power Rack.
- Specs: 14-gauge 2x2-inch steel, 1,000 lb weight capacity, 48" x 50" footprint.
- Pricing: Starts around $299 (base model).
- Best For: Beginners lifting alone who need the safety of pin-pipe catchers, and those who want to mount dip bars, lat pulldown attachments, and landmines.
2. The Squat Rack (Half Rack)
Half racks typically feature two main front uprights with a rear stabilizing crossmember and weight storage horns. They offer a more open feel for Olympic lifting or dumbbell work while maintaining high safety.
- Top 2026 Model: Rogue HR-3500 Half Rack.
- Specs: 11-gauge 3x3-inch steel, 1,000+ lb capacity, Westside 1-inch hole spacing in the bench press zone.
- Pricing: Approximately $675.
- Best For: Intermediate lifters with a higher budget who want premium build quality, UHMW plastic-lined J-cups, and integrated weight storage.
3. The Squat Stand (Open Uprights)
Squat stands are two independent, freestanding uprights. They are the ultimate space-savers but come with significant safety trade-offs.
- Top 2026 Model: Titan T-2 Short Squat Stand.
- Specs: 14-gauge 2x2-inch steel, 71" height (ideal for low 8-foot ceilings), 11" base depth.
- Pricing: Around $299.
- Best For: Garage gyms with strict spatial constraints or low ceilings. Warning: Must be bolted to a concrete floor or heavily sandbagged to prevent tipping during pull-ups or heavy re-racking.
Head-to-Head Comparison Matrix
| Feature | Power Rack (PR-1100) | Half Rack (HR-3500) | Squat Stand (T-2) |
|---|---|---|---|
| Footprint | 48" x 50" | 49" x 53" | 23" x 11" (per stand) |
| Safety Catchers | Pin Pipes (Included) | Strap Safeties (Add-on) | Spotter Arms (Add-on) |
| Pull-Up Bar | Multi-grip (Included) | Straight (Included) | None (Add-on) |
| Floor Anchoring | Optional (Heavy enough) | Required for heavy use | Strictly Required |
Step-by-Step: Choosing and Setting Up Your Rig
- Measure Your Ceiling Height: Standard residential ceilings are 8 feet (96 inches). If you have an 8-foot ceiling, avoid standard 90-inch power racks. Opt for "Short" versions (like the 71" Titan T-2 or 82" Rep PR-1100) to ensure you can safely press barbells overhead without scraping the drywall.
- Plan for Dumbbell Clearance: If you plan to use adjustable dumbbells (like the popular 2026 Nuobell 80lb sets) inside the rack for bench pressing, ensure the interior width is at least 43 inches to avoid hitting the uprights during your descent.
- Invest in UHMW Plastic: When assembling your J-cups, ensure they feature UHMW (Ultra-High Molecular Weight) plastic liners. Bare steel J-cups will permanently scar your barbell's zinc or cerakote finish within a few sessions.
Beyond the Barbell: Good Exercises for Arms with Dumbbells
While your new rack will be the epicenter of your heavy squats and bench presses, the American Council on Exercise (ACE) emphasizes that dumbbell isolation is paramount for targeting the specific heads of the biceps and triceps that barbells miss. Here is a beginner-friendly, step-by-step arm protocol utilizing an adjustable bench set inside your rack.
1. Incline Dumbbell Curls (Biceps - Long Head)
By setting your adjustable bench to a 45-degree incline inside the power rack, you place the biceps in a stretched position behind the torso, triggering stretch-mediated hypertrophy.
- Execution: Let your arms hang completely straight. Curl the dumbbells up while keeping your elbows pinned back. Do not swing.
- Prescription: 3 sets of 10-12 reps. Use a 3-second eccentric (lowering) phase.
2. Cross-Body Hammer Curls (Brachialis & Forearms)
Standing just outside the squat rack, hold the dumbbells with a neutral grip (palms facing your body).
- Execution: Curl the dumbbell across your torso toward the opposite shoulder. This targets the brachialis, a muscle that sits under the biceps and pushes them up, creating the illusion of thicker arms.
- Prescription: 3 sets of 8-10 reps per arm.
3. Overhead Dumbbell Tricep Extension (Triceps - Long Head)
The triceps make up two-thirds of your arm mass. The long head only fully activates when the arm is raised overhead.
- Execution: Sit on your bench (back support set to 90 degrees). Hold a single heavy dumbbell with both hands overhead. Lower it behind your neck until you feel a deep stretch in the tricep, then press back up.
- Prescription: 4 sets of 12-15 reps. Keep the movement strict to avoid lower back arching.
Real-World Edge Cases & Failure Modes
When reviewing equipment for Garage Gym Reviews and testing setups in our own 2026 fitgearpulse lab, we consistently see beginners make three critical errors:
- The "Spotter Arm" Tipping Hazard: If you buy squat stands and attach spotter arms for bench pressing, the center of gravity shifts forward. If you fail a rep and dump the barbell forward onto the spotter arms, unanchored stands will flip forward onto your chest. Solution: Always bolt squat stands to concrete when using spotter arms.
- Hole Spacing Frustrations: Cheaper racks use standard 2-inch hole spacing throughout. This makes it incredibly difficult to set up J-cups for bench pressing, as the bar might be too high (risking shoulder impingement) or too low. Look for racks with "Westside" 1-inch spacing in the bench zone.
- Adjustable Dumbbell Fragility: Dropping adjustable dumbbells (like PowerBlocks or Bowflexts) on the metal base plates of a power rack will shatter their internal selector mechanisms. Always use rubber drop pads or a dedicated dumbbell bench when performing heavy arm isolation work near the rack.
Final Verdict
If you have the space (at least 4x4 feet) and a standard ceiling, a Power Rack is the undisputed champion for beginner safety and long-term versatility. If you are relegated to a low-ceiling basement or a shared garage, a Squat Stand paired with a foldable bench will get the job done, provided you respect the anchoring requirements. Finally, never neglect the smaller muscle groups; integrating good exercises for arms with dumbbells into your weekly routine ensures balanced, aesthetic, and injury-free upper-body development.
More gear to consider
All reviews
2026 Trends: Beyond the Decathlon Dumbbell to Competition Kettlebells

Cast Iron vs Competition Kettlebells & Dumbbell Exercises for Butt
Standing Dumbbell Kickbacks: Power Rack vs Squat Rack vs Stand

Barbell Collar Setup: Clamp Types for Your Dumbbell Full Arm Workout

Half Kneeling Single Arm Dumbbell Press: Urethane vs Rubber Hex Trends
