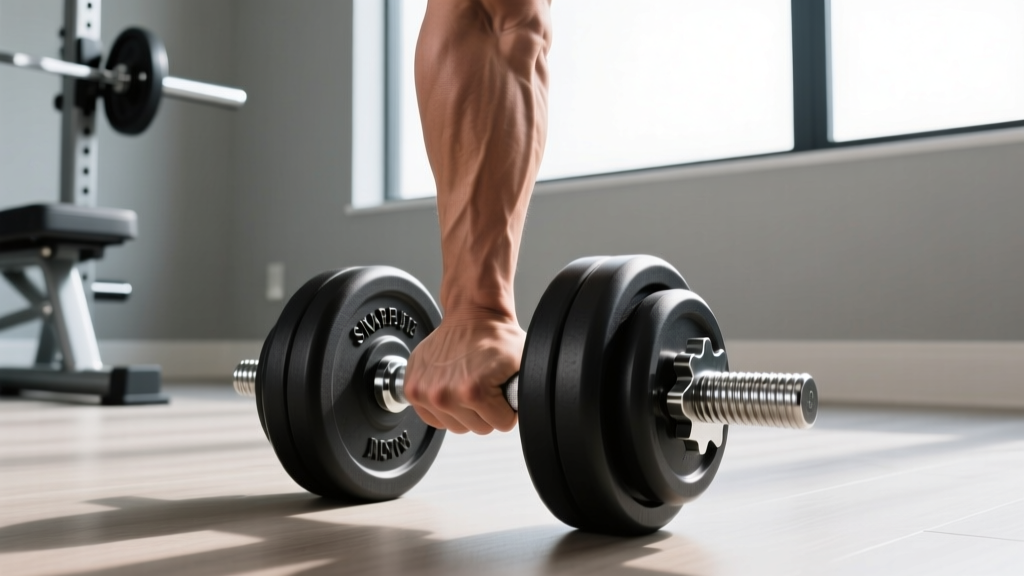
Olympic vs Standard Setup & 15 Minute Upper Body Dumbbell Workout
Master your home gym with our Olympic vs standard weight plate setup guide, plus a 15 minute upper body dumbbell workout to test your new gear.

Building a comprehensive home gym in 2026 often means bridging the gap between your beginner equipment and your advanced lifting gear. If you have a collection of legacy 1-inch standard plates and recently invested in a commercial-grade Olympic barbell system, figuring out how to safely store, rack, and integrate both into a single footprint is a common logistical hurdle. According to the U.S. Consumer Product Safety Commission (CPSC), improper equipment storage and racking are leading causes of home gym injuries, making a proper installation walkthrough critical.
This guide will walk you through the exact structural setup for a hybrid plate tree, the hardware required for concrete anchoring, and how to integrate your adjustable dumbbell station. Finally, we will break in your newly optimized lifting zone with a highly effective 15 minute upper body dumbbell workout designed to test your spatial flow and equipment accessibility.
The Arbor Divide: Understanding 50.8mm vs. 25.4mm
Before unboxing your storage rack, you must understand the biomechanical and dimensional differences between Olympic and standard weight plates. The primary distinction lies in the center hole diameter, which dictates the sleeve size of the barbell and the loading horn (arbor) of your storage tree.
Olympic Plates (2-Inch / 50.8mm)
Olympic plates are the gold standard for serious lifters. The 2-inch center hole accommodates heavy-duty barbell sleeves designed to handle loads exceeding 800 lbs without bending. Modern Olympic plates—whether cast iron, crumb rubber, or urethane—are calibrated to a strict 450mm outer diameter for bumper plates, ensuring consistent starting heights for deadlifts and Olympic lifts. In 2026, high-quality urethane Olympic plates average between $2.50 and $4.00 per pound.
Standard Plates (1-Inch / 25.4mm)
Standard plates feature a 1-inch center hole and are typically found in budget-friendly, entry-level home gym sets. While perfectly adequate for light-to-moderate lifting, standard barbells max out around 250–300 lbs of total loaded weight simply because the 1-inch sleeves run out of physical space. Standard plates are also notoriously inconsistent in outer diameter; a 45-lb standard plate might be significantly smaller than a 45-lb Olympic bumper, altering your pulling mechanics.
⚠️ Critical Safety Warning: Never use 2-inch to 1-inch sleeve adapters for heavy compound lifts like the bench press or squat. These adapters introduce lateral play and micro-movements that can cause catastrophic imbalance during a failed rep. Keep your standard and Olympic ecosystems strictly separated on your storage tree.Complete Installation Walkthrough: Hybrid Plate Tree Setup
To store both plate types safely, you need a dual-tier weight tree or a modular power rack with integrated storage saddles. For this walkthrough, we are installing a freestanding, heavy-duty steel plate tree (such as the Titan Fitness 6-Horn Olympic/Standard Hybrid Tree) onto a standard concrete garage floor.
Tools and Hardware Required
- Rotary hammer drill with a 1/2-inch masonry bit
- 17mm and 19mm sockets with a 3/8-inch drive torque wrench
- Four 3/8-inch x 3-inch wedge anchors (e.g., Red Head or Hilti)
- Shop vacuum for concrete dust extraction
- High-density rubber matting (minimum 8mm thickness)
Step-by-Step Anchoring Process
- Positioning and Clearance: Place the tree on your 8mm rubber matting. Ensure you have a minimum of 24 inches of clearance on all sides to allow for safe plate loading and unloading without striking nearby walls or equipment.
- Drilling the Pilot Holes: Mark the four base flange holes. Use your rotary hammer to drill 1/2-inch holes exactly 3.5 inches deep. This provides a half-inch of clearance at the bottom of the hole for concrete dust and ensures the anchor expands fully.
- Cleaning the Holes: Use a shop vacuum to remove all silica dust from the holes. Pro Tip: If dust remains, the wedge anchor will not grip the concrete properly, reducing pull-out strength by up to 40%.
- Setting the Anchors: Insert the 3/8-inch wedge anchors through the tree flange and into the concrete. Hand-tighten the nuts to pull the anchor sleeve into the hole.
- Torquing to Spec: Using your torque wrench, tighten each nut to exactly 60 ft-lbs. This specific torque ensures the wedge expands against the concrete walls without shearing the bolt threads.
Spec Comparison Matrix: Olympic vs. Standard Ecosystems
| Feature | Olympic System | Standard System |
|---|---|---|
| Arbor / Hole Size | 2 inches (50.8mm) | 1 inch (25.4mm) |
| Max Barbell Load | 800 - 1,500+ lbs | 200 - 300 lbs |
| Plate Diameter Consistency | Strict 450mm (Bumpers) | Highly Variable |
| Average Cost per Pound (2026) | $1.50 (Iron) - $4.00 (Urethane) | $0.80 - $1.20 |
Integrating the Dumbbell Station
A complete setup isn't just about barbell plates; it requires seamless integration of your dumbbell ecosystem. If you are using adjustable dumbbells like the Nuobell 80lb system (retailing around $429 in 2026) or PowerBlock Elites, your storage tray height is critical.
Mount your dumbbell tray or saddle at exactly 16 to 18 inches from the floor. This specific height aligns with the natural hinge of the hips, allowing you to pick up and dock heavy adjustable dumbbells without placing excessive shear force on your lumbar spine. Ensure the tray is mounted to the vertical uprights of your rack using grade-8 hardware, as adjustable dumbbells exert immense point-load stress on the mounting brackets when dropped into the cradle.
The Break-In Test: 15 Minute Upper Body Dumbbell Workout
Now that your hybrid tree is bolted down and your dumbbell station is ergonomically calibrated, it is time to test the spatial flow of your gym. The American Council on Exercise (ACE Fitness) notes that EMOM (Every Minute on the Minute) protocols are highly effective for testing equipment transitions while maintaining cardiovascular demand.
This 15 minute upper body dumbbell workout is designed to force you to interact with your rack, bench, and dumbbell tray from multiple angles, ensuring your installation holds up to dynamic, real-world fatigue.
The 15-Minute EMOM Protocol
Set a timer for 15 minutes. At the start of every minute, perform the prescribed repetitions. Rest for the remainder of the minute. The goal is to complete the reps with perfect form, re-rack the weights safely on your newly installed tray, and recover before the next minute begins.
- Minute 1: Heavy Dumbbell Floor Press
Reps: 10-12
Execution: Lie on the floor directly in front of your plate tree. Press the dumbbells up, focusing on a deep stretch at the bottom. The floor limits your range of motion, protecting the shoulders while overloading the triceps and chest. Re-rack on the floor gently to test your matting. - Minute 2: Chest-Supported Dumbbell Row
Reps: 12 per arm
Execution: Set an adjustable bench to a 30-degree incline. Brace your chest against the pad and pull the dumbbells toward your hip pockets. This eliminates momentum and isolates the lats and rhomboids. - Minute 3: Seated Arnold Press
Reps: 10-12
Execution: Sit on a 90-degree bench. Start with palms facing you, press up while rotating the wrists so palms face forward at the top. This targets all three heads of the deltoid and tests the stability of your bench setup. - Minute 4: Dumbbell Lateral Raise to Front Raise Complex
Reps: 8 lateral raises + 8 front raises (no rest between movements)
Execution: Use a lighter pair of dumbbells. Perform strict lateral raises, then immediately transition to front raises. This burns out the medial and anterior deltoids, testing your grip endurance and tray docking precision when fatigued. - Minute 5: Active Recovery & Equipment Reset
Action: Do not lift. Use this minute to wipe down the dumbbells, inspect the wedge anchors on your plate tree for any signs of shifting, and organize your collars. Mobility work, such as thoracic spine extensions over a foam roller, is highly recommended here.
Repeat this 5-minute circuit three times to complete the full 15 minutes.
Final Thoughts on Gym Spatial Planning
Transitioning from a standard plate setup to a hybrid Olympic ecosystem is a major milestone in any home gym's evolution. By respecting the dimensional differences, using proper masonry anchors for your storage trees, and optimizing your dumbbell tray heights, you create a training environment that is both safe and highly efficient. Use the 15 minute upper body dumbbell workout provided above not just as a training stimulus, but as a functional audit of your new setup. For further reading on structural anchoring and load-bearing specifications for heavy fitness equipment, consult the Simpson Strong-Tie connector guides to ensure your concrete slab can handle the dynamic forces of heavy dropping and racking.
More gear to consider
All reviews
Cast vs Competition Kettlebells for Your Dumbbell Training Schema

EZ vs Straight Bar: Budgeting a Good Chest Workout with Dumbbells

Olympic Barbell Guide: Weight, Knurling & the Dumbbell Hang Snatch

Olympic vs Standard Plates: Setup for Dumbbell Man Makers
Space-Saving Kettlebell Guide & Arm Exercises at Home with Dumbbells