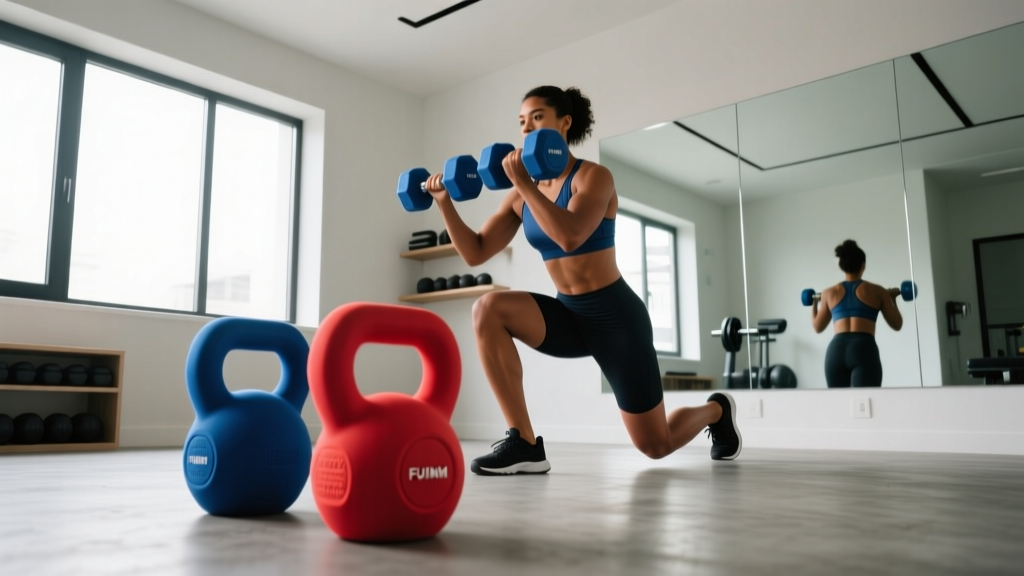
Home Gym Setup: Using Neoprene Dumbbells for Legs Effectively
Master your home gym setup with our complete walkthrough for organizing and training with neoprene dumbbells for legs. Includes space planning and routines.

The Complete Walkthrough: Setting Up Your Home Gym for Lower Body Training
Building a dedicated lower-body training zone in a home gym requires more than just buying weights; it demands strategic spatial planning, proper flooring installation, and an understanding of equipment biomechanics. When selecting the best dumbbells for legs, many home gym owners gravitate toward neoprene coated dumbbells for home use. They offer vibrant color-coding, a hexagonal anti-roll design, and a softer exterior that protects home floors. However, training legs involves heavy loads, high sweat volumes, and dynamic movements that can expose the limitations of synthetic rubber coatings if your space isn't set up correctly.
This comprehensive installation and setup walkthrough will guide you through preparing your physical space, mounting your storage racks, and executing a biomechanically sound leg routine using neoprene dumbbells.
Phase 1: Spatial Planning and Flooring Installation
Leg training with dumbbells—specifically movements like Dumbbell Romanian Deadlifts (RDLs) and walking lunges—requires a minimum clearance zone of 8 feet by 6 feet. Before unboxing your weights, you must prepare the subfloor. While neoprene is softer than cast iron, a pair of 50 lb dumbbells dropped from waist height generates enough kinetic energy to crack standard residential tiles or dent engineered hardwood.
Step-by-Step Flooring Installation
- Clear and Clean: Remove all baseboards and vacuum the bare subfloor to ensure no debris creates pressure points under the mats.
- Lay the Vapor Barrier: If installing over concrete (like a garage or basement), lay down a 6-mil polyethylene vapor barrier to prevent moisture from degrading the rubber mats over time.
- Install Vulcanized Rubber Mats: Use 3/4-inch thick vulcanized rubber horse stall mats (typically measuring 4x6 feet). In the 2026 market, these cost between $55 and $70 per mat from agricultural suppliers. Avoid cheap interlocking EVA foam tiles; they compress entirely under heavy unilateral leg loads, destroying your balance during Bulgarian split squats.
- Seal the Seams: Use heavy-duty double-sided carpet tape or mat connecting pins to lock the rubber mats together, preventing them from sliding apart when you drag your feet during lateral lunges.
Phase 2: Rack Installation and Weight Distribution
Neoprene hex dumbbells are dense and compact, but storing them improperly can lead to wall damage or rack failure. A standard 5-tier wall-mounted rack holding a full set (5 lb to 50 lb pairs) will bear over 1,600 lbs of dead weight.
Mounting Your Storage Solution
- Locate the Studs: Never use drywall anchors for a loaded dumbbell rack. Use a magnetic stud finder to locate the wooden or metal studs (typically spaced 16 inches on center).
- Install Heavy-Duty Toggle Bolts or Lag Screws: If mounting into wood studs, use 3/8-inch x 3-inch structural lag screws. For metal studs or concrete block walls, use appropriately rated toggle bolts or masonry anchors.
- Load Distribution: Always load the heaviest dumbbells (35-50 lbs) on the bottom tier to lower the center of gravity and prevent the rack from pulling away from the wall. Place lighter neoprene pairs (5-15 lbs) on the top tiers.
Phase 3: Material Science and the 'Neoprene Grip' Challenge
Before initiating your leg workout, it is critical to understand the material properties of neoprene compared to other coatings. Neoprene is a synthetic polychloroprene rubber that excels at impact absorption and color retention, but it reacts poorly to moisture and friction.
| Material | Floor Protection | Sweat Resistance | Cost per lb (2026) |
|---|---|---|---|
| Neoprene | Excellent | Poor (Becomes slippery) | $1.80 - $2.20 |
| Urethane | Good | Excellent | $3.50 - $4.50 |
| Bare Cast Iron | Poor | Moderate (Rusts) | $1.20 - $1.60 |
Phase 4: The Leg Training Walkthrough
With the flooring secured, the rack mounted, and your grip strategy established, you can now execute your lower body routine. Research highlighted by Harvard Health emphasizes that resistance training is crucial for maintaining muscle mass and metabolic health, and dumbbells offer a superior range of motion compared to fixed machines.
1. The Goblet Squat (Quad & Glute Focus)
- Setup: Stand with feet shoulder-width apart, toes pointed slightly outward (15-30 degrees). Hold a single heavy neoprene dumbbell (35-50 lbs) vertically against your chest, cupping the top head.
- Execution: Brace your core and descend until your elbows brush the inside of your knees. The hex shape of the neoprene dumbbell prevents it from rolling against your sternum.
- Volume: 3 sets of 12-15 repetitions.
2. Dumbbell Romanian Deadlift (Hamstring & Posterior Chain)
- Setup: Grab a pair of heavy neoprene dumbbells. Use lifting straps if the weight exceeds 40 lbs per hand to mitigate the neoprene slip factor. Stand tall with the weights resting against your thighs.
- Execution: Push your hips backward as if closing a car door with your glutes. Keep a slight bend in the knees. Lower the dumbbells along your shins until you feel a deep stretch in the hamstrings, then drive the hips forward to return to the start.
- Volume: 4 sets of 8-10 repetitions.
3. Bulgarian Split Squat (Unilateral Stability)
- Setup: Position a standard 16-to-18-inch flat bench behind you. Hold a lighter pair of neoprene dumbbells (15-25 lbs) at your sides.
- Execution: Elevate your rear foot on the bench. Descend with your front leg until your thigh is parallel to the floor. The softer neoprene coating ensures that if you accidentally drop the weights at the end of a grueling set, you won't damage your 3/4-inch rubber flooring or the equipment.
- Volume: 3 sets of 8-12 repetitions per leg.
Phase 5: Post-Workout Maintenance and Storage
Neoprene is highly susceptible to degradation from harsh chemicals and UV light. To ensure your dumbbells maintain their structural integrity and grip texture for years, follow this strict maintenance protocol:
- Wipe Down: After your leg session, wipe the handles with a damp cloth and a mild dish soap solution. Never use bleach, alcohol, or abrasive gym wipes, as these dry out the synthetic rubber, causing it to flake and peel.
- Dry Completely: Moisture trapped between the dumbbell heads and the rack can lead to rust on the internal steel core, which eventually bleeds through the neoprene coating.
- UV Protection: Ensure your home gym setup is not in direct, unfiltered sunlight. Prolonged UV exposure breaks down the chemical bonds in polychloroprene, leading to fading and a chalky, degraded surface.
"A well-planned home gym isn't just about the equipment you buy; it's about how that equipment interacts with your physical space and your biomechanics. Treating your flooring, rack installation, and material maintenance with the same respect as your training program is the hallmark of a serious lifter."
By meticulously setting up your space and understanding the unique physical properties of neoprene coated dumbbells, you create a safe, efficient, and highly effective environment for building lower body strength right at home.
More gear to consider
All reviews
Cast Iron vs Competition Kettlebell Care & Lat Pull Down with Dumbbells

Power Rack vs Squat Rack vs Stand for 120 Pound Dumbbells & Barbells
Olympic vs Standard Plates: Plus, What Weight Dumbbells Should I Use?
Triceps Kickbacks with Dumbbells: 2026 Neoprene Picks Compared

Wrist Dumbbell Exercises and Barbell Collar Clamp Troubleshooting
