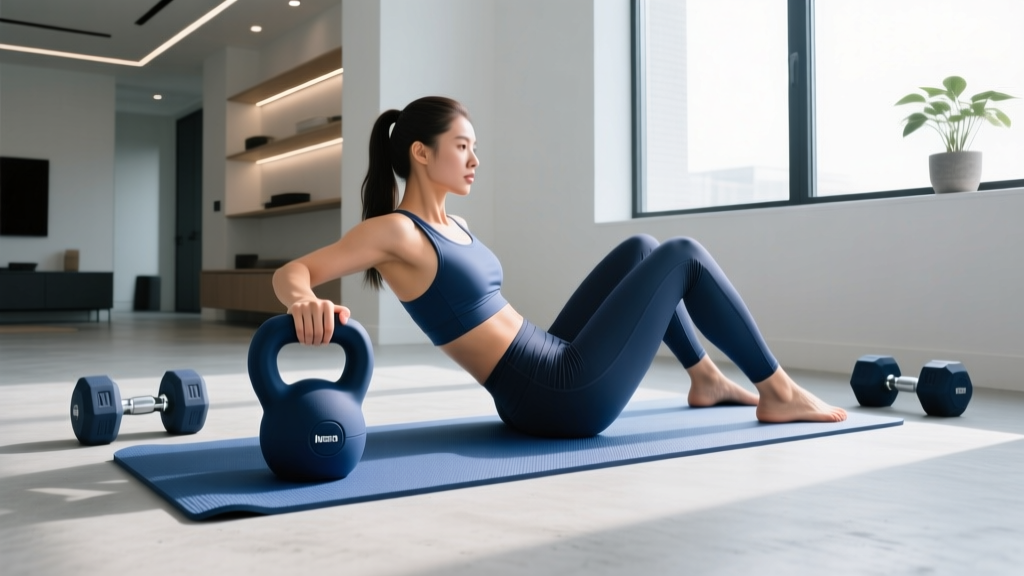
Master Side Crunches With Dumbbell: Neoprene Home Gym Setup
Learn how to set up your home gym for side crunches with dumbbell exercises using neoprene weights. Includes mat installation, storage, and form tips.

The Complete Home Gym Setup for Oblique Training
Building a dedicated core training zone in your home gym requires more than just throwing a mat on the floor. When targeting the obliques through lateral flexion, the equipment you choose and how you install your space directly impacts your biomechanics and safety. Specifically, mastering side crunches with dumbbell resistance demands a precise setup. Neoprene-coated dumbbells are the undisputed champion for home use in this context, offering floor protection, sweat-resistant grip, and acoustic dampening. However, simply buying them isn't enough. This walkthrough covers the complete spatial installation, equipment selection, and biomechanical setup required to execute this movement flawlessly in a home environment.
Phase 1: Hardware Selection & Edge Cases
Not all neoprene dumbbells are created equal, and choosing the wrong variant will actively sabotage your side crunch setup. Neoprene (polychloroprene) provides a tactile, slightly porous grip that is ideal for high-repetition core work, but the shape of the dumbbell head is the critical variable.
CRITICAL SETUP WARNING: Hex vs. Round NeopreneYou must exclusively purchase Hexagonal neoprene dumbbells (e.g., CAP Barbell Neoprene Hex or Yes4All Hex) for lateral core work. Round neoprene dumbbells (like the standard Amazon Basics line) will roll unpredictably when placed on the floor next to your mat during rest periods, or worse, roll against your thigh during the eccentric phase of the side crunch, causing balance loss and potential lumbar strain.
Weight Selection & Pricing (2026 Market Data)
The obliques are heavily composed of Type I (slow-twitch) muscle fibers, designed for postural endurance rather than explosive power. Therefore, your installation should prioritize moderate weights for high-volume sets (15-25 reps). As of 2026, high-quality cast-iron core neoprene hex dumbbells average between $1.80 and $2.50 per pound. For a complete home oblique station, install a rack holding pairs of 10 lb, 15 lb, and 20 lb dumbbells. This 90 lb total set will cost approximately $160 to $225 and will cover 95% of home users' lateral flexion needs.
Phase 2: Spatial Installation & Floor Matting
Performing side crunches with dumbbell weight places your spine in lateral flexion. If your floor setup is too rigid, the greater trochanter (the bony prominence of your hip) will bruise, and your spine will lack the necessary shock absorption. If the floor is too soft, you will lose the kinetic stability required to drive the concentric contraction.
Mat Installation Walkthrough
- Measure the Zone: Clear a 4x6 foot rectangular space. This allows for full lateral extension without striking surrounding equipment.
- Select the Material: Avoid thin PVC yoga mats. You need high-density NBR (Nitrile Butadiene Rubber) or 3/4-inch EVA foam.
- Seam Taping: If using interlocking EVA tiles, apply double-sided carpet tape to the underside of every seam. During the setup phase of a side crunch, your feet may drag laterally; untaped seams will separate, creating a severe tripping hazard.
| Mat Material | Density / Thickness | Suitability for Side Crunches | Estimated Cost (4x6) |
|---|---|---|---|
| High-Density NBR | 1/2 inch (12mm) | Excellent (Ideal hip cushioning) | $35 - $50 |
| EVA Foam Tiles | 3/4 inch (19mm) | Good (Requires seam taping) | $60 - $80 |
| Horse Stall Rubber | 3/4 inch (19mm) | Poor (Too rigid for lateral hip contact) | $40 - $60 |
Phase 3: Storage & UV Degradation Prevention
A common failure mode in home gyms is the degradation of neoprene coatings. Neoprene is highly susceptible to UV and ozone breakdown. If you install your dumbbell rack next to a sun-facing window, the UV rays will cause the neoprene to oxidize, turning it sticky, brittle, and prone to peeling within 12 to 18 months.
Installation Rule: Mount your 3-tier A-frame dumbbell rack or wall-mounted shelf in an interior, climate-controlled zone away from direct sunlight. If utilizing a wall-mounted wooden shelf to save floor space, ensure you are driving 3-inch lag screws directly into 16-inch on-center wall studs. Neoprene dumbbells are incredibly dense; a standard drywall toggle bolt will eventually pull through the gypsum under the sustained static load of a 100+ lb dumbbell collection.
Phase 4: Biomechanical Setup & Execution
With the physical space and hardware installed, we must address the biomechanical setup. According to research on core stabilization published by Harvard Health, effective core training requires maintaining a neutral spine while challenging the torso's resistance to movement. The side crunch (lateral flexion) isolates the internal and external obliques, but poor setup leads to lumbar compression.
The 'Wall-Anchor' Setup Technique
Most home gym users perform side crunches with their feet together, which creates a narrow base of support. As you fatigue, your hips will sway backward, shifting the load from the obliques to the erector spinae (lower back). To fix this, use the Wall-Anchor setup:
- Step 1: Position your NBR mat perpendicular to a solid wall or the upright of your power rack.
- Step 2: Stand sideways, pressing the heel and edge of your bottom foot firmly against the wall or rack base. This creates an immovable physical barrier.
- Step 3: Stagger your top foot slightly in front of you for anterior-posterior balance.
- Step 4: Grasp your hex neoprene dumbbell in your top hand, letting it hang dead-center down your thigh. The hex shape ensures it rests flush against your leg without rolling.
- Step 5: Initiate the movement by sliding the dumbbell down the side of your leg toward your knee, crunching the ribcage toward the pelvis. As noted by the Cleveland Clinic, the focus must be on shortening the distance between the ribs and hips, not just leaning sideways.
Neoprene is excellent for dry hands, but once you begin sweating during high-rep core circuits, the synthetic rubber can become surprisingly slick. Keep a block of magnesium carbonate gym chalk or a liquid chalk dispenser at your mat station. A single coat on your palms will bind with the porous neoprene texture, ensuring the dumbbell doesn't slip and strike your knee during the eccentric lowering phase.
Troubleshooting Common Setup Failures
1. Lower Back Pinching
Diagnosis: You are leaning backward into extension rather than purely lateral flexion. Fix: Check your spatial alignment. Ensure your ears, shoulders, and hips are in a single vertical plane against an imaginary wall. Reduce the dumbbell weight by 5 lbs until the motor pattern is corrected.
2. Neck Strain
Diagnosis: You are jutting your chin forward to initiate the crunch, straining the sternocleidomastoid. Fix: Maintain a 'double-chin' posture. Imagine holding a tennis ball between your chin and collarbone throughout the entire range of motion.
3. Dumbbell Swinging
Diagnosis: Using momentum from the shoulder joint rather than contracting the obliques. Fix: Implement a 2-second isometric pause at the bottom of the movement (when the dumbbell is near the knee). The hex edges of the neoprene dumbbell will make it easy to safely 'park' the weight on your thigh for a second if grip fatigue sets in before the set is over.
Final Thoughts on Your Core Station
Installing a dedicated space for lateral core work elevates a home gym from a basic lifting space to a comprehensive athletic facility. By intentionally selecting hex-shaped neoprene dumbbells, properly taping high-density mat seams, and utilizing the wall-anchor biomechanical setup, you ensure that every repetition of side crunches with dumbbell resistance is safe, effective, and entirely focused on oblique development. Take the time to install your space correctly, and your core stability will translate directly to heavier compound lifts and injury-free training.
More gear to consider
All reviews
Single Arm Dumbbell Overhead Press & Barbell Knurling

Olympic vs Standard Plates: Sizing for the Supine Dumbbell Curl

EZ Curl Bar vs Straight Bar & How to Work Chest with Dumbbells

Barbell Clamps Compared: Upper Arm Dumbbell Exercises & Safety
Power Rack vs Squat Stand: Setup for Dumbbell Workout Squats
