Complete Home Gym Setup for Dumbbell Leg Exercises
Master lower-body workouts with our complete home gym setup guide for neoprene dumbbell leg exercises, covering spatial planning, flooring, and loading.

The Architecture of a Lower-Body Home Gym
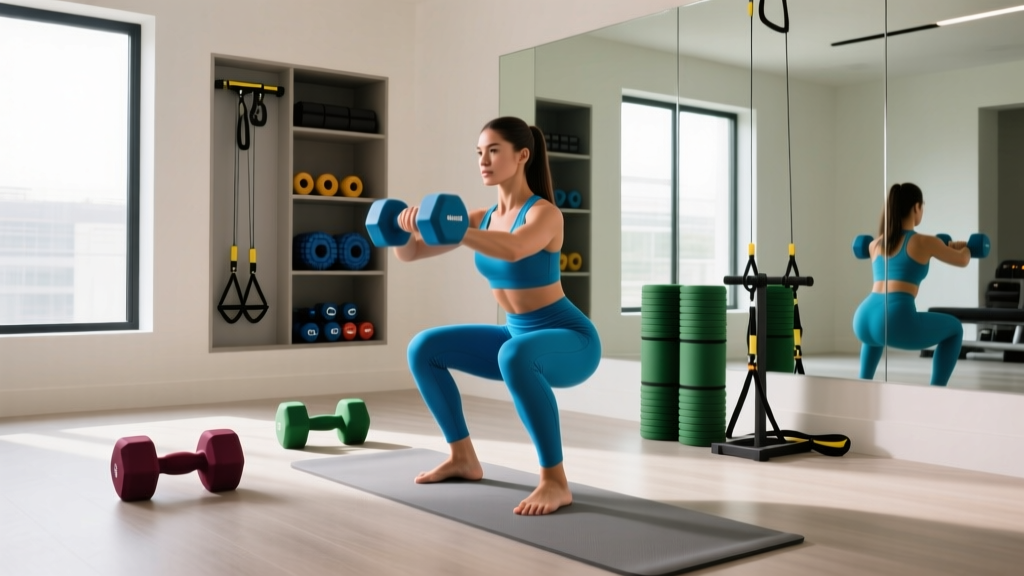
When building a home gym, most enthusiasts focus heavily on upper-body equipment or power racks. However, executing effective dumbbell leg exercises requires a highly specific environmental and biomechanical setup. Unlike machines that lock you into a fixed path, free-weight lower-body training demands precise spatial geometry, impact-resistant flooring, and incremental loading strategies. For home environments, neoprene-coated dumbbells have emerged as the gold standard due to their secure grip, floor-friendly exterior, and aesthetic appeal. This complete setup and installation walkthrough will guide you through preparing your space, selecting the right neoprene gear, and calibrating your biomechanics for optimal leg day execution in 2026.
Setup Callout: Why Neoprene?Neoprene is a synthetic rubber that provides a slightly tacky, sweat-resistant grip. Unlike bare cast iron, it protects your floors from minor scuffs. However, it is softer than urethane, meaning your 'installation' must include proper drop-matting to prevent the coating from tearing upon heavy impact.
Phase 1: Environmental Installation and Spatial Mapping
You cannot safely perform heavy walking lunges or goblet squats on standard household carpet or hardwood. The lateral forces and potential for dropping weights require a dedicated 'installation' of your training zone.
Flooring Specifications
For a dedicated dumbbell leg zone, you must install 3/4-inch (19mm) thick vulcanized rubber mats. Standard EVA foam puzzle mats will compress unevenly under the load of a heavy lunge, compromising your knee stability. Vulcanized rubber (often sold as horse stall mats from agricultural suppliers or premium home gym brands like Mats Inc.) provides the necessary density. Expect to pay between $2.50 and $4.00 per square foot in the current 2026 market.
Calculating Your Lunge Footprint
Lower body movements require a larger spatial envelope than upper body work. To properly set up your room:
- Width: Minimum 6 feet to allow for lateral lunges and wide-stance sumo squats without wall clearance issues.
- Length: Minimum 8 to 10 feet for walking lunges. If your room is shorter, you must 'install' a turnaround protocol or rely exclusively on stationary split squats and reverse lunges.
- Ceiling Height: Ensure at least 8 feet of clearance if you plan to perform dumbbell jump squats or high-pull variations.
Phase 2: Sizing Your Neoprene Dumbbell Arsenal
The legs are the largest muscle group in the body, meaning your neoprene dumbbell set must skew significantly heavier than what you would use for pressing or curling. Most neoprene dumbbells (from brands like Yes4All, CAP Barbell, and Amazon Basics) feature a hexagonal head to prevent rolling—a critical safety feature for home setups where pets or children may be present.
Current 2026 pricing for high-quality neoprene dumbbells averages $1.80 to $2.20 per pound. Because leg exercises require rapid load progression, we recommend a specific 'installation' of weight pairs rather than buying a massive, expensive rack of every increment.
| Dumbbell Pair Weight | Primary Leg Exercise Application | Estimated Cost (per pair) | Handle Diameter |
|---|---|---|---|
| 15 lbs (Each) | Warm-ups, Lateral Lunges, Calf Raises | $55 - $65 | 32mm |
| 25 lbs (Each) | Goblet Squats, RDLs (Beginner) | $90 - $110 | 34mm |
| 35 lbs (Each) | Bulgarian Split Squats, Step-Ups | $125 - $155 | 35mm |
| 50 lbs (Each) | Heavy RDLs, Deficit Reverse Lunges | $180 - $220 | 38mm (Thicker grip) |
Note: The handle diameter increases on heavier neoprene dumbbells to support the larger cast-iron core. This thicker grip will tax your forearms during heavy Romanian Deadlifts (RDLs), making lifting straps a necessary secondary installation for your gear kit.
Phase 3: Biomechanical Setup and Movement Calibration
Installing the equipment is only half the battle; you must also 'install' proper movement patterns. According to the National Strength and Conditioning Association (NSCA), proper joint alignment and stance width are the primary drivers of hypertrophy and injury prevention in free-weight leg training. Here is how to calibrate your setup for the two most critical neoprene dumbbell leg exercises.
1. The Bulgarian Split Squat Stance Setup
This unilateral movement is the cornerstone of home leg training, as it requires less overall weight to achieve muscular failure compared to bilateral squats.
- Bench Installation: Use a bench or sturdy surface that is exactly 16 to 18 inches high. Standard gym benches are often 17 inches. Anything higher will force excessive hip flexion and strain the rectus femoris.
- Foot Placement: Stand 2 to 3 feet in front of the bench. Place the top of your rear foot on the bench, laces down.
- Dumbbell Positioning: Hold your neoprene dumbbells at your sides in a suitcase grip. The hexagonal shape of the dumbbells allows them to rest flush against your outer thighs without rolling into your IT band.
- Descent Calibration: Lower your hips straight down until your front thigh is parallel to the floor. Your front shin should remain relatively vertical to minimize shear force on the knee.
2. Dumbbell Romanian Deadlift (RDL) Hinge Mechanics
The RDL targets the posterior chain (hamstrings and glutes). As detailed in ExRx.net's biomechanical breakdown of lower-body free-weight movements, the hip hinge requires a specific spatial setup to prevent lumbar rounding.
- Stance Width: Hip-width apart, toes pointing dead ahead or slightly outward (max 10 degrees).
- The 'Soft Knee' Lock: Unlock your knees to about 15 degrees of flexion and lock them in that position. Do not allow the knees to bend further as you descend.
- Dumbbell Path: The neoprene coating provides excellent friction against your clothing. Keep the dumbbells literally dragging against your quads and shins throughout the entire range of motion. If the weights drift forward by even two inches, the moment arm on your lower back increases exponentially.
Expert Troubleshooting: If you feel your RDLs primarily in your lower back rather than your hamstrings, your spatial setup is flawed. You are likely squatting the weight down rather than hinging. Install a tactile cue: place a foam roller or a spare dumbbell about 12 inches behind your heels to force your hips to travel backward to maintain balance.
Phase 4: Storage Installation and Neoprene Care
Neoprene is highly durable but susceptible to specific environmental failure modes. Improper storage can lead to delamination, where the synthetic rubber coating peels away from the cast iron core.
Shelving and Rack Setup
Do not store heavy neoprene dumbbells on wire shelving; the thin metal wires will slice into the soft coating over time, creating permanent indentations and eventual tears. Install a solid wood or steel A-frame dumbbell rack with flat, padded tiers. For a home gym, a 3-tier horizontal rack is ideal, keeping the heaviest 50 lb pairs on the bottom tier to maintain a low center of gravity and prevent tipping hazards.
Environmental Degradation Prevention
To maximize the lifespan of your neoprene investment, follow these maintenance protocols:
- UV Protection: Never store neoprene dumbbells in direct sunlight or in a garage with an uninsulated, sun-facing window. UV radiation breaks down the chemical bonds in synthetic rubber, causing it to become brittle and flake.
- Sweat and pH Management: Human sweat is slightly acidic. Wipe down the handles and hex heads with a damp microfiber cloth and a mild, pH-neutral soap solution after heavy leg days. Avoid bleach or ammonia-based cleaners, which will instantly dry out and crack the neoprene.
- Temperature Control: While neoprene handles temperature fluctuations better than solid rubber, extreme cold (below freezing in an unheated garage) can make the coating stiff and prone to cracking if dropped.
Final Thoughts on Your Lower-Body Setup
Building a dedicated space for dumbbell leg exercises using neoprene-coated weights is an investment in both safety and long-term consistency. By properly installing 3/4-inch rubber flooring, mapping out your spatial envelope for dynamic movements, and strictly adhering to biomechanical setup cues for split squats and RDLs, you can replicate—and in some cases exceed—the lower-body stimulus of a commercial gym. Treat your equipment and your environment with the same precision you apply to your rep schemes, and your home leg days will yield massive dividends.
More gear to consider
All reviews
Senior Dumbbell Storage & Seated Dumbbell Exercises for Seniors PDF Guide

Power Rack vs Squat Rack vs Stand & Dumbbell Workout Exercise Poster

Olympic vs Standard Plates: Chest and Arms Dumbbell Workout Setup
Loadable Dumbbell Care for Your Female Arm Workout With Dumbbells

Neoprene Dumbbells for Home Use: Buying Guide & Dumbbell Shoulder Press Angle