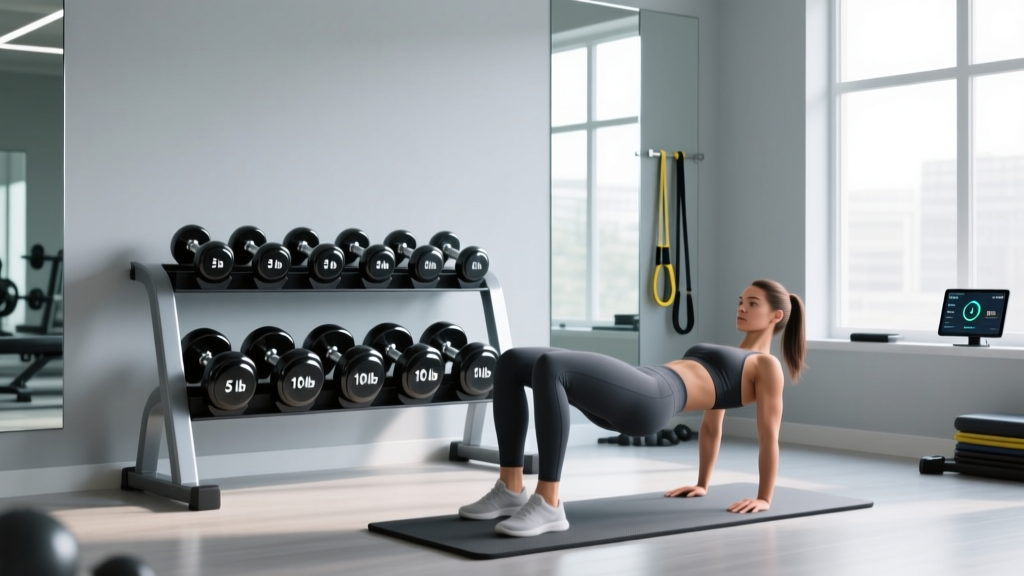
Space-Saving Dumbbell Racks to Elevate Your Dumbbell Glutes Workout
Optimize your home gym layout with the best dumbbell racks. Discover space-saving storage solutions designed for a seamless dumbbell glutes workout.

Executing a high-volume dumbbell glutes workout requires more than just discipline and a solid pair of shoes; it demands an optimized physical environment. When you are supersetting heavy Romanian Deadlifts (RDLs) with walking lunges, the last thing you need is to navigate a cluttered floor or wrestle with poorly stored weights. As urban home gym footprints continue to shrink in 2026, intelligent space optimization and strategic layout design have become critical for effective lower-body training.
In this guide, we break down the spatial requirements of glute-focused training, evaluate the best dumbbell storage solutions on the market, and provide a concrete layout framework to ensure your workouts are seamless, safe, and highly effective.
The Biomechanical Footprint of Glute Training
Unlike upper-body isolation movements that can be performed in a tight corner, a comprehensive dumbbell glutes workout demands significant floor space. According to the American Council on Exercise (ACE), multi-planar lower-body movements require unrestricted pathways to maintain proper joint alignment and muscle activation.
- Bulgarian Split Squats & Lunges: Require a minimum 4x8 foot linear pathway to accommodate stride length and knee tracking without hitting walls or equipment.
- Dumbbell Hip Thrusts: Require a 6x6 foot zone to accommodate a standard flat bench, the lifter's supine body position, and the lateral roll of dumbbells.
- Romanian Deadlifts (RDLs): Require a 5x5 foot zone, specifically demanding clear space behind the lifter to allow for proper hip hinge mechanics without the dumbbells striking a wall or rack.
The 'Pick-Up' Problem: Rack Placement for Heavy Hinges
The most overlooked aspect of home gym layout design is the 'pick-up problem.' When performing heavy dumbbell RDLs or sumo squats, you must lift the weights from the floor or a low rack tier into the starting position. If your dumbbell rack is placed directly in front of your workout zone, you will be forced to round your lumbar spine to retrieve 50lb or 70lb dumbbells from the bottom tier, risking a lower-back injury before your first rep even begins.
Expert Layout Tip: Always position your dumbbell rack parallel to your lifting zone or slightly behind your starting stance. This allows you to use a proper hip-hinge or squat pattern to retrieve heavy dumbbells from the bottom tier, turn 90 degrees, and immediately begin your set with a neutral spine.Storage Solutions Matrix: Footprint vs. Capacity
Choosing the right rack depends entirely on your available square footage and the weight range required for your glute progression. Below is a comparison of the primary storage configurations available in 2026.
| Rack Type | Footprint (L x W) | Max Capacity | Avg. Price (2026) | Glute Workout Suitability |
|---|---|---|---|---|
| 3-Tier Horizontal | 48" x 22" | ~1,200 lbs | $229 - $289 | Excellent (Easy bottom-tier access) |
| A-Frame | 30" x 24" | ~800 lbs | $165 - $195 | Good (Compact, but can obstruct hinges) |
| Vertical Tree | 24" x 24" | ~500 lbs | $120 - $150 | Poor (Awkward retrieval for heavy pairs) |
| Wall-Mounted | 48" x 8" (Wall space) | ~600 lbs | $130 - $180 | Great (Zero floor footprint) |
Top 3 Dumbbell Racks for Space-Constrained Gyms
Based on structural integrity, space efficiency, and real-world usability for lower-body training, here are the top storage solutions currently dominating the market.
1. REP Fitness 3-Tier Dumbbell Rack (Best Overall for Heavy Lifters)
The REP Fitness 3-Tier rack is the gold standard for home gyms focused on progressive overload. Measuring 48 inches wide, it comfortably holds 10 pairs of hex or urethane dumbbells (typically 5lb to 50lb). The angled tiers allow you to read the weight markings instantly, which is crucial when you are mid-superset and need to grab your 35lb pair for walking lunges without hesitation. Priced around $249 in 2026, its 11-gauge steel frame prevents the swaying often seen in cheaper alternatives.
2. Rogue A-Frame Dumbbell Rack (Best for Tight Corners)
If your home gym is relegated to a single-car garage or a spare bedroom corner, the Rogue A-Frame is an exceptional choice. With a footprint of just 30" x 24", it consumes minimal floor space while holding up to 10 pairs of dumbbells. However, as noted by Garage Gym Reviews, A-frames require strict loading discipline. You must load symmetrically (e.g., 40s on the left, 40s on the right) to prevent the rack from tipping—a critical safety consideration when you are fatigued at the end of a grueling hip-thrust session.
3. Titan Fitness Wall-Mounted Dumbbell Rack (Best Zero-Floor Option)
For those utilizing fold-in squat racks or training in multi-purpose rooms, floor space is sacred. The Titan Fitness Wall-Mounted rack bolts directly into your wall studs, elevating your dumbbells entirely off the floor. This allows you to place your lifting mat directly beneath the weights, creating a dedicated 'drop zone' for your dumbbell glutes workout. Ensure you mount this into solid wood studs or masonry; drywall anchors will fail under the dynamic load of racking heavy iron.
Zoning Your Gym: The Triangle Layout Method
To maximize efficiency during high-intensity lower-body sessions, implement the 'Triangle Layout' for your equipment placement.
- Point A (The Anchor): Your dumbbell rack. Positioned parallel to your main lifting lane.
- Point B (The Support): Your adjustable bench. Placed at a 45-degree angle to the rack, allowing you to grab dumbbells and sit for hip thrusts or seated abductions in two steps.
- Point C (The Zone): Your primary lifting mat (minimum 4x8 feet). Positioned directly in front of the rack and bench, kept entirely clear of stray collars, bands, or kettlebells.
Warning on Rubber Degradation: If your dumbbell rack is positioned near a garage door or window, UV exposure will rapidly degrade the rubber or neoprene coatings on your dumbbells, causing them to dry-rot and flake onto your workout mat. Always position storage racks in climate-controlled, UV-shielded zones to protect your investment.
Safety Protocols and Failure Modes in Storage
Improper dumbbell storage doesn't just ruin the flow of your workout; it introduces severe safety hazards. Be mindful of these common failure modes:
- Asymmetrical A-Frame Loading: Storing all your heavy dumbbells (e.g., 50s and 60s) on one side of an A-frame rack shifts the center of gravity. When you pull a heavy dumbbell from the top tier, the rack can tip laterally. Always balance the load.
- Hex Dumbbell Roll-Off: While hex dumbbells are designed not to roll, placing them hastily on a slightly uneven 3-tier rack can cause them to vibrate and walk off the edge during heavy floor movements nearby. Ensure your rack is leveled using rubber shims.
- Bottom-Tier Toe Strikes: During walking lunges, if your rack is placed too close to the perimeter of your lifting mat, your forward foot may strike the base of the rack, leading to ankle sprains or toe fractures. Maintain a minimum 24-inch buffer zone between the edge of your mat and the base of the rack.
Frequently Asked Questions
Can I use a vertical dumbbell tree for heavy glute workouts?
Vertical trees are generally not recommended for heavy lower-body training. Retrieving 50lb+ dumbbells from a vertical peg requires an awkward twisting motion that places uneven shear stress on the wrist and lower back. Stick to horizontal 3-tier or A-frame racks for heavy hinge movements.
How much space do I need for a complete dumbbell glutes workout?
You need a minimum clear floor space of 6x8 feet. This accommodates the 4x8 foot footprint required for walking lunges and split squats, plus an additional 2-foot buffer for your dumbbell rack and bench placement.
Should I buy a rack with an integrated kettlebell shelf?
If your glute workouts incorporate heavy kettlebell swings or goblet squats, a combo rack is highly efficient. However, ensure the kettlebell shelf is at the very bottom. Kettlebells have a high center of gravity, and storing them on middle tiers can destabilize the rack.
More gear to consider
All reviews
Setting Up Your Home Gym for the 30 Degree Incline Dumbbell Press
Best Adjustable Dumbbells for Bent-Over Dumbbell Reverse Fly 2026

2026 Rack Trends: Storage and One-Arm Dumbbell Row Muscles Worked

Rubber Hex vs Urethane: Value & Single Arm Dumbbell Row GIF

Best Dumbbells for Bicep Exercises: Rubber Hex vs Urethane (2026)
