Dumbbell Push Jerk Setup: Power Rack vs Squat Rack vs Squat Stand
Master the dumbbell push jerk with our step-by-step guide. Compare power racks, squat racks, and squat stands to find the safest setup for 2026.

Mastering the Dumbbell Push Jerk: Technique and Equipment
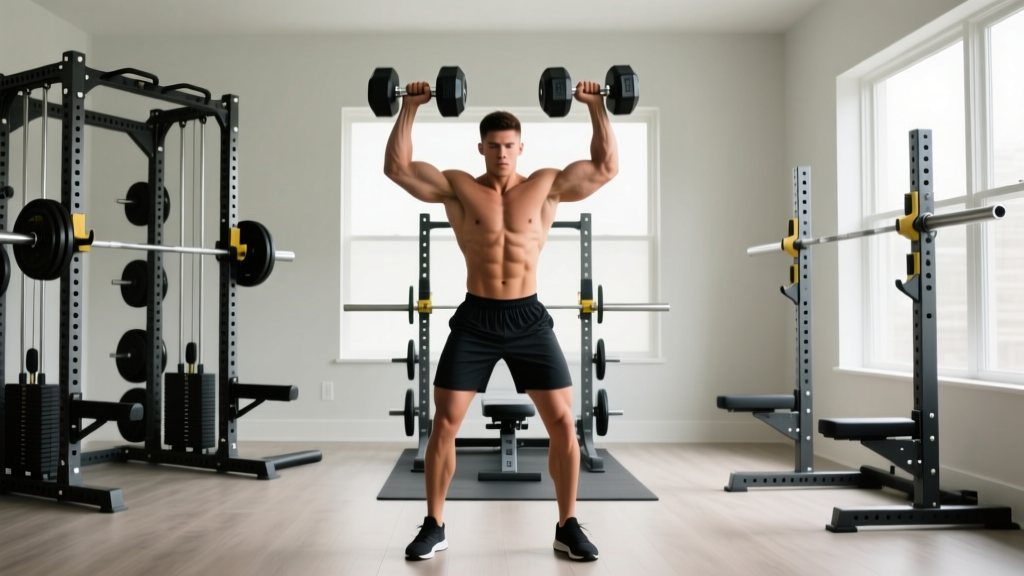
The dumbbell push jerk is a highly explosive, full-body movement that builds immense overhead power, coordination, and athletic performance. Unlike a strict overhead press, the push jerk utilizes the powerful triple extension of your hips, knees, and ankles to drive the weight upward, allowing you to move significantly heavier loads. However, as you progress from 30-pound dumbbells to 80-pound or 100-pound monsters, a critical problem emerges: how do you safely get the weights into position, and more importantly, how do you bail or rack them safely when a rep fails?
This is where your home gym infrastructure becomes non-negotiable. Choosing between a full power rack, a half squat rack, or independent squat stands will dictate not just your safety, but your ability to train the dumbbell push jerk with maximum intensity. In this comprehensive 2026 guide, we will break down the exact biomechanics of the lift and provide a deep-dive equipment comparison to help you build the ultimate overhead pressing station.
The Dumbbell Push Jerk: A Beginner's Step-by-Step Guide
Before investing in heavy steel, you must master the movement pattern. According to exercise biomechanics data from ExRx, the push jerk relies on momentum and rapid deceleration. Here is your step-by-step execution guide.
- The Clean and Rack Position: You cannot simply curl heavy dumbbells to your shoulders. You must perform a dumbbell clean to get them into the 'rack' position. The dumbbells should rest securely on your anterior deltoids, with your elbows pointed slightly forward and your wrists stacked directly over your elbows. Pro Tip: If you are using thick-handled dumbbells (35mm or 50mm grip diameter), your forearm fatigue will be high. Ensure your rack height allows you to clean the weights from just below the knee.
- The Stance and Brace: Place your feet exactly hip-width apart, with toes pointed slightly outward. Take a deep diaphragmatic breath and brace your core as if preparing for a punch. Your torso must remain perfectly vertical.
- The Dip and Drive: Initiate the dip by pushing your hips straight down and slightly back. The dip should be shallow—roughly 10% to 15% of your total height. If you dip too deep, you lose the elastic stretch reflex in your quads. Violently reverse the motion, driving through your mid-foot and fully extending your hips, knees, and ankles.
- The Catch and Lockout: As the dumbbells become weightless at the peak of the drive, aggressively punch your arms upward while simultaneously dropping your body under the weight. You can catch the weight in a 'power' stance (slight quarter squat) or a 'split' stance (one foot forward, one foot back). Lock out your elbows completely before standing up tall.
The push jerk allows you to move roughly 20% to 30% more weight overhead compared to a strict military press by utilizing the powerful triple extension of the hips, knees, and ankles. For detailed muscular activation breakdowns, refer to the BarBend Dumbbell Push Jerk Guide.
Why Your Rack Choice Matters for Overhead Lifts
When performing barbell push jerks, athletes typically drop the barbell back to the front rack or the floor. With dumbbells, however, the mechanics of bailing are vastly different. Dropping 90-pound urethane dumbbells from a height of seven feet can destroy your flooring, damage the dumbbell handles, and cause unpredictable bouncing that leads to ankle injuries. Furthermore, if you fail a rep at the top of the movement, you need a safe way to guide the dumbbells down without tearing a rotator cuff. This requires specific rack configurations, spotter arm placements, and adequate overhead clearance.
Power Rack vs. Squat Rack vs. Squat Stand: The 2026 Breakdown
As of 2026, the home gym market has standardized around 3x3-inch, 11-gauge steel uprights with 1-inch hole spacing (often featuring Westside spacing in the bench press zone). However, the footprint and safety features vary wildly. Below is our expert comparison matrix.
| Feature | Power Rack (Full Cage) | Half Rack (Squat Rack) | Squat Stands (Independent) |
|---|---|---|---|
| Average Price Range | $1,100 - $2,500+ | $600 - $1,200 | $250 - $500 |
| Footprint (Depth x Width) | 48" x 48" to 53" x 53" | 48" x 36" | 24" x 24" (per stand) |
| Bailing Safety | Maximum (Enclosed) | High (Spotter Arms) | Low to Moderate |
| Best For | Heavy Olympic lifts, kipping pull-ups | Garage gyms with limited depth | Low ceilings, budget builds |
1. Power Racks (Full Cages): The Ultimate Safety Net
A full power rack, such as the Rep Fitness PR-5000 V3 or the Rogue RM-6 Monster Rack, features four main uprights connected by crossmembers. For the dumbbell push jerk, this is the gold standard for safety. If you fail a rep at the top of the lockout, you can simply lower your body and let the dumbbells rest on the interior J-cups or safety spotter arms. Furthermore, full cages allow you to install interior pull-up bars and lat pulldown attachments, maximizing the utility of your footprint.
- Pros: Unmatched safety for bailing heavy overhead lifts; highly modular; supports heavy band attachments.
- Cons: Expensive; requires a massive footprint; can feel claustrophobic during dynamic movements like split jerks if the interior width is less than 42 inches.
2. Half Racks (Squat Racks): The Space-Saving Compromise
Half racks, like the Titan T-3 Half Rack or Rogue SML-2, utilize two main front uprights and a rear storage base. They are incredibly popular for garage gyms because they save roughly 12 to 18 inches of depth compared to a full cage. When performing dumbbell push jerks, you will stand slightly in front of the uprights. If you fail, you can drop the dumbbells forward onto extended spotter arms. However, you must ensure your spotter arms are at least 24 inches long to catch a wide dumbbell stance safely.
- Pros: Excellent balance of safety and space efficiency; built-in weight plate storage on the rear base adds counterbalance stability.
- Cons: Failing backward is dangerous; requires precise spotter arm placement.
3. Squat Stands: Minimalist but Risky for Jerks
Independent squat stands, such as the Rogue S-2 Squat Stand 2.0 or Rep Fitness SR-4000, are essentially two disconnected uprights. They are phenomenal for low-ceiling basements (often available in 72-inch or 80-inch heights) and tight budgets. However, for the dumbbell push jerk, they present a significant hazard. Because there is no rear crossmember, if you lose your balance backward during the dip and drive, you can easily tip the stands over, resulting in a catastrophic failure.
⚠️ Safety Warning: If you must use squat stands for overhead pressing, you are strictly required to purchase heavy-duty spotter arms with safety catch pins, and you must bolt the stands to a wooden platform or use massive rear weight plate storage pegs to act as a counterbalance. Never perform explosive jerks with unanchored, lightweight squat stands.How to Safely Bail and Protect Your Flooring
Even with the best rack, you will occasionally miss a lift or need to drop the dumbbells after a successful set. The type of dumbbell you own dictates your dropping strategy. Standard hex-shaped rubber dumbbells are notorious for cracking or snapping their internal steel handles when dropped from shoulder height or higher. If you are training the push jerk, you must invest in urethane-coated dumbbells or round-headed pro-style dumbbells, which absorb impact far better.
To protect your concrete garage floor, standard 1/2-inch rubber gym tiles are insufficient. You need 3/4-inch thick vulcanized rubber horse stall mats (typically 4x6 feet, costing around $50 to $70 each at local agricultural supply stores). Place two mats directly in your drop zone. When bailing from a failed push jerk, do not throw the dumbbells outward. Instead, guide them down your thighs to your hips, hinge backward, and drop them straight down onto the mats from waist height, keeping your hands on the handles until the last possible second to control the bounce.
Expert Verdict: Which Setup Should You Buy?
Your final decision should be driven by your ceiling height, budget, and long-term training goals. If you have standard 8-foot ceilings, a 90-inch Half Rack is your best option, providing enough clearance for your arms to lock out overhead while keeping the footprint manageable. If you have 10-foot ceilings and plan to eventually transition to barbell Olympic weightlifting, invest in a Full Power Rack with 3x3 uprights and 1-inch hole spacing. Finally, reserve Squat Stands strictly for strict pressing and benching, avoiding explosive jerk variations unless you have heavily anchored them and possess elite spatial awareness. For a complete look at industry-leading rack configurations, you can explore the current lineup at Rogue Fitness to compare exact steel gauges and attachment compatibilities.
More gear to consider
All reviews
Trulap Dumbbell Setup: Beginner Guide to Neoprene Home Weights
Barbell Collars For Your Workout With Bench And Dumbbells Setup
Space-Saving Racks for Biceps Curl Dumbbells & Layouts

EZ vs Straight Bar: Beyond the Dumbbell Bench Press Exercise Image

Power Rack vs Squat Rack vs Stand: Best Way to Do Dumbbell Rows