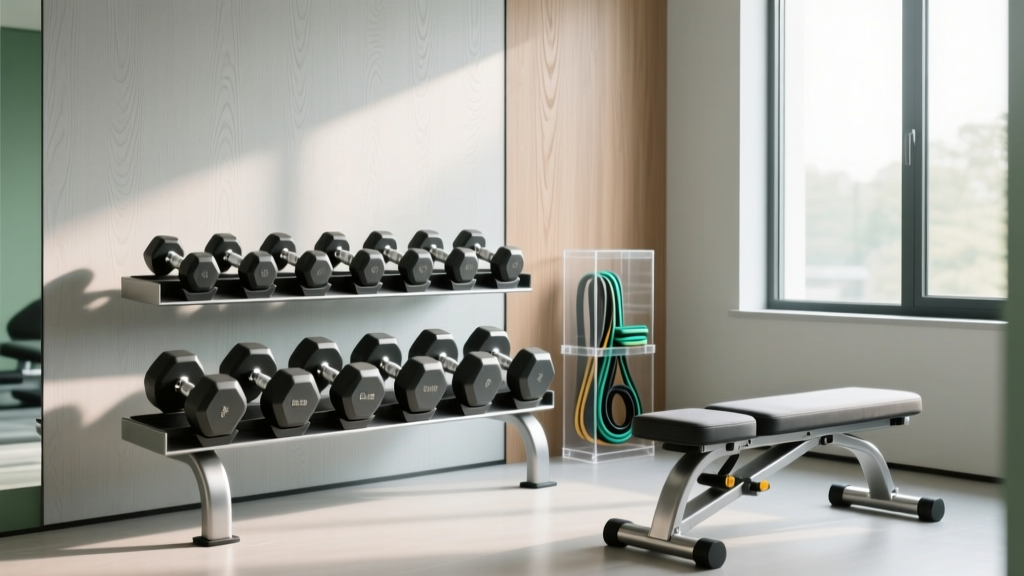
Optimize Space for Your Dumbbell Home Routine: Storage & Rack Guide
Maximize your workout space with our layout guide. Discover the best dumbbell racks and storage solutions to optimize your dumbbell home routine.

The Spatial Economics of a Dumbbell Home Routine
Executing a high-volume dumbbell home routine requires more than just discipline; it demands an intelligently designed physical environment. As urban living spaces shrink and home gym footprints become increasingly constrained in 2026, the spatial economics of free weight storage have never been more critical. A standard 5-to-50-pound hex dumbbell set (10 pairs) left scattered on the floor consumes approximately 15 to 18 square feet of usable space. This not only creates tripping hazards during dynamic movements like walking lunges or dumbbell snatches but also visually clutters the room, which psychological studies show can decrease workout adherence.
Transitioning from floor storage to a dedicated rack system compresses that footprint by up to 75%. However, selecting the right storage solution is not merely about buying the cheapest metal shelf. It requires understanding load distribution, steel gauge thickness, and the specific geometric constraints of your room. According to facility layout guidelines emphasized by fitness industry experts at BarBend, optimizing a home gym requires balancing equipment density with mandatory safety clearances to prevent injury and equipment damage.
Pro Layout Tip: Always measure your space with the dumbbells physically in your hands. Simulate a dumbbell chest press or a goblet squat to ensure your elbows and the weights will not strike the wall or the rack during your routine.Rack Typologies: Footprint vs. Capacity Matrix
Not all racks are created equal. The ideal storage unit for your dumbbell home routine depends entirely on whether your limiting factor is floor space (square footage) or wall space (linear footage). Below is a structural comparison of the three primary rack configurations available on the market today.
| Rack Configuration | Average Floor Footprint | Max Weight Capacity | Spatial Efficiency Rating | Best Use Case |
|---|---|---|---|---|
| 3-Tier Horizontal | 5.2 sq ft (34" x 22") | 500 - 800 lbs | High | Garage gyms, dedicated spare rooms |
| A-Frame Vertical | 4.0 sq ft (24" x 24") | 300 - 400 lbs | Very High | Small apartments, bedroom corners |
| Wall-Mounted Saddle | 0.0 sq ft (Floor) | 150 - 250 lbs | Maximum | Studios, wall-adjacent bench setups |
Layout Frameworks for Compact Rooms
Integrating a rack into your space requires adherence to specific clearance metrics. The Americans with Disabilities Act (ADA) recommends 36 inches of clearance for safe passage, a metric that translates perfectly to home gym safety. You need at least 36 inches of unobstructed space in front of your rack to safely pick up and drop heavy dumbbells without straining your lower back or damaging your flooring.
Framework 1: The Perimeter Run (For 3-Tier Horizontal Racks)
If you are utilizing a traditional 3-tier horizontal rack, place it along the longest uninterrupted wall.
- Wall Offset: Leave a 4-to-6-inch gap between the back of the rack and the baseboard. This prevents the rubber coating of the dumbbells from scuffing the paint and allows for easy retrieval of dropped items.
- Anchor Point: While 3-tier racks are generally stable, if you live in an earthquake-prone zone or have children/pets, use L-brackets to secure the top rear crossmember to the wall studs.
- Adjacency: Place your adjustable bench directly parallel to the rack, leaving the 36-inch gap in between. This allows you to sit on the bench, lean forward, and grab the weights without taking unnecessary steps.
Framework 2: The Corner Wedge (For A-Frame Vertical Racks)
A-frames are designed to tuck into 90-degree corners, utilizing dead space that horizontal racks cannot access.
- Clearance Arc: Ensure a 48-inch semi-circle clearance in front of the A-frame. Because A-frames store weights higher up, you need extra overhead and lateral clearance to maneuver a 50-pound dumbbell down to chest level safely.
- Lighting Consideration: Corners are often poorly lit. Mount a cheap LED puck light under the top tier of the A-frame so you can read the weight markings during early morning or late night routines.
Top Storage Solutions by Space Profile
Based on current market pricing, steel quality, and spatial efficiency, here are the top-performing storage units to anchor your setup. Comprehensive testing by Garage Gym Reviews consistently highlights these models for their durability and footprint-to-capacity ratios.
1. Rep Fitness 3-Tier Dumbbell Rack (Best Overall Horizontal)
Priced around $179 to $199, the Rep Fitness 3-Tier is constructed from 14-gauge steel and features a 34" x 22" base. It holds up to 10 pairs of hex or rubber-coated dumbbells. The angled shelves on the top two tiers are a crucial ergonomic feature, allowing you to read the weight numbers without bending over. Edge Case Warning: The 14-gauge steel is robust, but if you are storing a full set of 100-pound urethane dumbbells, the middle shelf may experience slight deflection over time. Stick to sets maxing out at 50 or 60 pounds per pair for this specific model.
2. Yes4All A-Frame Dumbbell Rack (Best Budget Vertical)
Coming in at roughly $89 to $109, this is the undisputed king of budget, space-saving storage. Its 24" x 24" footprint is remarkably small. However, users must be acutely aware of the pendulum effect. If you load the top tier with heavy 40-pound dumbbells and leave the bottom tier empty, the center of gravity shifts dangerously high. Always load A-frames from the bottom up, and never pull a heavy weight from the top tier while the base is unweighted.
3. Rogue Wall-Mount Dumbbell Storage (Best Zero-Floor Option)
For roughly $145 to $175, Rogue offers a heavy-duty wall-mounted saddle system. This requires mounting directly into wooden studs or using heavy-duty toggle bolts in concrete. It holds up to 5 pairs of dumbbells. This is the ultimate solution for studio apartments where every square foot of floor space is required for yoga, HIIT, or bodyweight movements when the dumbbell home routine is not active.
"A well-organized home gym isn't just about aesthetics; it's about reducing the friction between your intention to work out and the actual execution. If you spend 5 minutes moving weights just to clear a space to stand, you're introducing unnecessary cognitive load."
Safety Hazards & Edge Cases in High-Density Setups
When optimizing for space, safety is often the first casualty. Be vigilant about the following failure modes common in compact home gyms:
Hazard Alert: Rubber Off-Gassing in Enclosed SpacesIf your space-optimized setup involves storing a massive set of cheap, recycled-rubber dumbbells in a small, unventilated room (like a converted closet or small bedroom), you risk exposure to volatile organic compounds (VOCs). The off-gassing smell isn't just unpleasant; it can cause headaches and respiratory irritation during high-cardio dumbbell routines. If space forces you to store rubber weights in a small room, invest in a HEPA/Carbon air purifier or opt for cast-iron or urethane-coated dumbbells, which do not off-gas.
The Tripping Hazard of "Temporary" Storage
The most common injury in a home gym doesn't happen during a lift; it happens when stepping over a dumbbell left on the floor "just for a minute." Commit to a strict zero-floor policy. If a weight is not in your hands or on the rack, it does not belong in the room. Utilize the 36-inch clearance zone strictly as a movement corridor, never as a staging area for your next set.
Subfloor Compression and Rack Leveling
A fully loaded 3-tier rack can easily exceed 600 pounds, concentrating that weight onto four small rubber feet. If your gym is located on a second-floor room with standard joists, or over a crawl space, this point-load can cause the rack to lean over time. Use a 3/4-inch horse-stall mat beneath the rack to distribute the load across a wider surface area, and check the leveling feet every six months to ensure the rack has not warped, which could lead to dumbbells rolling off the shelves during a minor vibration or bump.
Ultimately, the success of your dumbbell home routine hinges on the environment you curate. By selecting the correct rack typology for your specific spatial constraints and adhering to strict layout geometries, you transform a cluttered room into a high-performance training facility.
More gear to consider
All reviews
Pec Deck Fly with Dumbbells: Neoprene Grip & Form Troubleshooting

Barbell Collar Guide & Leg Exercises for Men with Dumbbells
Best Neoprene Dumbbells for a Home Dumbbell Exercise Plan

Olympic Barbell Knurling & Setup for Proper Dumbbell Curl Form

Barbell Curls vs Dumbbell Curls: Dumbbell Rack Storage & Care
