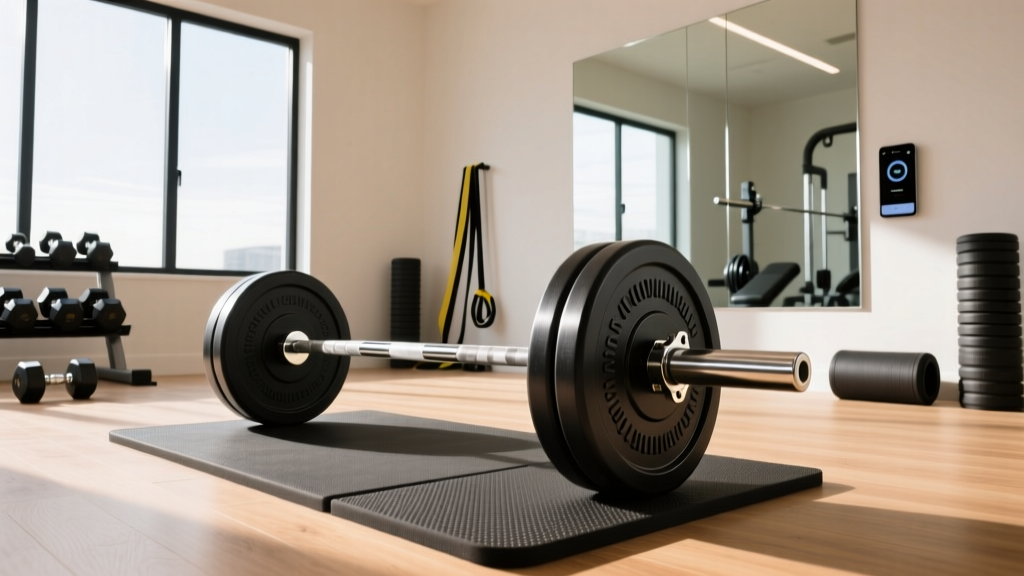
DIY Dumbbell Home Gym Mistakes: Power Rack vs Squat Rack vs Squat Stand
Avoid costly home gym mistakes. Troubleshoot DIY dumbbell setups and learn which rack — power rack, squat rack, or squat stand — fits your space and budget.

The Hidden Cost of Home Gym Mistakes Nobody Talks About
Building a home gym in 2026 should save you money — the average commercial gym membership costs between $40 and $80 per month, totaling up to $960 annually. But thousands of lifters lose hundreds of dollars every year on equipment that doesn't work together. The most common trap? Crafting a DIY dumbbell set on a tight budget and then pairing it with the wrong rack system, creating safety hazards and wasted space.
Whether you're pouring concrete into buckets for homemade dumbbells or buying adjustable sets, your rack choice — power rack, squat rack, or squat stand — dictates what exercises you can safely perform and how efficiently your space functions. This troubleshooting guide dissects the seven most expensive mistakes lifters make and provides exact solutions with real product references and pricing.
⚠️ Safety Warning: According to the U.S. Consumer Product Safety Commission, home gym equipment injuries send over 8,700 people to emergency rooms annually. Improperly loaded DIY dumbbells and unsecured rack systems account for a significant portion of these incidents.Mistake #1: Building DIY Dumbbells Without Planning Rack Compatibility
The most frequent error begins before you even buy a rack. Lifters construct DIY dumbbells using 5-gallon buckets filled with concrete (producing roughly 40-50 lb dumbbells) or PVC pipe filled with sand (yielding 15-25 lb pairs), without measuring whether these oversized creations actually fit inside standard rack uprights.
The Dimension Problem
A typical bucket-cast DIY dumbbell measures 11-12 inches in diameter. Most power rack J-hooks sit at a width of 42-49 inches between uprights. That sounds sufficient, but the real issue emerges when you try to store these oversized dumbbells on standard weight horns designed for Olympic plates (17.7-inch diameter). Your DIY dumbbells will either slide off or won't sit flush, creating a tipping hazard.
| DIY Dumbbell Type | Approx. Weight | Diameter | Rack Compatibility |
|---|---|---|---|
| 5-gal bucket + concrete | 40-50 lbs | 11.75 in | Poor — won't fit weight horns |
| PVC pipe + sand | 15-25 lbs | 4-6 in | Good — fits most shelves |
| Steel pipe + plates (bolted) | 20-60 lbs | 7-10 in | Moderate — may fit weight horns |
| Hex-shaped concrete mold | 25-45 lbs | 6-8 in (flat side) | Best — won't roll, stores flat |
The Fix: Before casting any DIY dumbbell, measure your intended storage solution. If you're using a Rogue R-3 Power Rack (49" width, 10-gauge steel, approximately $1,095), plan for dumbbells no wider than 8 inches or invest in a dedicated dumbbell shelf attachment like the Rogue Monster Utility Shelf ($135).
Mistake #2: Choosing a Squat Stand When You Need a Power Rack
Squat stands look like a budget-friendly option — typically $150-$350 compared to $700-$1,500+ for a full power rack. But the decision should never come down to price alone.
When Squat Stands Fail
Squat stands consist of two independent uprights with J-hooks and spotter arms. They work for basic squats and bench presses, but here's where lifters get burned:
- No overhead clearance for pull-ups: Most squat stands max out at 72-84 inches. If you want to integrate pull-up work (which pairs naturally with a dumbbell-heavy program), you need a power rack with a built-in pull-up bar at 84-93 inches.
- Spotter arm limitations: Squat stand spotter arms typically extend only 18-24 inches. A DIY dumbbell bench press gone wrong with 50-lb homemade bells requires at least 30-inch coverage to catch safely.
- Stability under lateral loads: Kettlebell swings, landmine rotations, and band work create lateral force. Squat stands rated for 500-800 lbs vertical load often wobble dangerously under 100-150 lbs of lateral force unless bolted to a platform.
Mistake #3: Overbuying a Power Rack for a Simple DIY Dumbbell Routine
The opposite error is equally expensive. If your program consists primarily of DIY dumbbell goblet squats, dumbbell presses, and kettlebell swings — and you never plan to back squat with a barbell — a full 4-post power rack is overkill.
A squat rack (2-post design with safety straps or catch bars) costing $300-$600 handles 90% of what a dumbbell-focused lifter needs. You can perform dumbbell bench presses inside it, use the uprights as anchor points for bands, and store your DIY dumbbells on the weight posts.
Cost Breakdown: What You Actually Need
| Training Goal | Recommended Rack Type | Price Range (2026) | Example Product |
|---|---|---|---|
| Dumbbell-only program, no barbell | Squat Stand or Folding Wall Rack | $150 - $400 | Fitness Reality 1000 Super Max ($200) |
| Mixed barbell + dumbbell, budget build | 2-Post Squat Rack | $350 - $650 | Titan T-2 Series ($450) |
| Full barbell training + accessories | 4-Post Power Rack | $700 - $1,500 | Rogue SML-2C Monster Lite ($995) |
| Heavy lifting, commercial-grade | 6-Post Power Rack w/ plate storage | $1,500 - $3,000+ | Rep Fitness PR-5000 ($1,799) |
Mistake #4: Ignoring Floor Load Capacity and Structural Limits
Here's a mistake that doesn't show up in any product listing: your floor might not support the combined weight of a loaded power rack plus your DIY dumbbell collection.
A standard residential floor joist system (2x10 lumber, 16-inch on-center spacing) supports approximately 40 pounds per square foot of live load, according to the American Wood Council. A fully loaded power rack with 400 lbs of plates, a 45-lb bar, and 200 lbs of DIY dumbbells stored on adjacent shelving concentrates over 600 lbs into a 4x4 foot footprint — that's 37.5 lbs per square foot, dangerously close to the limit.
The Structural Checklist
- Identify your floor type: Concrete slab (basement/garage) supports virtually unlimited load. Upper-level wood framing requires calculation.
- Spread the load: Place your rack on a 3/4-inch plywood platform (4x8 sheet, approximately $45-$65 at most lumber yards). This distributes weight across multiple joists.
- Position wisely: Place the rack perpendicular to joist direction and near load-bearing walls rather than at mid-span.
- Store dumbbells separately: Don't stack your entire DIY dumbbell collection on the rack itself. Use a separate low-profile storage rack positioned against a wall.
Mistake #5: Wrong Safety System for Your Training Style
The safety mechanism you need depends entirely on how you train — and most buyers don't think about this until after purchase.
Comparing Safety Systems
| Safety Type | Best For | Risk If Misused | Typical Cost Add-On |
|---|---|---|---|
| Pin-pipe safeties | Barbell squats, bench press | Bar can roll off if not centered | Included with most racks |
| Strap safeties | Catch-and-drop movements, DIY dumbbell drops | Straps stretch over time, need replacement every 2-3 years | $40 - $80 |
| Flip-down spotter arms | Squat stands, quick adjustments | Limited catch width (18-24 in) | $60 - $120 |
| Safety spotter bars (Monolift style) | Heavy singles, no-spotter training | Requires precise height adjustment | $100 - $200 |
Critical insight for DIY dumbbell users: If you're pressing heavy homemade dumbbells without a spotter, strap safeties are superior to pin-pipes. A failing DIY dumbbell (especially concrete-cast versions that can crack on impact) falls unpredictably. Straps catch and cradle irregular shapes; pin-pipes deflect them sideways.
Mistake #6: Underestimating Ceiling Height Requirements
This mistake forces more returns and exchanges than almost any other. Here are the exact clearance numbers you need:
- Squat Stands: 72-80 inches tall. Require minimum 84-inch ceiling for overhead movements.
- Squat Racks (2-post): 82-90 inches tall. Require minimum 96-inch ceiling.
- Power Racks (4-post): 84-93 inches tall. Require minimum 100-inch ceiling for pull-ups with full arm extension.
"I see customers return power racks every week because they measured floor space but forgot to measure vertical clearance. A 90-inch rack under an 8-foot ceiling leaves only 6 inches for pull-ups — that's not enough to clear your head." — Home gym equipment specialist, Garage Gym Reviews
The Fix: If your ceiling is under 84 inches, choose a short squat stand (72-inch models from Fringe Fitness start around $200) and perform pull-ups using a separate doorway-mounted bar ($25-$45). This saves you from buying a full rack you can't fully utilize.
Mistake #7: Skipping the Bolt-Down Step on Budget Racks
Every squat stand and most budget squat racks under $600 require anchoring. The physics are simple: a 200-lb rack with a 225-lb barbell creates a tipping moment of approximately 375 foot-pounds of force during a failed rep. Without anchoring, the entire assembly can tip forward.
Anchoring Methods by Floor Type
Concrete floors: Use 3/8-inch wedge anchors (4 per rack, approximately $2-$3 each). Drill with a hammer drill and 3/8-inch masonry bit. Total cost: under $15 and 30 minutes of work.
Wood subfloor over joists: Use 3/8-inch lag bolts (3 inches long) driven directly into floor joists. Locate joists with a stud finder, mark positions, and drive bolts through the rack base plates. Cost: under $8.
No-drill option: Build a 4x6 foot platform from two layers of 3/4-inch plywood (total cost: $90-$130 for lumber). Bolt the rack to the platform instead of the floor. The platform's weight (approximately 120-150 lbs) plus any stored plates provides sufficient counter-force against tipping.
🚫 Never Skip This: If you're using DIY dumbbells (which may have inconsistent weight distribution compared to calibrated commercial dumbbells), the asymmetric loading increases tipping risk on unanchored squat stands by an estimated 25-40%. Always anchor.Quick-Reference Troubleshooting Matrix
| Problem | Likely Cause | Solution | Cost to Fix |
|---|---|---|---|
| DIY dumbbells won't store on rack | Oversized cast diameter | Add utility shelf or separate dumbbell rack | $50-$135 |
| Rack wobbles during use | Not anchored or on uneven floor | Anchor to floor or build plywood platform | $8-$130 |
| Can't do pull-ups in rack | Insufficient ceiling clearance | Switch to shorter rack + doorway pull-up bar | $25-$45 |
| Concrete DIY dumbbell cracked | Dropped on hard surface without rubber coating | Apply Plasti Dip coating ($15/can) or use horse stall mats | $15-$50 |
| Spotter arms don't catch dumbbells | Arms too short for dumbbell press width | Upgrade to strap safeties or longer spotter arms | $40-$120 |
The Bottom Line: Match Your Rack to Your Actual Training
The most expensive mistake isn't buying the wrong rack — it's buying ANY rack without first documenting exactly which exercises you'll perform, what equipment you'll use, and what your space allows. Before spending a dollar, write down your five most common lifts, measure your ceiling height, check your floor construction, and calculate your total equipment weight. Then match those facts against the comparison data above.
A well-planned $350 squat stand setup with properly sized DIY dumbbells will outperform a haphazard $1,500 power rack installation every single time. The equipment doesn't make the gym — the planning does.
More gear to consider
All reviews
Best Loadable Dumbbells for the One Arm Dumbbell Clean (2026)

Power Rack vs Squat Rack vs Stand for Dumbbell Glute Exercises
EZ Curl Bar vs Straight Bar and Standing Overhead Dumbbell Presses

Hammer Curls Cable vs Dumbbell: 2026 Adjustable Set Review
Power Rack vs Squat Rack vs Stand: Dumbbell Chest Workouts at Home