Collar Comparison: Fixing Dumbbell Farmers Carry & Squat Mistakes
Compare barbell collar types and troubleshoot slippage mistakes. Expert guide to securing plates for squats and heavy dumbbell farmers carry lifts.

The Hidden Physics of Collar Failure
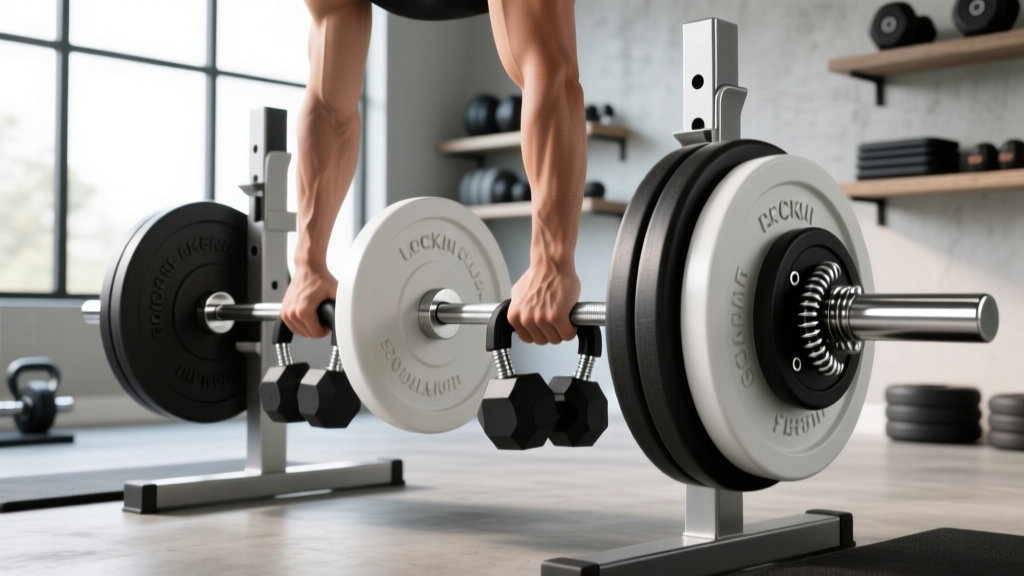
Most lifters treat barbell collars as an afterthought, tossing a pair of cheap spring clips onto the sleeves before loading up the bar. But when you transition from static lifts to dynamic, high-torque movements, collar failure becomes a critical safety hazard. This is especially true when utilizing Olympic loadable handles for a heavy dumbbell farmers carry. The pendulum-like swinging motion of a farmers carry generates immense lateral and rotational force, easily overwhelming subpar clamps and sending bumper plates sliding off the sleeve mid-stride.
Troubleshooting collar slippage requires understanding the mechanical differences between clamp types, the metallurgy of your barbell sleeves, and the specific force vectors of your lifts. In this guide, we break down the most common mistakes lifters make with barbell collars and compare the top clamp designs to ensure your equipment stays locked in, whether you are squatting in a power rack or dominating a strongman-style dumbbell farmers carry.
2026 Collar & Clamp Comparison Matrix
Not all collars are created equal. The table below compares the primary collar mechanisms available on the market, evaluating their grip force, durability, and suitability for dynamic movements.
| Collar Type | Material | Est. Lateral Grip Force | Avg. Price (2026) | Best Use Case | Farmers Carry Rating |
|---|---|---|---|---|---|
| Spring Clip | Zinc-Plated Steel | < 15 lbs | $2 - $5 | Light accessory work, group fitness | 1/5 (Dangerous) |
| Polymer Lock (e.g., Lock-Jaw) | Glass-Filled Nylon | ~ 120 lbs | $25 - $30 | CrossFit, Olympic drops, daily barbell work | 3/5 (Moderate) |
| CNC Aluminum (e.g., Bulldog) | Aircraft Aluminum | ~ 250 lbs | $35 - $45 | Heavy powerlifting, static barbell lifts | 4/5 (Good) |
| Hitch-Pin (e.g., Rogue AH-1) | Steel / Aluminum | 500+ lbs | $45 - $60 | Strongman, heavy loadable dumbbells | 5/5 (Elite) |
Deep Dive: Clamp Types and Real-World Failure Modes
1. Spring Clips: The False Economy
Spring clips rely on the tension of bent steel wire to grip the sleeve. The most common mistake is assuming that a tighter spring equals a safer lift. In reality, spring clips only grip a fraction of the sleeve's circumference. During a dynamic movement like a dumbbell farmers carry, the weight plates shift outward, and the vibration easily walks the spring clip off the sleeve. Furthermore, spring tension degrades rapidly with use. If you are still using spring clips for anything beyond an empty barbell warm-up, it is time to upgrade.
2. Polymer Locks (Lock-Jaw / Proloc)
Polymer collars use a cam-lever mechanism to squeeze an internal O-ring against the barbell sleeve. They are the industry standard for commercial gyms and functional fitness competitions. Troubleshooting tip: The primary failure mode for polymer collars is environmental. If left in a cold garage gym or exposed to UV light over several years, the nylon becomes brittle and the cam-lever hinge can snap under heavy torque. Additionally, the internal rubber O-rings flatten out after 18 to 24 months of heavy use, reducing grip force by up to 40%. Replace the O-rings annually to maintain maximum clamping pressure.
3. CNC Aluminum Screw-Down Clamps
Machined aluminum collars (like the Bulldog Elite or Iron Bull clamps) use a threaded screw mechanism to press a steel or brass insert directly into the barbell sleeve. These offer phenomenal grip for static, ultra-heavy lifts like squats and deadlifts. Failure mode: The hex-screws can strip if over-tightened with a metal Allen key, and the hard metal insert can chew up the finish of your barbell sleeves if grit or chalk gets trapped between the clamp and the bar. They are excellent for barbells, but their wider profile can sometimes interfere with hand placement on shorter loadable dumbbell handles.
4. Hitch-Pin and Lever-Action Steel Collars
For strongman events and heavy loadable dumbbells, hitch-pin collars like the Rogue AH-1 are the undisputed gold standard. They utilize a lever-action that drives a steel wedge or pin directly against the sleeve, completely eliminating slippage. While they are heavier and more expensive, they are virtually indestructible and immune to the rotational forces that ruin lesser clamps.
⚠️ Warning: The Knurled Sleeve Mistake
Some budget loadable dumbbell handles feature knurled sleeves to prevent plates from spinning. Never use polymer or aluminum screw-down collars on knurled sleeves. The knurling will act like a cheese grater, destroying the collar's internal O-rings or scoring the aluminum insert. Use only smooth-sleeved handles or hitch-pin collars specifically designed for knurled surfaces.
Troubleshooting the Dumbbell Farmers Carry
The dumbbell farmers carry is unique because it combines heavy axial loading with aggressive lateral sway. When using 20-inch or 24-inch Olympic loadable dumbbell handles, you face two distinct collar-related challenges:
- Sleeve Real Estate: A standard Olympic barbell has 16.4 inches of sleeve space. A loadable dumbbell handle might only have 10 to 12 inches. If your collar is 3 inches wide, you lose 25% of your loading capacity. For farmers carries, prioritize low-profile collars (like the Lock-Jaw Pro, which is only 1.5 inches wide) to maximize plate space.
- Pendulum Torque: As you walk, the dumbbell swings. This creates a tearing force that pulls the collar away from the inner plate. If the collar is not perfectly flush against the first bumper plate, the micro-movements will slowly rattle the clamp loose over a 50-meter course.
'In strongman, a dropped dumbbell during a farmers carry isn't just a failed rep; it's a catastrophic ankle injury waiting to happen. If your collar requires two hands and a struggle to remove, it's the right tool for the job. If it slides off with a light tap, it belongs in the trash.'
— Elite Strongman Coaching Guidelines
The 'Shake Test' Protocol
Before stepping onto the course or the gym floor, perform the Shake Test. Load your dumbbell handle with the intended weight and secure the collar. Grip the handle and aggressively shake it vertically and horizontally for 10 seconds. If you hear the plates 'clacking' against the collar, the clamp has not achieved full compression. Loosen it, push it flush against the plate, and re-tighten.
Sleeve Tolerances: The Silent Slippage Culprit
One of the most frustrating troubleshooting scenarios is when a high-quality collar slips on a specific barbell or dumbbell handle, despite working perfectly on others. The culprit is almost always sleeve tolerance variance.
An Olympic sleeve is nominally 50mm in diameter. However, according to equipment testing data reviewed by BarBend's equipment experts, budget import bars and some specialized loadable dumbbell handles can measure anywhere from 48.5mm to 50.5mm. A rigid CNC aluminum collar machined exactly to 50.1mm will slide right off a 49mm sleeve, no matter how hard you tighten the screw.
How to Fix Tolerance Mismatches
- The Chalk Trick: For a temporary fix on slightly undersized sleeves, rub a thin layer of lifting chalk on the barbell sleeve before applying a polymer collar. The chalk fills the microscopic gap and increases friction, allowing the O-ring to bite.
- Sandpaper Sleeves: If you have a cheap dumbbell handle with a painted or powder-coated sleeve that is slightly oversized (50.5mm+), wrap 120-grit sandpaper around a dowel and lightly sand the end of the sleeve where the collar sits. This removes the coating and brings the steel down to a true 50mm.
- Invest in Calibrated Collars: Premium collars like the Eleiko Platform Collars or Rogue AH-1 feature internal compliance mechanisms (like urethane bushings or pivoting wedges) that adapt to sleeves ranging from 49mm to 51mm, entirely bypassing tolerance issues.
Final Maintenance Checklist for 2026
To ensure your collars remain safe for both heavy squats and the dumbbell farmers carry, implement this 60-second monthly maintenance routine:
- Wipe the Sleeves: Use a nylon brush and a light coat of 3-in-One oil to clean barbell and dumbbell sleeves. Built-up chalk and sweat create a slick, paste-like film that reduces collar friction by up to 30%.
- Inspect O-Rings: Run your thumb along the inside of your polymer collars. If the rubber feels flat, cracked, or permanently deformed, order replacement O-rings (usually $5 for a pack) or retire the collar.
- Lubricate Hinges: Apply a single drop of silicone lubricant to the cam-lever hinges of your clamps to ensure they achieve full lock-out without binding.
By matching the right collar mechanism to the specific force vectors of your lifts, you eliminate equipment failure from the equation. Whether you are chasing a new squat PR or loading up iron for a grueling dumbbell farmers carry, proper collar selection and troubleshooting is the foundation of safe, heavy lifting.
More gear to consider
All reviews
Kettlebell Guide & Chest Supported Incline Dumbbell Row Setups
Best Neoprene Dumbbells for a Bicep Workout Using Dumbbells at Home

Barbell Collars & Clamps for Seated Dumbbell Lateral Raises (2026)

Meadow Rows Dumbbell Trend: 2026 Shift to Loadable Plates
Olympic vs Standard Plates: Avoiding Bowflex Dumbbell Recall Failures