
Dumbbell vs Barbell Setups: The Complete Barbell Collar & Clamp Guide
Master your barbell setup with our complete installation walkthrough. Compare lever, lockjaw, and spring collars for safe, secure heavy lifting.

The Critical Role of Barbell Retention in Your Setup
Building a safe and effective free-weight zone requires more than just purchasing a high-quality Olympic barbell and a stack of bumper plates. The true integrity of your lifting setup relies on the often-overlooked retention devices: barbell collars and clamps. When you are executing a heavy back squat or a dynamic power clean, the moment of inertia generated by the barbell can cause unsecured plates to shift outward. This asymmetric weight distribution alters the bar's center of gravity, leading to catastrophic loss of balance or severe equipment damage.
In this complete setup and installation walkthrough, we will break down the exact mechanics of loading your barbell, compare the leading collar and clamp types available in 2026, and provide material-specific troubleshooting to ensure your equipment remains secure under maximum loads.
Step-by-Step Barbell Loading and Installation Walkthrough
Proper installation begins before the collar even touches the sleeve. Follow this standardized sequence to ensure optimal friction and weight distribution.
- Center the Barbell: Always load the barbell while it is resting evenly in the J-cups of your power rack or on a dedicated floor jack. Never load one side completely before the other, as this can tip the bar and damage the sleeve bearings.
- Sequence Your Plates: Load the largest diameter plates first (e.g., 45 lb / 20 kg bumpers), moving inward to the smallest fractional plates. This keeps the heaviest mass closest to the bar's center, reducing whip and shear stress on the sleeve.
- Flush the Plates: Push all plates tightly toward the shoulder of the sleeve. Eliminate any micro-gaps between the plates. Even a 2mm gap can compound into a half-inch of lateral shift during a heavy deadlift.
- Install the Collar: Slide your chosen clamp onto the 50mm sleeve and lock it flush against the outermost plate. Ensure the locking mechanism is fully engaged before lifting the bar off the rack.
Comprehensive Comparison: Collar & Clamp Types
The market is saturated with retention devices, but they are not created equal. Below is a technical comparison matrix of the primary clamp categories used in modern home and commercial gyms.
| Collar Type | Mechanism | Clamping Force | Sleeve Space Used | Avg. Price (2026) |
|---|---|---|---|---|
| Lever Clamp (Aluminum) | Cam-lever tension | High (~250+ lbs) | ~1.0 inch | $40 - $55 / pair |
| Lock-Jaw (Resin) | Push-button ratchet | Medium-High | ~1.5 inches | $30 - $40 / pair |
| Screw-Down (Competition) | Threaded steel screw | Extreme (IWF Spec) | ~2.5 inches | $80 - $120 / pair |
| Spring Clip | Coiled steel tension | Low (~20 lbs) | ~0.5 inch | $8 - $15 / pair |
1. Lever Clamps: The Heavy-Duty Standard
Lever clamps, such as the Rogue AB-11 Lever Clamp or similar anodized aluminum models, utilize a cam mechanism. When you flip the lever, it pulls a tension band or internal wedge tight against the 50mm sleeve. These are the gold standard for powerlifting and heavy CrossFit WODs. They take up minimal sleeve real estate (usually around 1 inch), leaving maximum room for plate loading. According to extensive equipment testing by BarBend, high-quality aluminum lever clamps consistently survive thousands of drop cycles from overhead heights without losing their tension calibration.
2. Lock-Jaw Collars: The Resin Alternative
The Lock Jaw Omega is a staple in garage gyms. Made from high-density nylon resin, these collars use an internal ratcheting gear that bites into the sleeve when you squeeze the handles. While incredibly secure and easy to operate with sweaty hands, their primary drawback is thickness. At 1.5 inches wide, they consume valuable sleeve space, which can be frustrating if you are trying to load six 45-pound bumper plates onto a standard 16.4-inch loadable sleeve.
3. Competition Screw-Down Collars
If you are training for Olympic weightlifting, the International Weightlifting Federation (IWF) mandates the use of specific screw-down collars that weigh exactly 2.5 kg each. These feature a threaded bolt that crushes a metal wedge against the sleeve. While they offer unparalleled grip force and are mathematically factored into the total lifted weight, they are slow to install and remove, making them impractical for high-volume hypertrophy or fast-paced circuit training.
Material Science: Sleeve Finishes and Friction Failures
A common troubleshooting issue in 2026 home gyms is collar slippage, which is rarely the fault of the clamp itself, but rather a mismatch between the clamp's internal lining and the barbell's sleeve finish.
- Bare Steel & Zinc Sleeves: These offer the highest coefficient of friction. Resin lock-jaws and rubber-lined lever clamps grip these surfaces aggressively. Slippage is almost non-existent unless the sleeve is heavily chalked or oiled.
- Cerakote Sleeves: Cerakote is a ceramic-polymer coating that provides incredible rust resistance, but it creates a micro-smooth, almost glass-like finish. Standard plastic collars will slide right off a Cerakote sleeve during a heavy clean and jerk. If you own a Cerakote-coated bar (like the Rogue Ohio Bar Cerakote edition), you must use lever clamps with aggressive rubberized inner gaskets or specialized competition clamps.
- Stainless Steel Sleeves: Offering a middle ground, stainless steel provides excellent corrosion resistance with a slightly textured grain that plays well with almost all collar types.
Pro-Tip for Equipment Longevity: Never leave lever clamps or lock-jaws locked onto the barbell when storing it vertically in a weight tree. The constant gravitational pull against the tension mechanism can warp the internal springs or warp the resin housing over time, leading to premature failure.
FAQ: Global Gym Setups and Equipment Security
How does barbell security differ from dumbbell setups?
When expanding a home gym, international lifters often research the perbedaan dumbbell dan barbel (the fundamental differences between dumbbell and barbell training). While dumbbells offer unilateral freedom and fixed-weight security (or internal dial-mechanisms in adjustable sets), barbells allow for massive axial loading but require external retention. A 50-pound adjustable dumbbell is a self-contained unit; a 315-pound barbell is a dynamic system of independent plates that must be mechanically bound together. Understanding this distinction is vital for purchasing the right safety accessories for your specific training modality.
Do I need collars for dumbbell bars?
Yes, if you are using traditional loadable dumbbell handles (1-inch or 2-inch Olympic dumbbell handles), you must use collars. However, because dumbbell handles have very short loadable sleeves (often only 3 to 5 inches), bulky lever clamps will not fit. For loadable dumbbell handles, traditional spin-lock nuts or specialized low-profile spring clips are the only viable installation options.
Final Installation Checklist
Before stepping under the bar for your working sets, run through this final mental checklist:
- Are the plates loaded symmetrically?
- Are all plates pushed completely flush against the bar shoulder?
- Is the collar locked tightly against the outermost plate with zero lateral play?
- Is the collar mechanism compatible with my bar's specific sleeve coating?
By treating your barbell collars not as an afterthought, but as a critical structural component of your lifting setup, you ensure that the only thing failing during your workout is your muscle tissue, never your equipment.
More gear to consider
All reviews
Compact Senior Gyms: Dumbbell Squats for Seniors & Kettlebell Buying Guide
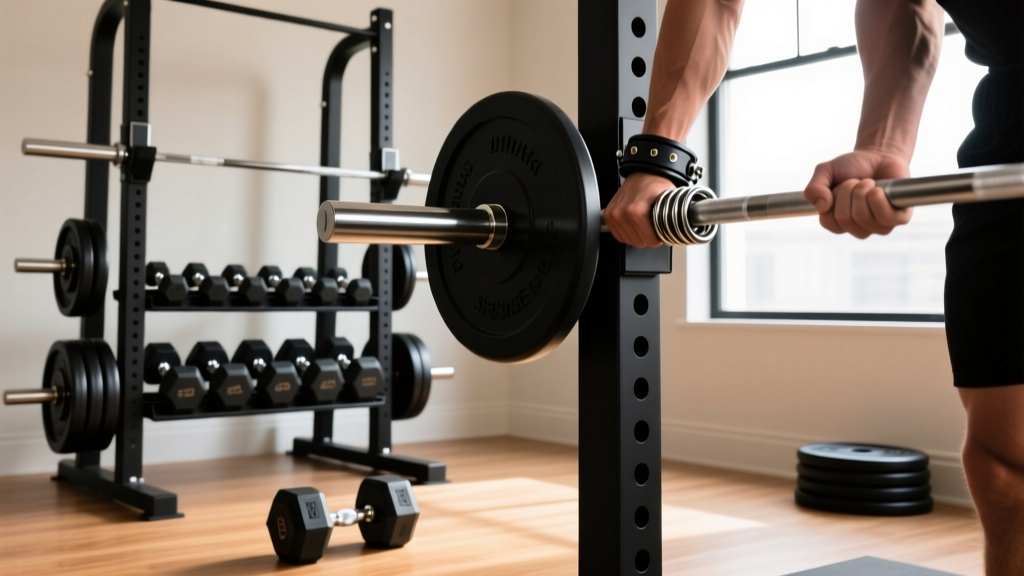
Barbell Collar Types Comparison & Dumbbell Shoulder Row
Home Setup: Arm Workout Routine With Dumbbells & Neoprene Gear

Olympic vs Standard Plates: Pairing with SelectTech 552 Dumbbells

Senior Dumbbell Storage & Seated Dumbbell Exercises for Seniors PDF Guide
