
Adjustable Dumbbell Setup for Your Upper Body Dumbbell Workout Program
Unbox, assemble, and calibrate top adjustable dumbbells. Our setup walkthrough ensures your gear is ready for any upper body dumbbell workout program.

The Pre-Flight Check: Unboxing Your Adjustable Dumbbells
You have finally committed to a structured, progressive upper body dumbbell workout program, and your new adjustable dumbbells have just arrived. However, unlike traditional hex dumbbells that you simply unbox and rack, adjustable models are precision-engineered pieces of fitness equipment. Improper setup, uneven tray placement, or ignored calibration steps can lead to jammed dials, shattered internal gears, or catastrophic weight drops during a heavy set of incline presses.
This comprehensive installation and setup walkthrough bridges the gap between hardware assembly and workout execution. We will compare the top 2026 adjustable dumbbell models through the lens of setup, footprint, and integration, ensuring your home gym is optimized for safety and performance.
💡 Expert Insight: According to extensive durability testing by Garage Gym Reviews, the majority of adjustable dumbbell failures occur not during the lift, but during improper re-racking or setup on uneven surfaces. The tray is just as important as the dumbbell itself.2026 Hardware Comparison: Top Models for Your Home Gym
Before we dive into the physical installation, you must understand the spatial and mechanical requirements of the market leaders. When designing the layout for your upper body dumbbell workout program, bench clearance and tray footprint are critical metrics.
| Model | 2026 Base Price | Tray Footprint (L x W) | Setup Time | Mechanism Type |
|---|---|---|---|---|
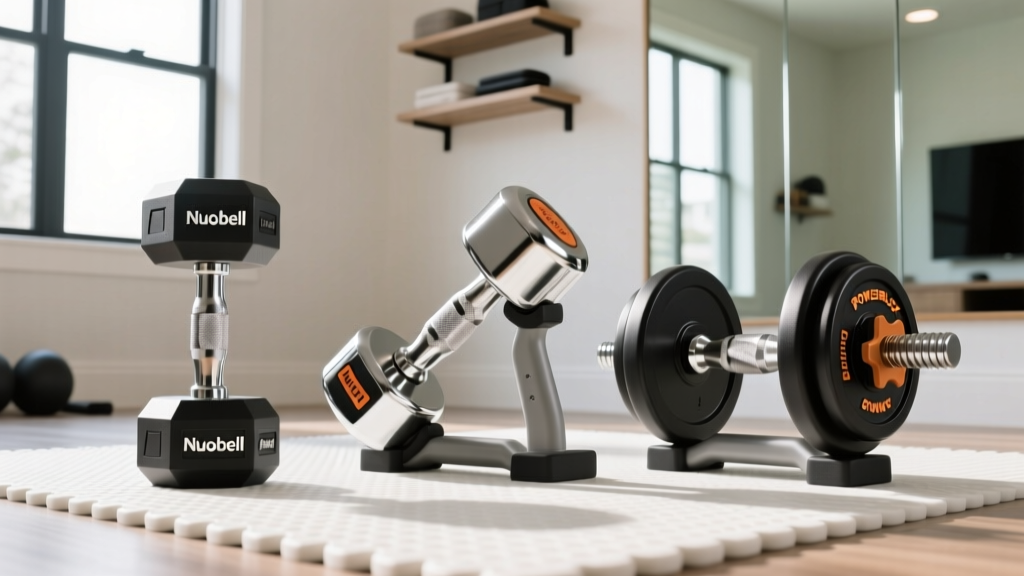
| Nuobell 80lb | $349 - $389 | 15.7" x 7.5" | 5 Minutes | Twist-Dial / Steel Gear |
| Bowflex SelectTech 552 | $399 | 16.9" x 8.3" | 15 Minutes | Dual-Dial / Plastic Bracket |
| PowerBlock Elite EXP | $379 | 12.0" x 6.5" | 2 Minutes | Selector Pin / Urethane |
Phase 1: Model-Specific Installation Walkthroughs
Each adjustable dumbbell system requires a unique approach to unboxing, tray placement, and initial calibration. Follow these specific instructions to protect your investment.
Nuobell 80lb: The Cradle and Gear Alignment Setup
The Nuobell system mimics the feel of a traditional dumbbell, but its internal steel gear mechanism is highly sensitive to tray alignment.
- Surface Leveling: Place the Nuobell cradle on your rack or bench. Use a standard torpedo level across the cradle base. If the cradle is tilted more than 2 degrees, the internal gears will bind when you attempt to twist the handle.
- Handle Seating: When placing the dumbbell into the cradle for the first time, ensure the alignment notches on the handle perfectly match the grooves in the cradle. You should hear a distinct click before attempting to turn the dial.
- Clearance Check: The Nuobell requires exactly 1.5 inches of vertical clearance above the handle to disengage the weight plates smoothly. If your rack shelf is too low, you will scrape the dial mechanism.
Bowflex SelectTech 552: Tray Assembly and Magnetic Brackets
The Bowflex 552 remains a staple for any upper body dumbbell workout program due to its 5-52.5 lb range, but its bulky footprint requires careful installation.
- Tray Screws: The included tray requires manual assembly using 8 Phillips-head screws. Do not use a high-torque power drill; overtightening will crack the ABS plastic base. Hand-tighten to 80% torque.
- Magnetic Retaining Brackets: Inspect the small magnetic tabs inside the tray. These keep the outer weight plates from sliding off during transport. Ensure they are free of metal shavings or dust from the shipping process.
- The Carpet Warning: Never place the Bowflex tray directly on thick, plush carpet. The foam compression will cause the tray to bow in the center, preventing the dials from turning. Always install a rigid 3/4-inch plywood sub-board beneath the tray if not using a metal weight rack.
PowerBlock Elite EXP: Urethane Block and Pin Assembly
PowerBlocks are virtually indestructible, making them ideal for high-intensity circuits, but their expandable nature requires specific setup foresight.
- Pin Insertion: The selector pin uses a heavy-duty magnetic tether. During initial setup, practice sliding the pin in and out of the urethane block without looking, ensuring the magnetic catch engages securely on the outer rail.
- Rack Integration: Because PowerBlocks are perfectly rectangular and compact (12" x 6.5"), they can be stored on standard barbell rack shelves. However, ensure the shelf depth is at least 10 inches to prevent the block from being bumped off during heavy bench press setups.
Phase 2: Bench Integration for Upper Body Movements
How you position your newly installed dumbbell trays relative to your adjustable bench will dictate the flow and safety of your upper body dumbbell workout program. According to biomechanics guidelines referenced by BarBend's equipment testing team, improper equipment spacing leads to compromised form and increased injury risk during transitional phases of a lift.
⚠️ Safety Callout: The 'Renegade Row' HazardIf your workout program includes renegade rows or floor presses, your trays must be positioned at least 24 inches away from your active floor space. A stray foot kicking a Bowflex or Nuobell tray during a plank position will shatter the plastic casing and void your warranty.
Optimal Tray Placement Matrix
- Flat Bench Presses: Place trays parallel to the bench, 12 inches from the edge. This allows you to safely kick the dumbbells up to your knees without twisting your spine.
- Incline Presses (30-45°): Move trays slightly forward, near the head of the bench. Reaching backward for heavy adjustable dumbbells while reclined places dangerous shear force on the shoulder capsule.
- Seated Shoulder Presses: Position trays directly to the left and right of the bench seat, exactly at knee-height, allowing for a neutral-grip pickup.
Phase 3: Calibration and Safety Stress-Testing
Before loading up your first working set, you must perform a calibration and stress test to ensure the locking mechanisms are fully engaged.
1. The 'Hover Test'
Set the dumbbells to an asymmetrical weight (e.g., 35 lbs). Lift the dumbbell exactly two inches off the tray and hover for 5 seconds. Inspect the gap between the selected weight plate and the unselected plates resting in the tray. If the unselected plates lift even a millimeter off the tray base, the locking pin or dial is not fully seated. Lower it, twist the dial back to 5 lbs, and re-engage.
2. The 'Shake Test'
Set the dumbbell to the maximum weight (e.g., 52.5 lbs or 80 lbs). Hold it at arm's length and perform three controlled, vigorous shakes. Listen for internal rattling. A slight metallic clinking is normal for Bowflex guide rods, but any grinding or loose shifting indicates a misaligned internal bracket that requires immediate manufacturer support.
FAQ: Troubleshooting Common Setup Issues
Why won't my Bowflex dial turn past 25 lbs?
This is almost always a setup clearance issue. The Bowflex 552 requires the handle to be pushed all the way down into the tray before the dials can rotate. If your rack shelf is slightly warped, or if a stray washer is stuck in the tray groove, the handle won't seat deeply enough to disengage the safety lock.
Can I mount my adjustable dumbbell trays to a wall?
Only if you are using specialized, heavy-duty steel wall shelves rated for at least 200 lbs of dynamic load. Standard wooden garage shelving will rip out of the drywall studs under the sheer weight of two 80lb Nuobells plus the steel trays. Always bolt directly into the center of wooden studs or use toggle bolts in metal studs.
Do I need to lubricate the Nuobell gears?
No. During the initial setup and throughout the lifespan of the product, avoid applying WD-40 or silicone sprays to the Nuobell handle or cradle. These lubricants attract dust and chalk, which will eventually form a paste that jams the internal steel gears. Keep them dry and wipe them down with a microfiber cloth after your upper body dumbbell workout program sessions.
Final Thoughts on Gym Layout
Completing a proper setup and installation walkthrough transforms your adjustable dumbbells from a fragile novelty into a commercial-grade staple of your home gym. By respecting the spatial requirements, leveling your trays, and integrating them logically with your bench, you ensure that your upper body dumbbell workout program is executed with maximum safety, efficiency, and focus. Take the extra 20 minutes to measure, level, and test your gear—your shoulders and your wallet will thank you.
More gear to consider
All reviews
Olympic vs Standard Plates & the Dumbbell Pullover Without a Bench
Best Adjustable Dumbbells for a Dumbbell Shoulder Workout at Home
PowerBlock Elite Dumbbells and Neoprene Home Setup

EZ Curl Bar vs Straight Bar Longevity & Dumbbell Deadstop Row Care
Chest Exercises with Dumbbells: Neoprene Mistakes & Troubleshooting
