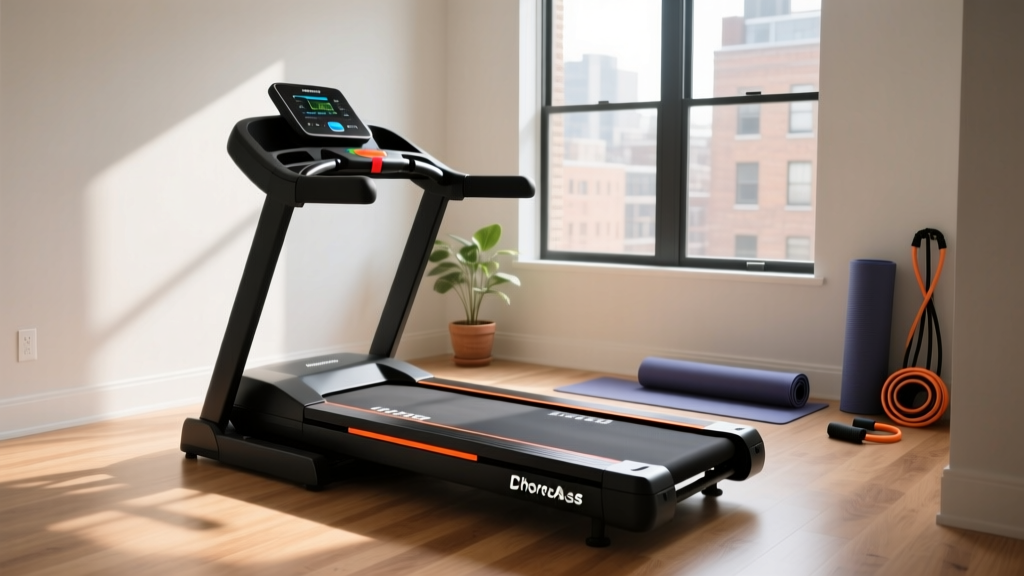
Treadmill Features & Setup Guide for Fat Burning Treadmill Workouts
Compare essential treadmill features for fat burning treadmill workouts and follow our expert setup guide to safely install your machine at home.

Selecting the Right Hardware for High-Intensity Interval Training
When your primary fitness goal involves executing high-intensity fat burning treadmill workouts, standard walking-pad specifications will inevitably fail under the mechanical torque of sprint intervals and steep incline climbs. Designing a home gym space optimized for metabolic conditioning requires a rigorous evaluation of continuous horsepower (CHP), belt ply construction, and structural rigidity. According to Mayo Clinic research on High-Intensity Interval Training (HIIT), these routines demand rapid velocity transitions that place immense lateral and vertical shear forces on the treadmill deck and motor drive system.
In this comprehensive 2026 installation and buying guide, we break down the exact feature matrix required for fat-loss protocols and provide a master-class walkthrough on assembling, calibrating, and troubleshooting your machine to prevent catastrophic mid-sprint failures.
Expert Insight: CHP vs. Peak Horsepower
Marketing materials often highlight 'Peak Horsepower,' which only measures the motor's maximum output for a few seconds before overheating. For fat burning treadmill workouts that require sustained 12% to 15% inclines at 4.0 MPH, you must look exclusively at Continuous Horsepower (CHP). A minimum of 3.0 CHP is mandatory to prevent thermal shutoffs during 45-minute metabolic conditioning sessions.
Feature Comparison Matrix: Walking vs. Fat Burning HIIT
Not all treadmills are engineered for the violent deceleration and acceleration phases of interval training. Below is a comparative breakdown of the hardware specifications you must demand from your 2026 equipment purchase.
| Component | Standard Walking / Light Jog | Fat Burning HIIT Requirements | 2026 Benchmark Model |
|---|---|---|---|
| Motor Output | 2.0 - 2.5 CHP | 3.0 - 4.0 CHP (DC Motor) | Sole F80 (3.5 CHP, $1,199) |
| Belt Dimensions | 18' x 55' | 22' x 60' (Accommodates long sprint strides) | Horizon 7.0 AT (22' x 60', $999) |
| Deck Construction | Single-ply, standard MDF | 4-Ply Urethane, reversible phenolic deck | NordicTrack 1750 ($2,499) |
| Incline Range | 0% - 10% | -3% Decline to 15% Incline | ProForm Pro 9000 |
| Shock Absorption | Basic rubber grommets | Variable-durometer elastomer cushions | Matrix T7xe |
Pre-Installation Site Preparation & Electrical Safety
Before unboxing your treadmill, you must verify that your installation environment can handle the electrical draw and physical footprint required for safe sprinting. The American Heart Association emphasizes consistent, uninterrupted exercise sessions for cardiovascular health; a tripped breaker mid-sprint ruins the metabolic stimulus and poses a severe fall risk.
Electrical Load Verification
- Dedicated 20-Amp Circuit: Treadmills with 3.0+ CHP motors draw up to 15 amps under heavy incline loads. Sharing a standard 15-amp bedroom circuit with a space heater or air conditioner will cause voltage drops, leading to motor stuttering and eventual control board failure.
- Surge Protection: Do not use standard power strips. Invest in a UL-listed, 15-joule minimum surge suppressor designed specifically for fitness equipment to protect the lower control board from micro-surges.
Biomechanical Clearance Zones
When performing fat burning treadmill workouts, fatigue inevitably alters your running mechanics. You must establish strict safety clearances:
- Rear Clearance: Minimum 72 inches of unobstructed space behind the treadmill. If you lose your footing during a 10 MPH sprint, you need adequate runoff space to prevent impact trauma against walls or furniture.
- Vertical Clearance: Measure your ceiling height and add 12 inches to the maximum incline height of the treadmill. For a 15% incline on a commercial deck, you need at least 84 inches of ceiling clearance to avoid head strikes during steep climbs.
Step-by-Step Assembly and Calibration Walkthrough
Proper assembly dictates the lifespan of your belt and motor. Follow this exact sequence to ensure your machine is calibrated for high-impact intervals.
- Deck Lubrication (Pre-Tension): Before applying any tension to the belt, lift the edge and apply exactly 15ml of 100% silicone treadmill lubricant in a zig-zag pattern across the center third of the deck. Never use petroleum-based products, which will dissolve the urethane belt backing.
- Upright Mast Wiring: When connecting the console data cable, ensure the locking tab clicks. A loose connection will cause the console to drop the Bluetooth signal, interrupting your heart-rate synced interval programs.
- Initial Belt Tensioning: Once assembled, power on the machine at 2.0 MPH. If the belt hesitates when you step on it, the drive belt or walking belt is too loose. Locate the rear roller adjustment bolts. Turn both the left and right bolts exactly one-quarter (1/4) turn clockwise. Re-test. Never over-tension, as this will destroy the front roller bearings within 50 miles.
- Incline Calibration Mode: Access the hidden diagnostic menu (usually by holding 'Incline Up' and 'Start' simultaneously for 5 seconds). Run the auto-calibration sequence. This forces the incline motor to find its absolute zero and maximum gear limits, ensuring that a programmed 12% incline is mathematically accurate for your calorie-burn calculations.
Optimizing the Console for Metabolic Conditioning
Once the hardware is secured, software configuration becomes your primary tool for progressive overload. Modern 2026 consoles allow for deep customization of interval parameters.
Heart Rate Zone Syncing
To maximize lipid oxidation, you must train in specific heart rate zones. Grip sensors are highly inaccurate during high-cadence sprints due to vibration and sweat. Instead, pair a Bluetooth chest strap (such as the Polar H10) via ANT+ or BLE. Set your console to 'Target Heart Rate' mode, programming the treadmill to automatically increase the incline by 1% if your heart rate drops below 80% of your maximum during the active recovery phases.
Custom Interval Programming
True fat-burning protocols require asymmetrical work-to-rest ratios. Instead of standard 1:1 intervals, program your console for a 1:2 ratio (e.g., 30 seconds at 10 MPH / 15% incline, followed by 60 seconds at 3.0 MPH / 0% incline). This allows for complete ATP replenishment, ensuring you can sustain maximum mechanical output across all 10 rounds.
Troubleshooting Sprint-Induced Failures
High-intensity routines expose mechanical weaknesses that casual walking masks. Use this troubleshooting matrix to diagnose and resolve issues specific to aggressive training.
| Failure Symptom | Root Cause Analysis | Expert Resolution |
|---|---|---|
| Belt slips or stutters during foot strike at speeds over 8 MPH. | Walking belt tension is inadequate, or the drive belt (connecting motor to front roller) is stretched. | Adjust rear roller bolts 1/4 turn. If issue persists, remove the motor hood and tighten the motor mount tensioner bolt to increase drive belt grip. |
| Motor emits a burning odor and shuts down during 15% incline intervals. | Thermal overload triggered by excessive amp draw, often exacerbated by a dry deck creating high friction. | Verify 20A dedicated circuit. Clean the deck underside and re-apply 100% silicone lubricant. Allow motor to cool for 45 minutes before resetting the thermal breaker. |
| Console freezes or reboots when speed transitions from 2 MPH to 10 MPH. | Voltage sag overwhelming the upper control board's capacitor due to rapid motor acceleration demands. | Disable 'Rapid Acceleration' in the engineering menu. This forces the motor to ramp up over 3 seconds instead of 1, smoothing the electrical draw and protecting the logic board. |
Final Maintenance Directives for Longevity
To sustain the rigorous demands of fat burning treadmill workouts, implement a strict maintenance cadence. Every 30 days, vacuum the motor compartment to remove dust that insulates the motor windings and traps heat. Every 90 days, check the belt tracking by running the machine at 4.0 MPH unweighted; if the belt drifts left, tighten the left rear bolt 1/8th of a turn. By pairing the correct heavy-duty hardware with meticulous installation and calibration, your treadmill will safely support years of high-intensity metabolic conditioning without mechanical compromise.
More gear to consider
All reviews
DeerRun A5 Pro Smart 2 in 1 Folding Treadmill: Setup & Noise Guide

How to Take a NordicTrack Treadmill Apart to Fix Loud Noises

Walking Pad vs Incline Treadmill: What Does 12 Incline Look Like?
Ciihi Treadmill Upgrade: Rowing Machine Buying Guide & Technique
V Fit Treadmill Noise Guide: Quietest Home Cardio Machines 2026