Treadmill Drive Belt Tension and Motor Horsepower: Beginner Guide
Learn how treadmill motor size and horsepower impact drive belt tension. Our beginner guide covers CHP ratings, belt adjustment, and sizing.

The Heart and the Arteries: Understanding Your Treadmill's Drivetrain
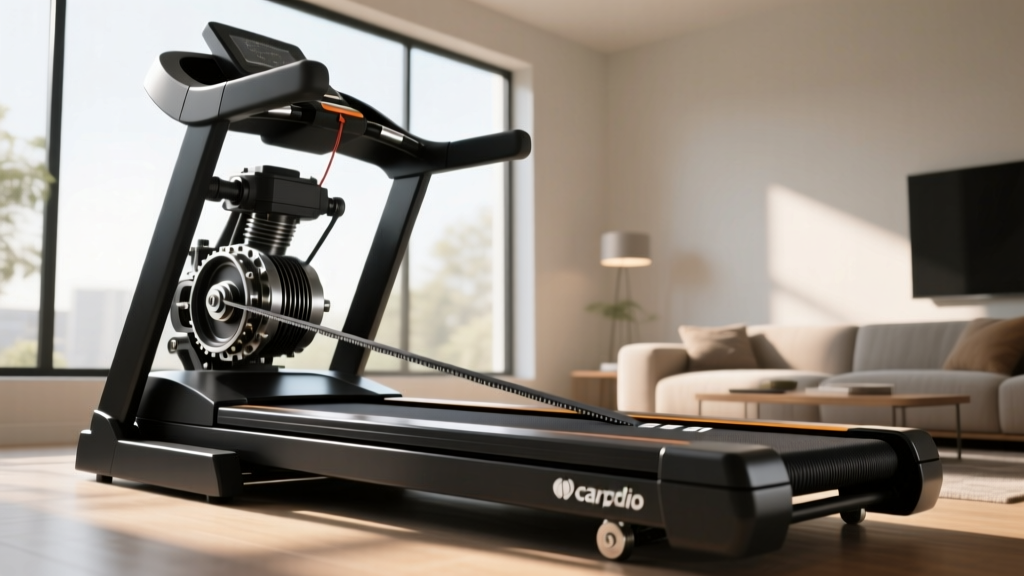
When shopping for or maintaining home cardio equipment, most beginners focus entirely on the console features or the running surface. However, the true longevity of your machine relies on the hidden relationship between its power source and its transmission. Specifically, understanding treadmill drive belt tension is impossible without first understanding your treadmill motor size and horsepower.
Think of the motor as the heart of your treadmill, and the drive belt as the arteries carrying that power to the wheels (the front roller). If the motor is exceptionally powerful but the belt tension is incorrectly calibrated, the system will fail. This beginner-friendly, step-by-step guide will demystify treadmill motor sizes, explain how horsepower dictates belt tension, and show you exactly how to adjust and maintain this critical connection.
Decoding Treadmill Motor Size: Peak HP vs. Continuous HP (CHP)
Before adjusting any hardware, you must know what kind of motor is powering your belt. According to Consumer Reports, the most common marketing trap in the fitness industry is the confusion between Peak Horsepower and Continuous Duty Horsepower (CHP).
- Peak Horsepower: The maximum power the motor can generate for a fraction of a second before overheating. It is a largely useless metric for real-world usage.
- Continuous Duty Horsepower (CHP): The power the motor can sustain indefinitely during a normal workout. This is the only number that matters.
Motor Sizing Matrix: What Do You Actually Need?
The size of your motor directly correlates to the rotational torque it produces. Higher torque places exponentially more stress on the drive belt. Here is the industry-standard baseline for CHP requirements based on user weight and activity level:
| Activity Level | User Weight (Under 180 lbs) | User Weight (180 - 250 lbs) | User Weight (250+ lbs) |
|---|---|---|---|
| Walking (1-4 mph) | 2.0 CHP | 2.5 CHP | 3.0 CHP |
| Jogging (4-6 mph) | 2.5 CHP | 2.75 CHP | 3.25 CHP |
| Running (6+ mph) | 2.75 CHP | 3.0 CHP | 3.5 - 4.0 CHP |
The Physics: How Motor Horsepower Dictates Treadmill Drive Belt Tension
Why does your motor size matter when adjusting the belt? The answer is torque.
A 2.0 CHP motor generates a baseline level of rotational force. If the belt is slightly loose, the motor can still grip the pulley under normal walking loads. However, a 3.5 CHP motor designed for sprinting generates massive low-end torque. If that high-torque motor is paired with an under-tensioned drive belt, the motor pulley will spin faster than the belt can travel. This is known as "belt slip."
⚠️ The Slip vs. Snap ParadoxBeginners often assume that "tighter is always better" to prevent slipping. This is a critical error. Over-tensioning a drive belt on a high-horsepower motor transfers the motor's massive torque directly into the motor's internal bearings and the front roller bearings. This will destroy a $400 motor bearing long before it snaps a $15 drive belt.
Conversely, if the belt is too loose, the friction from slipping will melt the rubber ribs of the Poly-V belt, creating black rubber dust inside the motor hood and triggering an "E1" or "LS" (Loss of Speed) error code on your console.
Step-by-Step Guide: Adjusting Treadmill Drive Belt Tension
Most modern treadmills use a ribbed Poly-V drive belt (typically a PJ4, PJ5, or PJ6 profile, indicating the number of rubber ribs). According to engineering guidelines from the Gates Corporation, a leading manufacturer of power transmission belts, proper tension is measured by deflection, not just "feel."
Step 1: Safety and Access
- Unplug the machine: Never work near the motor flywheel or drive belt while the treadmill is connected to a 120V power source.
- Remove the motor hood: Use a Phillips-head screwdriver to remove the 4 to 6 screws securing the front plastic shroud. Lift the hood off to expose the motor, the drive belt, and the front roller pulley.
Step 2: Inspect the Belt Profile
Before adjusting, check for wear. Run your finger along the underside of the belt. If the rubber ribs are cracked, glazed (shiny and hard), or if you see black dust accumulating on the motor mount, the belt has been slipping. A glazed belt cannot hold tension and must be replaced (typically costing between $12 and $25 for a direct OEM replacement).
Step 3: Loosen the Motor Mount
The motor is mounted to the frame via a pivot plate. Locate the two main mounting bolts that secure the motor to the chassis. Using the correct Allen wrench or socket, loosen these bolts by about two full turns. Do not remove them completely. The motor should now be able to slide slightly forward and backward.
Step 4: Adjust the Tensioning Bolt
Locate the long tensioning bolt (usually found at the front or side of the motor mount).
- To increase tension: Turn the bolt clockwise. This pushes the motor away from the front roller, pulling the belt taut.
- To decrease tension: Turn the bolt counter-clockwise, allowing the motor to slide closer to the roller.
Step 5: The Deflection Test (Crucial Step)
Find the longest uninterrupted span of the drive belt between the motor pulley and the roller pulley. Press down firmly in the exact center of this span with your thumb.
The Golden Rule of Deflection: You should be able to depress the belt exactly 1/4 inch to 1/2 inch using roughly 5 pounds of pressure. If it pushes in more than 1/2 inch, it is too loose (risk of slip). If it feels like a guitar string and barely moves, it is over-tensioned (risk of bearing failure).
Step 6: Secure and Test
Once the 1/4 to 1/2 inch deflection is achieved, tighten the main motor mounting bolts back down to secure the motor in its new position. Plug the treadmill in, stand on the side rails, and start the machine at 3 mph. Listen closely. A high-pitched whining means the belt is too tight; a rhythmic slapping or chirping means it is too loose. Walk on the belt at 4 mph; if the belt stutters but the motor hums smoothly, you need more tension.
Troubleshooting Matrix: Motor Size vs. Belt Tension Failure Modes
When things go wrong, the symptoms will vary depending on the horsepower of your specific motor. Use this diagnostic chart to identify your issue:
| Symptom | Motor Size Context | Root Cause | The Fix |
|---|---|---|---|
| Console shows "E1" or "LS" error and stops abruptly. | Common on 3.0+ CHP motors under heavy user loads. | Belt is slipping on the motor pulley; the console detects a mismatch between motor RPM and belt speed. | Increase drive belt tension by 1/4 turn; clean pulleys with isopropyl alcohol. |
| Loud, metallic whining or grinding noise from the front hood. | Common on 2.0 - 2.5 CHP motors where users over-tighten belts to compensate for weak torque. | Over-tensioned belt is pulling the motor shaft outward, grinding the internal motor bearings. | Immediately reduce tension. If noise persists, motor bearings are permanently damaged ($150-$300 replacement). |
| Rubber burning smell and black dust on the chassis. | Any motor size, but accelerates faster on high-torque 4.0 CHP commercial motors. | Severe under-tensioning causing extreme friction, melting the Poly-V belt ribs. | Replace the drive belt immediately. Adjust tension and check roller alignment. |
Advanced Insight: Sonic Tension Meters vs. The Thumb Test
While the "thumb deflection test" described above is the standard for home gym maintenance, commercial facilities and professional treadmill repair technicians often use a more precise method: a sonic tension meter.
"A sonic tension meter measures the natural frequency of the belt when you pluck it, much like a guitar string. By inputting the belt's mass and span length, the meter calculates the exact Newtons of force being applied. For high-horsepower commercial treadmills (4.0 HP to 5.0 HP AC motors), this eliminates the guesswork and prevents the catastrophic bearing failures associated with manual thumb-testing."
— Industrial Power Transmission Maintenance Standards
For the home user, a sonic meter (which can cost upwards of $300) is unnecessary. However, understanding that tension is a measurable science, not just a "feel," will prevent you from aggressively over-tightening your belt out of frustration.
Preventative Maintenance for Motor and Belt Longevity
To ensure your motor size and horsepower are utilized efficiently without destroying your drive belt, follow this bi-annual maintenance checklist:
- Vacuum the Motor Hood: Every 6 months, remove the hood and vacuum out dust and pet hair. A clogged motor runs hotter, which degrades the rubber of the drive belt sitting just inches away.
- Lubricate the Walking Belt (Not the Drive Belt!): Never apply silicone lubricant to the drive belt or the pulleys. The drive belt relies entirely on dry friction. If walking belt silicone migrates onto the drive belt, it will cause immediate slipping. Wipe the pulleys clean with a dry rag if contamination occurs.
- Check Pulley Alignment: Ensure the motor pulley and the front roller pulley are perfectly parallel. Even a 2-degree misalignment will cause a high-torque motor to slowly "walk" the drive belt off the edge of the pulley, shredding the side of the belt within weeks.
Final Thoughts: Respecting the Drivetrain
Matching your expectations to your treadmill motor size and horsepower guide is the first step in home fitness equipment ownership. A 2.5 CHP motor is a fantastic choice for walking and light jogging, but it requires a delicate balance of drive belt tension to prevent slipping under load. Conversely, a 4.0 CHP beast demands respect; its immense torque will quickly destroy over-tensioned belts and fragile bearings. By mastering the 1/4-inch deflection test and understanding the physics of your machine's drivetrain, you can add years of life to your treadmill, saving hundreds of dollars in avoidable repair costs.
More gear to consider
All reviews
Marcy Treadmill vs Rowing Machine: Beginner Guide
Echelon Stride 4S Treadmill Review: Ultimate Belt Maintenance Guide
Folding Treadmill Review: 2026 Treadmill Conversion Chart

Quiet High Intensity Interval Training Treadmill & Noise Guide 2026
Air Bike vs Assault Bike & ProForm Trainer 14.0 Treadmill
