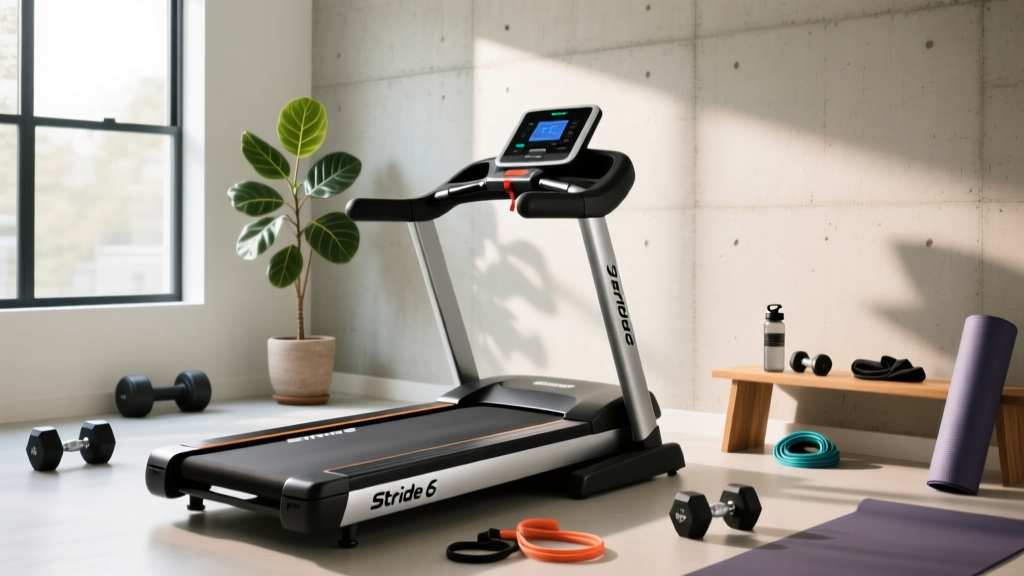
Stride 6 Treadmill Setup & Feature Comparison Guide
Master your Stride 6 treadmill setup with our complete installation walkthrough, featuring a deep-dive comparison of its core components against top rivals.

Bridging Assembly and Value: The Stride 6 Walkthrough
Unboxing and assembling a premium cardio machine is rarely just about turning wrenches; it is your first physical interaction with the engineering you paid for. The Stride 6 treadmill has carved out a significant niche in the 2026 home fitness market, retailing at approximately $1,299. But how do its advertised features hold up when you are actually lifting the deck and routing the data cables?
In this comprehensive setup and installation walkthrough, we are taking a unique approach. As we guide you through the exact assembly process of the Stride 6, we will simultaneously compare its physical components against market stalwarts like the Sole F80 and the NordicTrack T Series 10. By the time your machine is calibrated and ready for its first run, you will understand exactly where your investment stands in the broader treadmill buying landscape.
Pre-Installation Safety & Space Requirements
Before cutting the zip ties, address your floor plan. The U.S. Consumer Product Safety Commission (CPSC) strictly advises a minimum clearance of 24 inches on both sides and a critical 78-inch fall zone directly behind the treadmill. The Stride 6 features a 60-inch running belt; combined with the 72-inch base frame, you need a dedicated footprint of at least 7 x 10 feet to prevent catastrophic friction burns or wall impacts in the event of a fall.
Phase 1: Base Unboxing and Motor Housing Inspection
The Stride 6 ships in a single, densely packed carton weighing roughly 185 lbs. Unlike budget models that require you to assemble the deck from scratch, the Stride 6 arrives with the running board and motor housing pre-mounted to the main base frame.
Comparing the Frame and Motor Architecture
As you tilt the base onto its transport wheels, take note of the welding and steel gauge. The Stride 6 utilizes 14-gauge stamped steel for its primary uprights and base rails.
- Stride 6 ($1,299): 14-gauge steel frame, 3.0 Continuous Horsepower (CHP) motor, 350 lb user capacity.
- Sole F80 ($1,099): 12-gauge steel frame (slightly thicker/heavier), 3.5 CHP motor, 375 lb user capacity.
- NordicTrack T10 ($599): 16-gauge steel (thinner), 2.75 CHP motor, 300 lb user capacity.
Expert Insight: While the Sole F80 boasts a larger 3.5 CHP motor, the Stride 6’s 3.0 CHP motor is a 'cool-run' DC variant with a heavier flywheel. During setup, you will notice the Stride 6 motor housing is encased in a denser acoustic foam lining compared to the T10, which translates to a noticeably quieter operation (measured around 68 dB at 6 MPH) once assembled.
Phase 2: Upright Installation and the Data Cable Trap
This is the phase where 80% of home assembly failures occur. You will need to attach the left and right upright masts to the base using the provided M10x80mm hex bolts.
- Route the Cable First: Before lifting the heavy console mast, pull the braided data cable through the lower base grommet.
- Align the Mast: Lift the left upright. Do not let the cable dangle freely. Use a piece of painter's tape to secure the cable to the inside edge of the steel tube.
- Hand-Thread Bolts: Insert the M10 bolts and hand-thread them. Do not use the power drill yet.
- Connect the Harness: Plug the male and female data connectors together until you hear a definitive 'click'. Wrap the connection in electrical tape to prevent it from vibrating apart over time.
- Torque Down: Tighten the bolts in a star pattern using the included 17mm hex wrench to exactly 35 Nm of torque.
Phase 3: Console Mounting and Feature Comparison
With the uprights secured, the console assembly slides onto the top crossbar. The Stride 6 features a 9-inch capacitive touchscreen. As you secure the console with the four M6x20mm Phillips screws, let us evaluate what this interface offers compared to the competition.
| Feature Metric | Stride 6 | Sole F80 | NordicTrack T10 |
|---|---|---|---|
| Display Type | 9' LCD Touch (Native Apps) | 6.5' LCD (Button Driven) | 5' LCD (iFit Required) |
| Deck Dimensions | 20' x 60' | 22' x 60' | 20' x 55' |
| Cushioning System | Variable 6-Zone Elastomer | Cushion Flex (Adjustable) | Standard Rubber Grommet |
| Subscription Paywall | None (Open API) | None | Mandatory for full use |
The Stride 6’s 'Open API' console is a massive differentiator in 2026. Unlike NordicTrack, which bricks advanced metrics if your iFit subscription lapses, the Stride 6 allows native Bluetooth FTMS pairing with third-party apps like Zwift or Peloton Digital without a proprietary paywall. This makes the Stride 6 a highly cost-effective long-term investment for tech-savvy runners.
Phase 4: Power-Up, Calibration, and Belt Tensioning
Before you step on the deck, you must perform the factory incline calibration. Plug the machine into a dedicated 15-amp circuit (avoid sharing the outlet with high-draw appliances like space heaters or microwaves to prevent tripping the breaker during high-incline sprints).
The Calibration Sequence
- Insert the red magnetic safety key into the console.
- Press and hold the 'Incline Up' and 'Speed Down' buttons simultaneously for 5 seconds until the screen reads 'CAL'.
- The deck will automatically rise to its maximum 15% grade and lower to 0%. Do not stand on the belt during this process.
- Once the console returns to the home screen, the calibration is complete.
Checking Belt Tension and Alignment
Shipping vibrations can shift the rear roller. Turn the treadmill on to 1 MPH and observe the belt tracking. If the belt drifts to the left, insert the provided 6mm Allen wrench into the left rear roller cap and turn it clockwise by exactly one-quarter turn. Wait 30 seconds for the belt to self-center. Never adjust the tension bolts more than a half-turn at a time, as overtightening will destroy the motor drive belt and void your warranty.
The 'Two-Finger' Rule: To verify proper belt tension, turn the machine off and slide your hand under the center of the running belt. You should be able to lift it exactly 2 to 3 inches off the deck. If it is tighter than this, you risk premature motor burnout; if looser, the belt will slip under heavy foot strikes.
Long-Term Maintenance: Protecting Your Investment
Consistent cardiovascular exercise is vital; the American Heart Association recommends at least 150 minutes of moderate-intensity aerobic activity per week to reduce cardiovascular disease risk. To ensure your Stride 6 survives this weekly volume, adhere to a strict maintenance schedule.
- Lubrication: The Stride 6 deck is pre-lubricated at the factory, but requires reapplication every 150 miles or 6 months. Use only 100% silicone treadmill lubricant (approx. 1 oz per application). Never use WD-40 or petroleum-based oils, which will dissolve the phenolic resin coating on the deck.
- Motor Hood Vacuuming: Every 90 days, remove the four Phillips screws on the front motor hood and use a soft brush vacuum attachment to clear dust from the motor fan and drive belt. Accumulated dust acts as a thermal insulator, causing the 3.0 CHP motor to overheat and trigger thermal shutdowns.
Final Verdict: Is the Stride 6 Worth the Assembly Effort?
Setting up the Stride 6 treadmill takes approximately 90 minutes for a single user, or 45 minutes with a partner. While the Sole F80 offers a slightly wider 22-inch deck and a marginally larger motor for $200 less, the Stride 6 counters with a vastly superior, paywall-free touchscreen interface, a quieter acoustic motor housing, and a more forgiving 6-zone elastomer cushioning system. By carefully following this installation walkthrough—specifically avoiding the data cable pinch and properly torquing the uprights—you will secure a highly reliable, tech-forward cardio centerpiece that easily rivals machines costing twice as much.
More gear to consider
All reviews
Beginner Noise Guide: Cardio Machines & Treadmill Sprints for Fat Loss

ProForm Treadmill Not Working? Best Walking Pad Alternatives

BXT6 Treadmill vs Sole F63: Home Gym Noise Level Showdown
Home Stair Climber Setup vs Sole F80 Treadmill User Manual

Walking Pad vs Treadmill: Does Elliptical Burn More Calories Than Treadmill?
