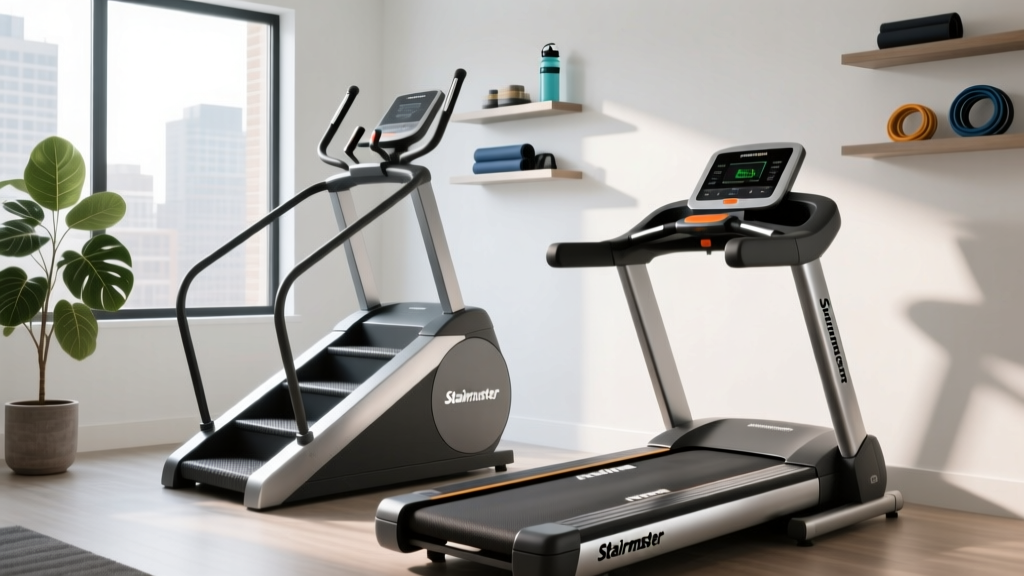
What's Better, StairMaster or Incline Treadmill? Motor & Setup Guide
Deciding what's better, StairMaster or incline treadmill? We compare motor sizes, horsepower requirements, and provide a complete installation walkthrough.

If you are researching what's better stairmaster or incline treadmill, you have likely noticed that most fitness blogs focus purely on calorie burn and joint impact. While biomechanics matter, the true differentiator between these two cardio titans lies hidden beneath the plastic hood: the drivetrain. As a senior equipment reviewer analyzing 2026 home gym standards, I can tell you that understanding the treadmill motor size and horsepower guide is critical before you drop $2,500+ on a machine that might trip your breakers or burn out its actuator.
In this comprehensive guide, we will dissect the mechanical engineering of high-incline treadmills versus chain-driven steppers, provide a definitive motor sizing matrix, and walk you through the brutal reality of installing these heavy-duty cardio machines in your home gym.
The Drivetrain Divide: Treadmill Motors vs. Stepper Actuators
When comparing a premium incline treadmill (like the NordicTrack x22i or Sole F85) to a commercial-grade StairMaster (like the SC916 or FreeClimber), you are looking at two completely different approaches to mechanical resistance.
The Incline Treadmill: A Tale of Two Motors
A high-incline treadmill actually houses two distinct motors. The Drive Motor is a Continuous Duty DC motor responsible for pulling the belt. When you elevate the deck to a 30% or 40% grade, gravity fights the belt. A weak motor will experience 'belt hesitation'—a dangerous stuttering effect when your foot strikes the deck. The second motor is the Lift Actuator, a high-torque screw-drive motor responsible for physically pushing hundreds of pounds of steel decking upward.
The StairMaster: Alternators and Chain Drives
StairMasters do not use a traditional belt drive. Modern steppers rely on a heavy-duty chain-and-sprocket system connected to an industrial alternator or a specialized stepper motor. Because the resistance is generated magnetically or via mechanical friction on a central axle rather than pulling a wide rubber belt against gravity, StairMasters don't use the 'Horsepower' metric in the same way. Instead, they are rated by torque and alternator wattage.
⚠️ Electrical Warning: Never plug a 4.0+ CHP incline treadmill into a standard 15-amp bedroom circuit. The initial startup surge (inrush current) of a high-torque drive motor combined with the lift actuator can easily draw 18-20 amps, tripping the breaker or melting standard 14-gauge copper wiring. Always install a dedicated 20-amp circuit with 12-gauge wire for high-incline treadmills.Treadmill Motor Size and Horsepower Guide (2026 Standards)
Marketing departments love to advertise 'Peak Horsepower.' Ignore it. Peak HP only measures the maximum output the motor can sustain for a fraction of a second before thermal shutoff. You must look for CHP (Continuous Horsepower), which measures the motor's ability to sustain power under load over a 60-minute workout.
Below is the definitive 2026 matrix for sizing your treadmill motor based on user weight and target incline. If you plan to simulate hiking at a 30%+ grade, the friction and gravitational load multiply exponentially.
| User Weight | Max Incline Target | Minimum Drive CHP | Lift Motor Spec | Required Belt Ply |
|---|---|---|---|---|
| Under 150 lbs | 15% Grade | 3.0 CHP | Standard Actuator | 2-Ply |
| 150 - 200 lbs | 20% Grade | 3.5 CHP | High-Torque Actuator | 2-Ply |
| 200 - 250 lbs | 30% Grade | 4.0 CHP | Heavy-Duty Screw Drive | 4-Ply |
| 250+ lbs | 40% Grade | 4.5+ CHP | Commercial Actuator | 4-Ply Urethane |
Expert Insight: If you buy a 3.0 CHP treadmill and routinely walk at a 20% incline while weighing 210 lbs, the motor will run at 110% of its continuous thermal limit. Within 6 to 8 months, the internal windings will degrade, leading to the dreaded 'E1' or 'E2' motor communication error codes.
Complete Setup and Installation Walkthrough: High-Incline Treadmills
Because high-incline treadmills require massive motors and reinforced lift actuators, their physical footprint and weight distribution make installation a two-person, heavy-duty job. Here is the step-by-step setup walkthrough for machines like the ProForm Pro 9000 or NordicTrack x-series.
Phase 1: Spatial and Electrical Prep
- Clearance Mapping: High-incline treadmills require a minimum of 84 inches of vertical clearance. When the deck raises to 40%, the front of the treadmill can elevate over 3 feet off the ground. Measure from the floor to the ceiling, accounting for ceiling fans and light fixtures.
- Floor Load Distribution: A 4.0 CHP incline treadmill base weighs between 280 and 350 lbs. Add a 220 lb user, and the point-load on the front roller exceeds 400 lbs. Place a 3/4-inch thick rubber equipment mat beneath the unit to distribute the load and prevent the incline feet from punching into drywall or softwood subfloors.
Phase 2: Unboxing and Base Positioning
Do not attempt to lift the motor base by the plastic shroud. The drive motor and steel flywheel make the front end wildly asymmetrical. Use a furniture dolly to move the base to its final location. Crucial Step: Ensure the base is perfectly level side-to-side using a 24-inch spirit level before attaching the uprights. If the base is skewed, the incline actuator will bind and shear its internal plastic gears when attempting to raise the deck.
Phase 3: Upright Assembly and Wiring
This is where 90% of home-installation failures occur. The uprights house the data cables connecting the console to the motor control board (MCB).
- Locate the red and white Molex connectors. Ensure the pins are perfectly aligned before pushing them together. A bent pin will result in the console turning on, but the incline motor refusing to calibrate.
- Secure the wiring harness with the provided zip-ties inside the upright tube. If the wires rest against the incline lift screw, the moving actuator will eventually pinch and sever the data cable.
Phase 4: Belt Tension and Actuator Calibration
Once assembled, plug the machine into your dedicated 20-amp circuit. Before stepping on the belt, initiate the factory calibration mode (usually achieved by holding the 'Incline Up' and 'Speed Up' buttons simultaneously while inserting the safety key). The machine will automatically raise to its maximum 40% grade and lower to 0%. This allows the MCB to map the exact voltage range of the lift actuator. Finally, check belt tension: you should be able to lift the center of the belt exactly 2.5 inches off the deck. Any tighter, and you add unnecessary drag to the drive motor; any looser, and the belt will slip on steep inclines.
StairMaster Installation: How It Compares
If you opt for the StairMaster route, the setup is fundamentally different. Because steppers like the SC916 use a central alternator and chain drive rather than a massive front-loaded DC motor, the base is lighter (around 150-180 lbs) but the machine is much taller and top-heavy. Installation focuses less on electrical draw and more on mechanical chain tensioning and ensuring the step pedals are perfectly level to prevent premature sprocket wear. Furthermore, steppers do not require the massive 84-inch front-clearance that an extending incline treadmill demands, making them ideal for rooms with sloped ceilings or low-hanging ductwork.
Biomechanics and Maintenance Realities
Beyond the hardware, your choice should align with your cardiovascular goals and maintenance tolerance. According to the American Heart Association, achieving optimal cardiovascular health requires a mix of moderate and vigorous aerobic activity. Both machines excel here, but they achieve it differently.
An incline treadmill allows for a natural walking gait while artificially increasing the metabolic equivalent (MET) of the task. It is highly effective for posterior chain development (glutes and hamstrings). However, the maintenance is higher: the belt requires 100% pure silicone lubrication every 150 miles, and the motor hood must be vacuumed monthly to prevent dust ingestion, which acts as an insulator and causes the drive motor to overheat.
Conversely, the StairMaster forces a continuous concentric lifting motion. The Centers for Disease Control and Prevention (CDC) notes that vigorous-intensity activities like stair climbing yield immense cardiovascular benefits in shorter timeframes. Maintenance on a StairMaster is largely limited to wiping down the step pedals to prevent slip hazards and having a technician re-tension the internal chain every 2 to 3 years.
Expert Verdict: Which Machine Wins for Your Home Gym?
So, what's better stairmaster or incline treadmill? The answer depends entirely on your home's infrastructure and your mechanical tolerance.
Choose the High-Incline Treadmill if: You have a dedicated 20-amp electrical circuit, high ceilings, and prefer low-impact, steady-state hiking simulations. Just ensure you invest in a 4.0+ CHP model to handle the gravitational load without burning out the drive motor.
Choose the StairMaster if: You have limited floor space, standard 15-amp electrical circuits, and prefer high-intensity, sweat-dripping interval workouts. The alternator-based drivetrain is incredibly robust, requires less daily maintenance, and completely bypasses the 'horsepower' marketing traps associated with treadmills.
By looking past the digital screens and focusing on the motor size, horsepower requirements, and physical installation realities, you can confidently select the machine that will survive years of relentless use in your home gym.
More gear to consider
All reviews
Image 15.0 R Treadmill: 2026 Features & Buying Guide

Best Interval Training Running Treadmill: Motor HP Guide

Compact Portable Cardio Options: Avoiding a Worn Out Treadmill Belt

Nordic Track Treadmill T6.5s vs Under Desk Pads: 2026 Office Value

Elliptical vs Treadmill: Calories Burned Walking Incline Treadmill
