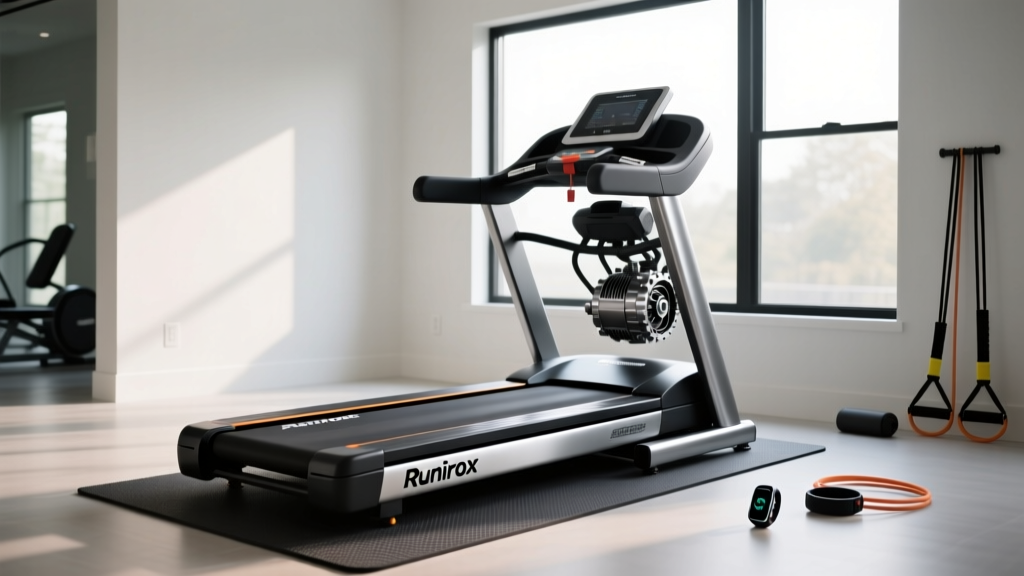
Runirox Treadmill Setup: Motor Horsepower & Installation Guide
Master your Runirox treadmill setup with our complete installation walkthrough, focusing on motor horsepower, electrical requirements, and calibration.

Pre-Installation Motor & Electrical Checklist
- Verify Model: Runirox Elite 3.0 (3.0 CHP) or Runirox Sprint X (2.5 CHP).
- Circuit Requirement: Dedicated 15-amp (Sprint X) or 20-amp (Elite 3.0) 120V circuit.
- Outlet Type: Standard 3-prong grounded. Do NOT use GFCI outlets.
- Clearance: Minimum 24 inches on all sides for motor ventilation.
Setting up a new treadmill is often treated as a simple matter of bolting uprights together and plugging it in. However, as any fitness equipment technician will tell you, the true heart of your machine is its motor. When you unbox a premium machine like the Runirox treadmill, understanding the relationship between its motor size, horsepower rating, and your home's electrical infrastructure is critical for a safe installation and long-term durability. This complete setup and installation walkthrough will guide you through inspecting, powering, and calibrating your Runirox treadmill with a specific focus on motor dynamics.
Unboxing and Inspecting the Runirox Motor Housing
Before you begin assembling the handrails and console, you must inspect the motor shroud. The Runirox Elite 3.0 (retailing around $1,499 in 2026) and the Runirox Sprint X ($1,199) ship with the motor pre-mounted to the steel frame.
- Remove the Transit Shroud: Use the included T20 Torx wrench to remove the four screws securing the front plastic motor cover.
- Inspect the Flywheel: Look at the front roller flywheel. The Elite 3.0 features a heavy 6.5 lb cast-iron flywheel, while the Sprint X uses a 4.5 lb composite wheel. A heavier flywheel reduces the initial torque spike on the motor when you step on the belt.
- Check the Cooling Vents: Ensure the internal DC motor fan is free of packaging debris. Blocked vents are the number one cause of thermal shutdowns during the first week of use.
- Verify the Data Plate: Locate the silver sticker on the motor casing. Confirm the Continuous Horsepower (CHP) matches your order. This plate also lists the exact amperage draw, which dictates your electrical setup.
Demystifying Treadmill Motor Size: HP vs. CHP
To properly install and configure your machine, you must understand the power metrics printed on that data plate. The fitness industry is notorious for misleading horsepower claims. According to Consumer Reports, buyers must look past 'Peak Horsepower' and focus exclusively on 'Continuous Duty Horsepower' (CHP).
Peak HP vs. Continuous HP
Peak HP is the absolute maximum power the motor can generate for a fraction of a second before it burns out. It is a marketing metric. CHP, on the other hand, is the power the motor can sustain continuously during a grueling 60-minute run without overheating.
- 2.0 CHP: Suitable only for light walking. Not recommended for running.
- 2.5 CHP (Runirox Sprint X): Ideal for walking, jogging, and users under 200 lbs.
- 3.0 CHP (Runirox Elite 3.0): The gold standard for home running, supporting users up to 300 lbs at speeds up to 12 mph.
- 4.0+ CHP: Reserved for commercial gym environments or elite sprinters.
Furthermore, Runirox utilizes high-torque DC (Direct Current) motors rather than AC motors. DC motors are quieter, more energy-efficient, and provide smoother torque delivery at low speeds, making them perfect for residential setups.
| Motor Size (CHP) | Ideal User Weight | Max Speed | Flywheel Mass | Required Circuit |
|---|---|---|---|---|
| 2.0 CHP | Under 160 lbs | 8.0 mph | 3.0 lbs | Standard 15A |
| 2.5 CHP (Sprint X) | Up to 225 lbs | 10.0 mph | 4.5 lbs | Dedicated 15A |
| 3.0 CHP (Elite 3.0) | Up to 300 lbs | 12.0 mph | 6.5 lbs | Dedicated 20A |
| 4.0 CHP (Commercial) | 300+ lbs | 14.0+ mph | 8.0+ lbs | 220V / 30A |
Electrical Setup: Matching Circuits to Motor Horsepower
The most common installation failure for high-CHP treadmills is electrical. A 3.0 CHP motor translates to roughly 2,238 watts of continuous mechanical output, but accounting for efficiency losses and startup surges, it can pull up to 14 to 16 amps under heavy load.
Step-by-Step Power Connection
- Identify a Dedicated Circuit: Your Runirox Elite 3.0 requires a dedicated 20-amp, 120-volt circuit. 'Dedicated' means no other appliances, lights, or electronics are drawing power from that same breaker. Sharing a circuit with a refrigerator or microwave will result in tripped breakers and potential damage to the treadmill's lower control board.
- Avoid GFCI Outlets: The National Electrical Code (NFPA 70) mandates GFCI outlets in garages and basements. However, treadmill motors generate static electricity and power surges upon startup that will cause 'nuisance tripping' on GFCI receptacles. If your gym is in a garage, have an electrician install a standard grounded, non-GFCI outlet on a dedicated breaker specifically for your equipment.
- Never Use Extension Cords: Extension cords introduce voltage drops. A voltage drop forces the DC motor to draw higher amperage to maintain speed, leading to overheated wiring and voided warranties. Plug the heavy-duty 10-gauge Runirox power cord directly into the wall.
Technician's Warning: If your lights dim slightly when the Runirox treadmill accelerates to 10 mph, your circuit is undersized or shared. Stop use immediately and consult an electrician to prevent melting the internal motor windings.
Belt Alignment and Motor Strain Calibration
Once the machine is assembled and powered, you must calibrate the running belt. The tension of the belt directly dictates the physical load on the motor. An over-tightened belt can increase amp draw by up to 40%, causing a 3.0 CHP motor to perform like a strained 2.0 CHP motor.
The Two-Finger Tension Test
- Stand on the side rails and start the treadmill at 2.0 mph.
- Reach down and attempt to lift the edge of the running belt in the middle of the deck.
- You should be able to lift the belt exactly two inches (or fit two fingers underneath) with moderate resistance.
- If the belt is too tight, use the provided hex key to turn the rear roller adjustment bolts counter-clockwise by exactly one-quarter (1/4) turn on both the left and right sides.
- If the belt slips when you step on it, tighten it clockwise by 1/4 turn.
After adjusting the physical tension, run the automated calibration sequence. Hold the 'Speed Up' and 'Incline Up' buttons simultaneously for 5 seconds. The Runirox console will cycle the belt through all speeds and inclines, allowing the lower control board to map the motor's PWM (Pulse Width Modulation) curve to the exact friction profile of your specific belt.
Smart Motor Diagnostics and First Run
As of early 2026, Runirox has integrated smart-motor diagnostics into their companion app. During your first 20-minute test run, connect your phone via Bluetooth and open the 'Hardware Diagnostics' tab. Monitor the Motor Temperature and Live Amp Draw.
Under normal conditions (a 180 lb user running at 6.0 mph on a flat incline), the Elite 3.0 should draw between 6 and 8 amps, and the motor housing temperature should remain below 115°F (46°C). If you observe amp spikes above 12 amps during steady-state running, re-check your belt tension and ensure the deck is properly lubricated with 100% silicone treadmill lube.
Frequently Asked Questions (FAQ)
Can I upgrade the motor on my Runirox Sprint X later?
No. The lower control board, wiring harness, and transformer on the Sprint X are specifically calibrated for the 2.5 CHP motor. Installing a 3.0 CHP motor would require replacing the entire electronic drive system, which costs more than simply purchasing the Elite 3.0 model upfront.
Why does my Runirox treadmill smell like burning rubber during the first week?
A slight odor during the first 5 to 10 hours of use is normal. This is the factory wax on the running belt and the protective coating on the motor windings heating up and curing. Ensure the room is well-ventilated. If the smell persists beyond two weeks or is accompanied by smoke, unplug the machine immediately and check for a misaligned belt rubbing against the side rails.
Does incline training damage the motor?
Running at a 15% max incline shifts the load from the drive motor to the lift motor. However, walking at a steep incline requires massive torque from the drive motor because the flywheel momentum is minimized at low speeds. If you primarily do steep incline walking, the 3.0 CHP Elite 3.0 is highly recommended over the 2.5 CHP model to prevent premature wear on the drive motor's carbon brushes.
More gear to consider
All reviews
Air Bike vs Assault Bike: Budget & Lifetime Treadmill ROI

Noise Level Comparison: Acezoe Walking Pad Treadmill with Incline

How to Prevent a Skin Burn From Treadmill Use: 2026 Buying Guide

Is Walking Backwards on a Treadmill Good for You? Air Bike vs Assault Bike Guide
Walking Pad Review 2026: Finding a Treadmill Water Bottle Holder
