
Rowing vs Treadmill: Technique, Buying & Treadmill Maintenance Oil
Compare top 2026 rowers and treadmills. Master rowing technique, explore buying tips, and learn exactly when to apply treadmill maintenance oil.

The Ultimate 2026 Cardio Showdown: Rower vs. Treadmill
As we navigate the 2026 home fitness landscape, the debate between investing in a premium rowing machine or a high-end treadmill remains one of the most common dilemmas for garage gym builders. Both machines offer elite cardiovascular conditioning, but they demand vastly different spatial footprints, biomechanical techniques, and long-term maintenance routines. According to the American Heart Association, adults need at least 150 minutes of moderate-intensity aerobic activity per week, a goal easily achieved on either machine. However, the deciding factor often comes down to technique mastery and the unglamorous reality of equipment upkeep—specifically, the critical role of treadmill maintenance oil versus rower chain care.
In this head-to-head comparison and buying guide, we break down the top models on the market, teach you the biomechanics of the perfect rowing stroke, and provide a masterclass on keeping your treadmill belt from burning out.
Head-to-Head Product Comparison Matrix
Before diving into technique and maintenance, let us look at the raw data comparing the industry benchmarks for both categories. Pricing reflects average direct-to-consumer MSRP as of early 2026.
| Model | Type | Price (2026) | Footprint (L x W) | Primary Maintenance |
|---|---|---|---|---|
| Concept2 RowErg | Air Rower | $990 | 94" x 24" | Chain oiling, monitor battery |
| Rogue Echo Rower | Magnetic Rower | $1,250 | 86" x 21" | Rail wiping, magnetic dusting |
| NordicTrack Commercial 1750 | Motorized Treadmill | $1,999 | 81" x 32" | Belt alignment, silicone lubrication |
| Sole F85 | Motorized Treadmill | $1,499 | 80" x 35" | Deck waxing, treadmill maintenance oil |
The Rowing Machine Buying Guide: What Actually Matters
When shopping for a rowing machine, consumers are often distracted by HD touchscreens and integrated streaming classes. While entertaining, these features do not dictate the longevity or biomechanical safety of the machine. Focus on these three core specifications:
1. Rail Length and Inseam Clearance
If you are taller than 6'2", you must verify the rail length. The Concept2 RowErg accommodates up to a 38-inch inseam on the standard rail. If you require more, you must purchase the extended rail, which adds roughly 6 inches of travel. Magnetic rowers like the Rogue Echo often have fixed rails, making them less accommodating for exceptionally tall athletes.
2. Resistance Profile: Air vs. Magnetic
Air resistance (fan-based) provides a dynamic, infinitely variable drag that scales perfectly with your effort. The harder you pull, the heavier it feels. Magnetic resistance offers a quieter, smoother stroke with exact, adjustable drag factors, but it lacks the raw, aggressive 'catch' feeling that competitive rowers prefer. For pure fitness and HIIT, air remains the gold standard.
3. The Drag Factor (Not Just the Damper)
A common beginner mistake is setting the side damper to 10, assuming it equates to 'maximum workout.' In reality, a damper setting of 10 mimics rowing a heavy, sluggish rowboat. Most elite athletes and Concept2's official technique guides recommend a damper setting between 3 and 5, which yields a drag factor of 100-130, closely simulating the feel of a sleek racing shell on water.
Mastering the Rowing Technique: The 4-Phase Stroke
Unlike a treadmill, where you simply step on and walk, a rowing machine requires technical proficiency. Poor form leads to lumbar strain and inefficient power transfer. The stroke is broken into four distinct phases:
- The Catch: Shins are perfectly vertical, torso is hinged forward at 11 o'clock, and arms are completely straight. The lats should be engaged, 'hanging' off the handle.
- The Drive: This is a pushing motion, not a pulling one. The power distribution is exactly 60% legs, 20% core swing, and 20% arm pull. Do not bend your elbows until your legs are nearly fully extended.
- The Finish: Legs are flat, core is braced with a slight backward lean (11 o'clock), and the handle is pulled to the lower sternum. Wrists remain completely flat.
- The Recovery: The reverse of the drive. Arms extend first, torso hinges forward past the knees, and finally, the legs bend to slide back to the catch. The recovery should take twice as long as the drive (a 2:1 ratio).
If your hips shoot backward before your shoulders move during the Drive phase, you are 'shooting the slide.' This disconnects your leg power from the handle and places massive shear force on your lower back. Focus on keeping your torso angle static until the handle passes your knees.
The Treadmill Side: Belt Care and Treadmill Maintenance Oil
While rowers require occasional chain lubrication and bolt tightening, treadmills demand a much stricter, schedule-based maintenance regimen. The friction between the running belt and the wooden/MDF deck generates immense heat. Without proper lubrication, the treadmill's motor will overwork, draw excessive amperage, and eventually burn out the control board—a repair that routinely costs upwards of $400.
Choosing the Right Lubricant
You must use 100% silicone treadmill maintenance oil. Never use WD-40, petroleum-based oils, or household spray lubricants. These chemicals will degrade the PVC backing of the running belt, causing it to stretch, fray, and ultimately void your manufacturer's warranty. Most premium brands, including Sole and NordicTrack, sell proprietary 100% silicone liquid or gel kits.
Step-by-Step Application Guide
- Frequency: Apply 15ml of silicone oil per side every 3 months, or every 130 miles of use, whichever comes first.
- Preparation: Unplug the treadmill from the wall. Loosen the rear roller bolts using an Allen wrench exactly 3 full turns to lift the belt.
- Application: Squeeze the applicator tube under the belt, aiming for the dead center of the deck. Squeeze exactly half the bottle (15ml) while moving from the front roller to the rear.
- Distribution: Tighten the bolts back to their original position. Plug the machine in, stand on the side rails, and run the belt at 2.0 MPH for 3 minutes to distribute the oil evenly across the deck.
If you notice a momentary hesitation or 'stutter' in the belt when your foot strikes the deck at walking speeds, or if the edges of the belt feel hot to the touch immediately after a run, your deck is bone dry. Stop using the machine immediately and apply treadmill maintenance oil to prevent permanent motor damage.
Verdict: Which Machine Wins for Your Home Gym?
If your primary goal is full-body conditioning, low-impact joint health, and minimal spatial footprint (since rowers can be stored vertically), the Concept2 RowErg is the undisputed champion. It requires virtually no expensive replacement parts and offers a lifetime of durability.
However, if you are training for road races, prefer passive entertainment while exercising, or struggle with the technical learning curve of the rowing stroke, a treadmill like the Sole F85 is the better investment. Just be prepared to commit to a strict quarterly schedule of belt alignment and treadmill maintenance oil to protect your $1,500+ investment.
More gear to consider
All reviews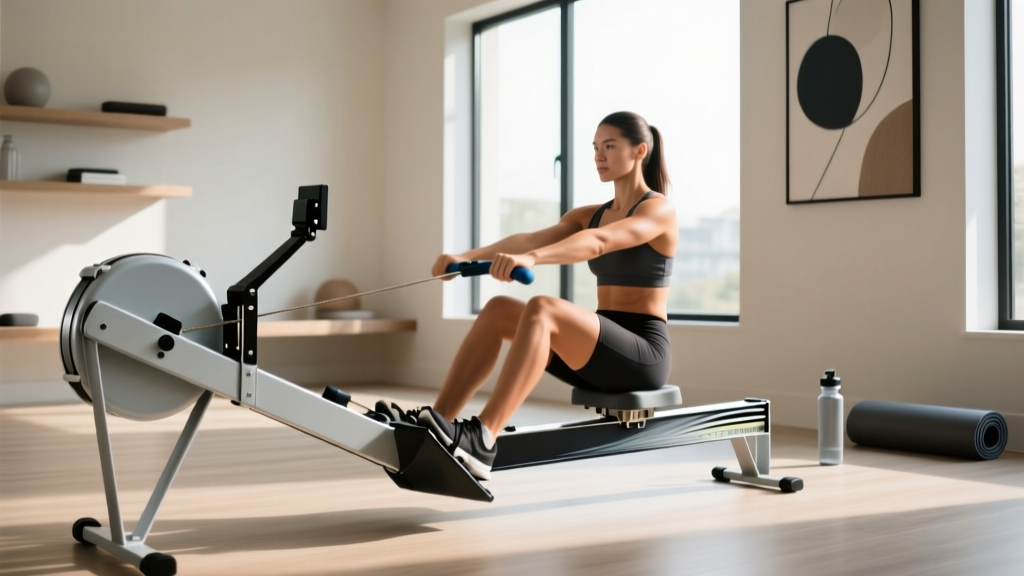
Rowing Machine Setup: Technique vs Weight Capacity for Treadmills
Manual vs Motorized Treadmills: Setup with RUNN Treadmill Sensor

Beyond Treadmill Pictures: Top Folding Models for Small Spaces 2026
Troubleshooting Your Pregnancy Treadmill Workout: Curved vs Motorized Mistakes

WalkingPad R1 Treadmill Motor Size & Horsepower Guide
