Rowing Machine Buying Guide & TR150 Treadmill Setup
Master rowing machine buying, technique, and installation. Compare space, setup costs, and assembly with the TR150 treadmill for your home gym.

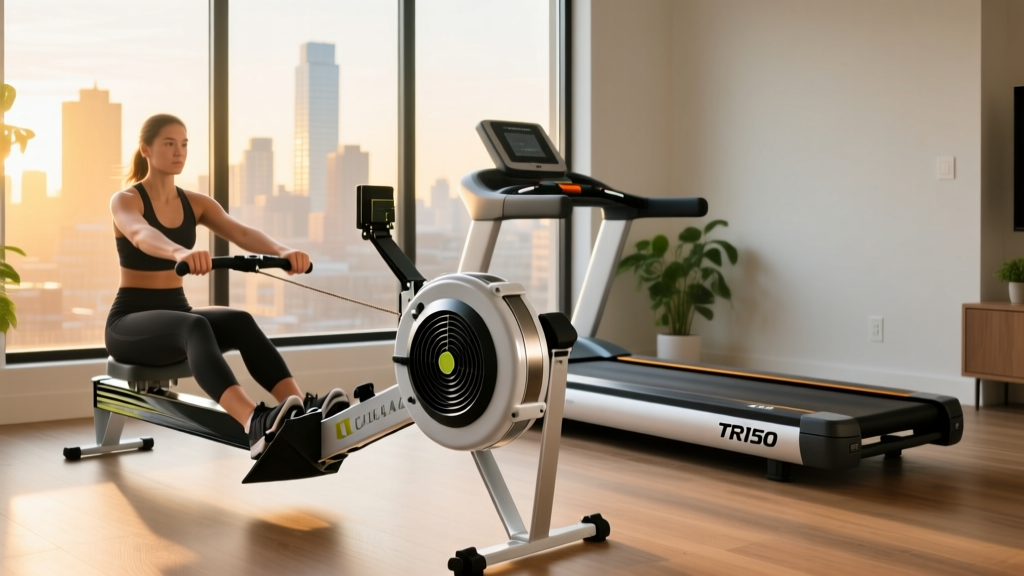
Building a comprehensive home cardio zone in 2026 requires more than just picking a machine; it demands a strategic approach to spatial planning, assembly, and biomechanics. Many home gym owners start with a compact folding model like the TR150 treadmill, appreciating its 2.5 HP continuous duty motor and space-saving vertical fold. However, as fitness goals evolve, the need for a full-body, low-impact counterpart becomes undeniable. This is where the indoor rowing machine enters the equation.
While the TR150 treadmill excels at lower-body endurance and convenient walking pad functionality, a rowing ergometer engages approximately 86% of the body's musculature. In this complete setup and installation walkthrough, we will dissect the rowing machine buying process, break down professional rowing technique, and directly compare the spatial and structural installation requirements of a premium rower against the popular TR150 treadmill.
The 2026 Rowing Machine Buying Matrix
Unlike motorized treadmills that rely on belt friction and incline motors, rowing machines utilize distinct resistance profiles. Choosing the right drive system is critical for noise mitigation, maintenance, and biomechanical feedback. Below is a comparative breakdown of the primary resistance types dominating the 2026 market.
| Resistance Type | Top 2026 Model | Price Range | Noise Level | Maintenance Profile |
|---|---|---|---|---|
| Air | Concept2 RowErg | $1,100 - $1,300 | High (Whoosh) | Low (Chain oiling, dust) |
| Water | WaterRower Natural | $1,200 - $1,500 | Medium (Sloshing) | Medium (Water purification) |
| Magnetic | NordicTrack RW600 | $600 - $900 | Very Low | Low (Belt tension checks) |
| Electromagnetic | Hydrow Rowing Machine | $2,495 - $2,795 | Virtually Silent | High (Software, electronics) |
Complete Setup and Installation Walkthrough
Installing cardio equipment is where most DIY home gym projects fail. Let us compare the spatial, electrical, and structural installation requirements of the TR150 treadmill against a standard air rower like the Concept2 RowErg to help you plan your layout.
Step 1: Spatial Clearance and Footprint Analysis
The TR150 treadmill requires a specific operational envelope for safety. According to manufacturer safety standards, you must maintain a 20-inch clearance on both sides of the belt and a 78-inch height clearance to accommodate tall runners and the motor hood's vertical oscillation. When folded, the TR150 shrinks to roughly a 25" x 25" base, but it demands a 78-inch vertical clearance to remain stored.
Conversely, a rowing machine like the Concept2 RowErg demands a massive 95-inch length and 24-inch width during operation, but only requires a 38-inch height clearance. This makes rowers ideal for rooms with sloped ceilings or low-hanging fixtures, provided you have the linear floor space.
Step 2: Electrical and Flooring Requirements
- Power Delivery: The TR150 treadmill requires a dedicated 120V/15A grounded outlet. Sharing this circuit with a space heater or AC unit will trip the breaker due to the motor's startup surge. Water and air rowers require zero electrical infrastructure, allowing you to place them in garages, basements, or off-grid spaces.
- Subfloor Protection: Treadmills generate high-impact vertical force. You must install a 3/8-inch vulcanized rubber mat beneath the TR150 to prevent subfloor cracking and dampen acoustic transfer. Rowing machines generate horizontal sheer force; a high-density PVC mat is sufficient to catch rail dust and prevent the front stabilizer from creeping forward during high-drag sprints.
Step 3: Assembly and Calibration
Assembling the TR150 treadmill typically involves hoisting an 80-pound main deck, securing the uprights, and tensioning the walking belt. Rowing machines are significantly lighter (the Concept2 weighs just 57 pounds) and usually only require attaching the monorail to the front flywheel housing using four heavy-duty carriage bolts. Calibration Note: Ensure the monorail junction is perfectly flush. A 1-millimeter misalignment will cause the seat wheels to 'clunk' during the recovery phase, degrading the user experience and accelerating wheel wear.
Mastering Rowing Technique: Avoiding Common Failure Modes
Transitioning from a treadmill to a rower requires a complete neurological shift. On a TR150 treadmill, the belt dictates your pace. On a rowing machine, you are the engine. Poor technique on a rower does not just reduce caloric output; it actively risks lumbar injury. The Cleveland Clinic notes that proper rowing form is essential for protecting the lower back while maximizing cardiovascular output.
The rowing stroke is divided into four distinct phases. Mastering this sequence is non-negotiable for long-term joint health.
- The Catch: Shins are vertical (not compressed past 90 degrees), torso is hinged forward at 11 o'clock, and lats are engaged to connect the arms to the core. Arms are straight, gripping the handle loosely.
- The Drive: This is a pushing motion, not a pulling motion. The power split is 60% legs, 20% core hinge, and 20% arm draw. The legs must fully extend before the arms begin to bend.
- The Finish: Legs are flat, torso is hinged slightly back at 1 o'clock, and the handle is drawn to the lower sternum. Shoulders remain depressed, away from the ears.
- The Recovery: The exact reverse of the drive. Arms extend first, torso hinges forward past the knees, and finally, the knees bend to slide back to the catch.
'The most common failure mode for beginners is 'shooting the slide'—initiating the drive with the hips before the legs have pushed, which transfers the load directly to the lumbar spine. Focus on the 60/20/20 power sequence.' — Adapted from the Concept2 Technique Guide.
Long-Term Maintenance: Belt Tension vs. Bungee Cords
Every cardio machine requires a strict maintenance schedule to survive past its warranty period. The maintenance paradigms for treadmills and rowers are vastly different.
TR150 Treadmill Maintenance
The primary failure point for the TR150 treadmill is belt friction. You must apply 100% silicone lubricant between the belt and the deck every 150 miles or every 3 months. Additionally, you must check belt tracking monthly; if the belt drifts left, tighten the left rear roller bolt by a quarter-turn. Failure to do so will result in a frayed belt edge and eventual motor burnout due to excessive amp draw.
Rowing Machine Maintenance
Air and water rowers require mechanical upkeep. For air rowers, the nickel-plated steel chain must be wiped down and oiled with purified mineral oil every 50 hours of use. More importantly, the internal bungee cord that retracts the handle will lose elasticity over time. If the handle does not retract briskly to the cage, you must open the flywheel housing and adjust the bungee tension screw. For water rowers, you must drop a chlorine purification tablet into the tank every 6 months to prevent algae buildup, which can degrade the polycarbonate tank and ruin the impeller seals.
Final Verdict: Integrating Both into Your Routine
The TR150 treadmill remains an unparalleled tool for daily step-count goals, incline walking, and low-impact jogging in a compact footprint. However, integrating a rowing machine into your home gym provides the necessary horizontal-plane resistance and posterior chain engagement that treadmills inherently lack. By understanding the distinct spatial, electrical, and biomechanical requirements of both machines, you can engineer a home cardio setup in 2026 that is both structurally sound and physiologically complete.
More gear to consider
All reviews
Compact Portable Cardio: HIIT Workout Plan Treadmill Budget Breakdown
Does Nike Run Club Work on Treadmill? Stationary Bike Budget Guide
Treadmill vs Outdoor: 2026 Belt Maintenance Market Data

The Long Walk Treadmill Screening: Elliptical vs Treadmill 2026

Under Desk Treadmill for Office Use Review: Bowflex vs Sole Treadmill