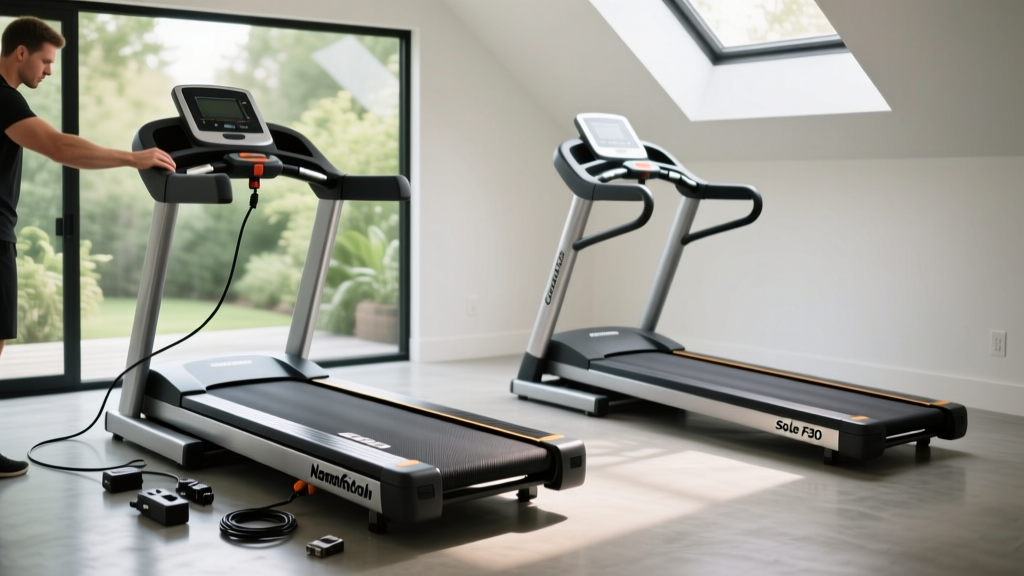
Setup Guide: NordicTrack T Series 16 vs Curved Manual Treadmills
Compare the setup process of the NordicTrack T Series 16 treadmill against curved manual models. Get step-by-step installation tips and space requirements.

The Hidden Cost of Home Gym Equipment: Installation and Setup
When outfitting a home gym in 2026, the debate between curved manual treadmills and traditional motorized models usually centers on biomechanics, joint impact, and price. However, as any seasoned fitness equipment technician will tell you, the true differentiator that catches buyers off guard is the setup and installation process. In this comprehensive walkthrough, we will contrast the complete installation of the highly popular NordicTrack T Series 16 treadmill against premium curved manual alternatives like the Rogue Echo and AssaultRunner Elite. Understanding these physical and electrical requirements is critical before you finalize your purchase.
According to CPSC guidelines on exercise equipment, improper assembly and placement are leading causes of home gym injuries and equipment failure. Whether you are bolting together a motorized chassis or maneuvering a 280-pound curved frame, precision matters.
Unboxing and Space Requirements: Motorized vs. Manual
The physical footprint and unboxing experience of these two treadmill categories are vastly different. The NordicTrack T Series 16 treadmill arrives in a single, elongated box measuring roughly 78 x 30 x 9 inches, weighing approximately 155 lbs. Because it features a folding deck with EasyLift technology, the shipping box is manageable for two people to move into a second-story room.
Conversely, curved manual treadmills do not fold. An AssaultRunner Elite or Rogue Echo ships in a massive, reinforced wooden crate or heavy-duty cardboard box, often weighing between 280 and 310 lbs. The footprint is fixed at roughly 68 x 33 inches. You cannot tilt a curved treadmill on its side without risking severe damage to the plastic shrouds and slat-belt alignment. You will need a clear, straight path from your front door to the gym space, and ideally, three people or a professional delivery service to maneuver it.
Expert Space Planning Tip
Always add 24 inches of clearance behind any treadmill for safety. For the NordicTrack T Series 16, account for the 16% maximum incline elevation, which raises the rear of the deck by several inches. For curved treadmills, ensure your ceiling height accommodates the 12-inch curve apex plus the user's height at peak stride.
Step-by-Step Installation Walkthrough: NordicTrack T Series 16
Setting up a motorized treadmill like the NordicTrack T Series 16 is a modular process. The base and motor arrive pre-assembled, but the uprights, console, and wiring require careful attention. Budget 60 to 90 minutes for this process.
Tools Required
- 15mm socket wrench (for frame bolts)
- 5mm and 6mm Allen wrenches (usually included, but bring your own for better leverage)
- Phillips head screwdriver
- Wire fish tape or a stiff wire hanger (crucial for cable routing)
- Level
The Assembly Sequence
- Base Positioning: Lay the folded base on its side (protected by the cardboard packaging). Attach the front and rear transport wheels if not pre-installed.
- Upright Mast Installation: This is the most critical step. The T Series 16 utilizes a single continuous data and power cable running from the motor control board to the console. Do not pinch this wire between the metal upright and the base bracket. Use M8 x 50mm bolts to secure the left and right uprights, feeding the cable through the center channel.
- Console Wiring: Connect the 9-pin data connector and the red/black power leads to the back of the 10-inch HD touchscreen console. Secure the console to the uprights using the provided M6 x 30mm bolts.
- Hydraulic Folding Mechanism: Attach the EasyLift hydraulic cylinder to the lower frame bracket. Ensure the safety pin clicks securely into place.
- Power and Initialization: Plug the machine into a dedicated outlet, flip the reset switch near the power cord, and insert the magnetic safety key to boot the iFIT operating system.
"The number one failure mode during motorized treadmill assembly is crushing the console data cable inside the steel upright mast. Always pull the cable taut and tape it to the inside of the tube before tightening the frame bolts." - FitGearPulse Technician Notes
Step-by-Step Installation Walkthrough: Curved Manual Treadmills
Curved manual treadmills bypass the complexities of electrical wiring and motor alignment, but they introduce significant physical challenges and mechanical calibration requirements. Setup time is usually shorter (30-45 minutes), but the physical exertion is much higher.
The Assembly Sequence
- Crate Extraction: Cut the straps and carefully slide the wooden or cardboard crate off the treadmill. Do not drag the machine out, as the rear slats can catch and snap.
- Handlebar and Console Mounting: Most curved models require you to bolt on the rear stabilizer bar and the front handlebars. Use high-grade threadlocker (Blue Loctite) on the handlebar bolts, as the high-impact nature of curved running can vibrate standard nuts loose over time.
- Slat Belt Tensioning: Unlike a motorized PVC belt, the rubber slat belt on a curved treadmill rides on a track of ball bearings. You must check the lateral tension. If the slats drift left or right during a test push, use a 6mm Allen key to adjust the rear axle tension bolts in quarter-turn increments.
- Guide Rail Lubrication: Apply a generous coat of PTFE-based dry lubricant to the curved guide tracks before your first run to prevent the dreaded 'squeak' that plagues poorly maintained manual treadmills.
Comparison Matrix: Setup Effort and Long-Term Maintenance
To help you decide which installation profile fits your capabilities and home environment, review the direct comparison below. For deeper insights into motorized vs. manual biomechanics, refer to the Consumer Reports treadmill buying guide.
| Feature | NordicTrack T Series 16 (Motorized) | Premium Curved Manual |
|---|---|---|
| Unboxing Weight | 155 lbs (Manageable for 2 people) | 280 - 310 lbs (Requires 3+ people) |
| Assembly Time | 60 - 90 Minutes | 30 - 45 Minutes |
| Primary Setup Risk | Pinching internal data cables | Dropping and cracking side shrouds |
| Electrical Needs | Dedicated 120V / 15A Circuit | None (100% Human Powered) |
| Post-Setup Calibration | Belt tracking and incline zeroing | Slat tension and track lubrication |
Electrical, Flooring, and Environmental Considerations
The installation environment is just as critical as the physical assembly. The NordicTrack T Series 16 treadmill features a 2.6 CHP motor and a motorized 16% incline mechanism. According to the Electrical Safety Foundation International (ESFI), high-draw fitness equipment should never be plugged into a shared circuit or an extension cord. Doing so can cause voltage drops that degrade the motor control board over time. Ensure your home gym has a dedicated 15-amp, 120-volt grounded outlet.
Curved manual treadmills bypass electrical requirements entirely, making them ideal for garages, basements, or off-grid spaces. However, they introduce a different environmental challenge: impact vibration. Because there is no motorized deck cushioning to absorb foot strikes, the kinetic energy of a 180-pound runner sprinting on a curved treadmill transfers directly into the floor. If installed on a second-floor wood-framed structure, this will cause severe noise transfer to the rooms below. You must install a 3/8-inch thick, high-density rubber equipment mat beneath a curved treadmill to dampen acoustic resonance.
Post-Setup Calibration and First Run
Once your chosen treadmill is assembled, do not immediately jump into a high-intensity interval session. Perform a calibration walk.
- For the T Series 16: Walk at 2.0 MPH and observe the rear roller. If the belt drifts to the left, insert the 5mm Allen key into the left rear adjustment bolt and turn it one-quarter turn clockwise. Repeat on the right if it drifts right. Test the 16% incline to ensure the hydraulic lift is not binding.
- For Curved Models: Perform a 'push test'. With the machine off, push the belt with your hand. It should glide smoothly with consistent resistance. If you feel 'dead spots' or grinding, the guide bearings may need reseating or the slat tension is too tight.
Final Verdict: Which Setup Fits Your Home Gym?
Choosing between the NordicTrack T Series 16 treadmill and a curved manual model extends far beyond the price tag or the iFIT screen. If you have a standard room with dedicated electrical circuits, prefer a modular setup that can be folded away, and are comfortable following a detailed wiring and bolting sequence, the motorized route is highly rewarding. The T Series 16 offers excellent value, provided you respect the cable-routing protocols during assembly.
On the other hand, if you are building a garage gym, lack dedicated electrical circuits, and have the physical manpower (or professional delivery) to handle a 300-pound unboxing, a curved manual treadmill offers a virtually maintenance-free, plug-and-play experience once the initial heavy lifting is done. By understanding these installation realities upfront, you ensure your 2026 home gym upgrade is a seamless success from day one.
More gear to consider
All reviews
Air Bike vs Assault Bike: Why We Swapped Our Small Pink Treadmill
Treadmill Feature Comparison & NordicTrack Troubleshooting
Is StairMaster or Incline Treadmill Better? Folding Treadmill Care
Air Bike vs Assault Bike Guide & Spirit XT285 Treadmill Reviews
Stair Climbers vs High Intensity Treadmill Workouts for Weight Loss
