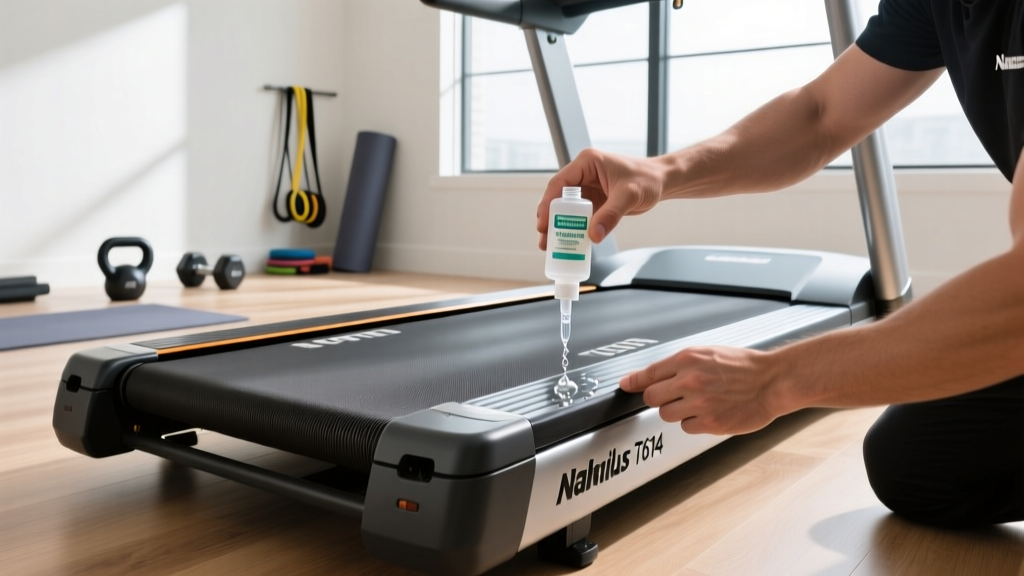
NordicTrack 1750 Treadmill Setup & Walking Pad Comparison
Master your NordicTrack 1750 treadmill setup with our complete walkthrough, and see how its installation compares to top 2026 walking pads.

The Ultimate Home Cardio Dilemma: Heavy-Duty vs. Ultra-Compact
As we navigate the 2026 home fitness landscape, buyers are increasingly torn between two extremes: the commercial-grade, feature-rich traditional treadmill and the ultra-compact, minimalist walking pad. At the top of the traditional hierarchy sits the NordicTrack 1750 treadmill (Commercial Series), a machine renowned for its 3.5 CHP motor, 14-inch HD touchscreen, and -3% to 15% incline/decline capabilities. On the opposite end of the spectrum are under-desk walking pads, which promise effortless integration into small apartments and home offices.
But how do these two vastly different approaches to cardio compare when it comes to actual setup, spatial footprint, and long-term biomechanical value? In this comprehensive guide, we provide a complete, step-by-step installation walkthrough for the NordicTrack 1750, followed by a direct comparison and review of the walking pad treadmill category to help you decide which footprint belongs in your home.
NordicTrack 1750 Treadmill: Complete Setup & Installation Walkthrough
The NordicTrack 1750 (Model NTL17621 and its recent 2025/2026 iterations) ships in a massive box weighing approximately 340 pounds. Unlike walking pads, which are entirely plug-and-play, the 1750 requires a meticulous, multi-hour assembly process. Skipping steps or ignoring electrical requirements is the leading cause of early motor failure and console errors.
Phase 1: Pre-Installation & Space Requirements
Before unboxing, you must prepare your space. According to the U.S. Consumer Product Safety Commission (CPSC), treadmills require a minimum clearance zone to prevent entrapment injuries in the event of a fall.
- Footprint: The 1750 measures 78.5 inches long by 32 inches wide.
- Clearance: Leave at least 24 inches of open space on both sides and a full 78 inches of clearance directly behind the treadmill.
- Ceiling Height: The deck sits roughly 8 inches off the floor. Add your height plus 8 inches to ensure you won't strike your head during high-incline running (15% grade).
- Electrical (CRITICAL): The 1750 requires a dedicated 120V, 15-amp circuit. Never plug this machine into a GFCI outlet, an extension cord, or a shared circuit with appliances like refrigerators or microwaves. Voltage drops will cause the console to reboot mid-run and can permanently damage the motor controller.
Phase 2: Unboxing & Base Assembly
- Box Removal: With two people, cut the straps and slide the cardboard sleeve off the base. Do not lift the base by the plastic motor hood.
- Stabilizer Installation: Attach the front and rear floor stabilizers using the provided M10 x 25mm bolts. Use a torque wrench to tighten to approximately 25 Nm to prevent frame wobble during sprints.
- Upright Threading: This is the most frustrating step. The console cables are pre-routed inside the metal uprights. As you lift the uprights into place, ensure the internal wire harnesses do not pinch against the bolt holes. A pinched wire will result in a blank console.
- Console Mounting: Connect the color-coded wire harnesses (usually a red and a black connector) until they click securely. Mount the 14-inch HD console and secure it with the four M8 carriage bolts.
Phase 3: Calibration & Edge Case Troubleshooting
Once assembled, the treadmill must be calibrated to synchronize the incline motor and speed sensor. To enter calibration mode on the 1750, press and hold the 'Stop' and 'Speed Up' buttons simultaneously while inserting the magnetic safety key.
Common Failure Modes:
- LS1 Error Code: This indicates a speed sensor misalignment. If the belt jolts or the console throws an LS1 code during the first test run, the optical sensor near the motor flywheel is likely misaligned or dusty from the unboxing process.
- Belt Slipping: If the walking belt hesitates when you step on it, the rear roller tension is too loose. Adjust the rear roller bolts in quarter-turn increments until the belt tracks smoothly at 3.0 MPH without centering drift.
Walking Pad Treadmill Comparison: The Setup Reality
Contrast the three-hour, two-person ordeal of the NordicTrack 1750 with the unboxing of a modern 2026 walking pad (such as the UREVO URMT053 or KingSmith WalkingPad R2). Walking pads arrive fully assembled. You cut the box, unfold the handrail (if applicable), plug it into a standard wall outlet, and begin walking within five minutes.
However, this convenience comes with severe engineering compromises. To achieve a weight of 55 pounds and a foldable footprint, walking pads utilize smaller motors, narrower belts, and rigid aluminum decks that lack shock absorption.
Specification & Setup Matrix: NordicTrack 1750 vs. Premium Walking Pads
| Feature | NordicTrack 1750 | Premium Walking Pad (e.g., UREVO/KingSmith) |
|---|---|---|
| Setup Time | 2.5 - 3.5 Hours (2 People) | 5 Minutes (1 Person) |
| Assembled Weight | ~340 lbs | 45 - 65 lbs |
| Motor Power | 3.5 CHP (Continuous Duty) | 2.0 - 2.5 HP (Peak Duty) |
| Running Surface | 22' x 60' (Accommodates full sprint stride) | 15' x 43' (Restricts to walking/jogging) |
| Electrical Needs | Dedicated 15-Amp Circuit | Standard 120V Outlet |
| Deck Cushioning | Runners Flex™ (Adjustable impact absorption) | None (Rigid aluminum base) |
| 2026 MSRP | $1,799 | $250 - $450 |
Performance & Biomechanics Review: Is the Compromise Worth It?
When reviewing walking pads against a heavyweight like the NordicTrack 1750, the installation convenience quickly fades if the machine cannot support your physiological goals. According to NordicTrack's engineering guidelines and independent biomechanical analyses, stride length and deck flex are critical for joint preservation.
The Stride Length Bottleneck
A standard walking pad features a belt length of roughly 43 inches. For a user over 5'6', this physically prevents a natural running stride. Attempting to jog at 4.0 MPH on a 43-inch belt forces you to shorten your gait, which increases the cadence artificially and places undue repetitive stress on the patellar tendon and Achilles. The 60-inch belt on the NordicTrack 1750 allows for full biomechanical extension, making it the only viable option for interval training or runners logging over 10 miles per week.
Heat Dissipation and Motor Lifespan
Walking pads utilize compact, often fan-less or poorly ventilated motors. When a 200-pound user walks at 3.0 MPH on a 2.0 HP peak motor, the friction generates immense heat. Because walking pads lack the massive steel chassis and active cooling fans of the 1750, they are prone to thermal shutdowns if used for more than 60 continuous minutes. The 1750's 3.5 CHP (Continuous Horsepower) motor is rated to run at marathon distances without thermal degradation.
"For users strictly targeting NEAT (Non-Exercise Activity Thermogenesis) by adding 3,000 to 5,000 steps to their workday, a walking pad is a brilliant, low-friction tool. But for cardiovascular conditioning, VO2 max improvement, and joint-safe impact absorption, the heavy-duty setup of a traditional treadmill remains biologically superior." — FitGearPulse Biomechanics Desk, 2026
Final Verdict: Choosing Your 2026 Cardio Footprint
The decision between the NordicTrack 1750 and a walking pad ultimately comes down to your spatial constraints and your definition of 'exercise.'
If you have a dedicated room, a 15-amp circuit, and the patience for a 3-hour assembly, the NordicTrack 1750 is an unparalleled investment. Its setup complexity is a one-time tax that pays dividends in the form of iFIT interactive coaching, joint-saving cushioning, and a commercial-grade motor that will last a decade.
Conversely, if you live in a 600-square-foot apartment, share a home office, and simply want to break up the sedentary nature of remote work without dedicating hours to assembly and electrical prep, a walking pad is the superior choice. Just be mindful of the biomechanical limits: keep the speed under 4.0 MPH, wear highly cushioned running shoes to compensate for the rigid deck, and limit continuous sessions to 45 minutes to preserve the motor.
More gear to consider
All reviews
Kinetic Treadmill Buying Guide: Feature Comparison & Fixes
Treadmill in Bedroom vs Elliptical: Expert Home Cardio Review

Are Treadmill Calories Accurate? Cardio Noise Levels Compared

Elliptical Trainer vs Treadmill for Weight Loss in Small Home Gyms
ProForm 505 CST Treadmill: Setup Walkthrough & Feature Comparison