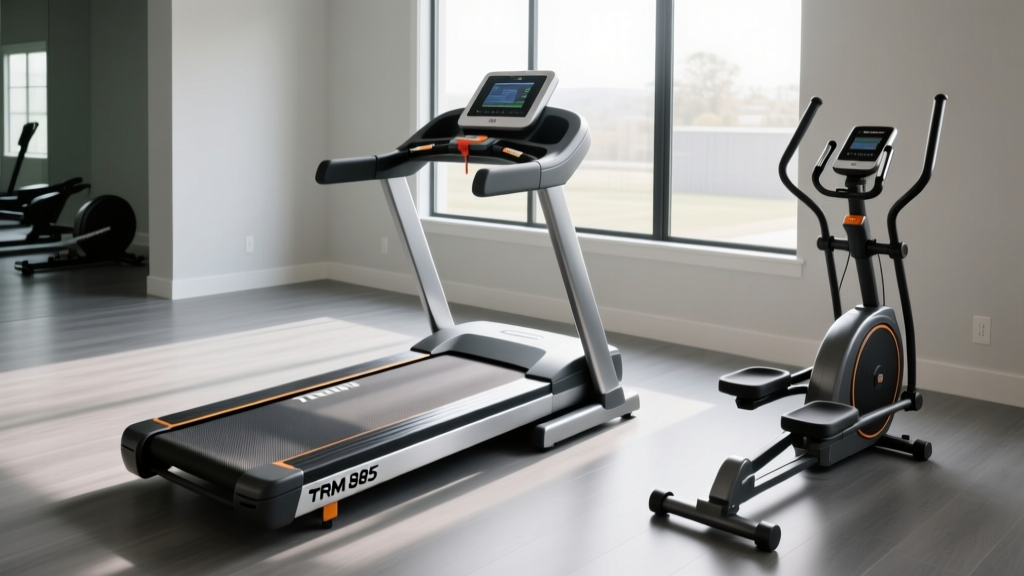
Life Fitness Treadmill Manual Guide: Setup, Installation & Noise Levels
Master your home gym setup with our Life Fitness treadmill manual walkthrough. Compare cardio machine noise levels and eliminate vibration.

The Acoustic Footprint of Your Home Gym
When outfitting a home gym in 2026, most buyers obsess over screen size, interactive programming, and max incline. Yet, the most common reason for equipment returns or basement relocations is the acoustic footprint. Cardio machines generate significant kinetic energy, and improper installation transforms that energy into structural vibration and airborne noise. Whether you are installing a commercial-grade unit or a compact walker, treating the setup process as an acoustic engineering project is vital.
This guide provides a complete setup and installation walkthrough, using the Life Fitness treadmill manual (specifically referencing the Club Series+ and Integrity Series lines) as our gold standard for proper deployment. We will also conduct a comprehensive cardio machine noise level comparison to help you understand how treadmills stack up against ellipticals, rowers, and bikes in a residential environment.
Decoding the Life Fitness Treadmill Manual for Silent Installation
Commercial manufacturers engineer their equipment to operate flawlessly under strict facility conditions. When you bring a Life Fitness Club Series+ treadmill into a residential space, ignoring the site preparation guidelines in the manual is the fastest way to void your warranty and create a noisy nuisance. Here is the step-by-step walkthrough for a vibration-free installation.
Step 1: Electrical Isolation and Motor Hum Prevention
The Life Fitness treadmill manual explicitly requires a dedicated 20-amp circuit for 110V/120V models. This is not merely a safety suggestion; it is an acoustic necessity.
- The Failure Mode: Plugging your treadmill into a shared 15-amp living room circuit causes voltage drops when the motor demands peak amperage (such as during foot-strike at higher speeds).
- The Acoustic Result: Voltage starvation forces the drive motor to work harder, generating a low-frequency electromagnetic hum (around 40-50 Hz) that easily penetrates drywall and floor joists.
- The Fix: Hire a licensed electrician to run a dedicated 12-gauge wire on a 20A breaker. Ensure the outlet is within 6 feet of the front motor hood to avoid using extension cords, which the manual strictly prohibits due to resistance-induced power loss.
Step 2: Subfloor Preparation and Mat Selection
A common mistake is placing a $40 PVC foam mat under a 300-pound treadmill. Foam compresses under dynamic loads, causing the machine to micro-shift and rattle its plastic shrouds. According to acoustic flooring standards, you need mass and density to dampen impact noise.
Expert Setup Tip: Purchase a 3/8-inch thick vulcanized rubber mat with a Shore A durometer rating of 60 or higher. This specific density absorbs the high-impact transient shocks of a runner's footfall (which can generate up to 2.5 times their body weight in force) before the vibration transfers into your floor joists.Step 3: Precision Leveling and Frame Torquing
If a treadmill frame is torqued—even by a fraction of an inch—the plastic motor hood and side rail shrouds will vibrate against each other, creating a high-pitched rattle between 3.0 and 4.5 mph.
- Place a 12-inch machinist level on the center of the running belt.
- Adjust the rear leveling feet (located on the back roller end caps) until the bubble is perfectly centered.
- Check the lateral level across the width of the deck.
- Once level, use a torque wrench to ensure all shroud screws are tightened to the manufacturer's specification (usually between 15-20 in-lbs for plastic housing screws) to prevent resonance.
Cardio Machine Noise Level Comparison Matrix
To contextualize the noise generated by your equipment, we must measure both airborne noise (what you hear in the room) and structure-borne noise (what your downstairs neighbors hear). The following matrix compares the decibel (dB) output of popular cardio machine categories during moderate use. For context, the American Speech-Language-Hearing Association (ASHA) notes that normal conversation is around 60 dB, while prolonged exposure to noise above 85 dB can cause hearing damage.
| Machine Category & Model Example | Idle / Motor Hum | Moderate Use (Airborne dB) | Peak Impact / Max Effort (dB) | Primary Noise Type |
|---|---|---|---|---|
| Treadmill (Life Fitness Club Series+) | 45 - 50 dB | 65 - 72 dB | 78 - 85 dB | Low-frequency structural thud, belt friction |
| Treadmill (NordicTrack Commercial 1750) | 55 - 60 dB | 70 - 75 dB | 82 - 88 dB | Motor whine, heavy deck impact |
| Elliptical (Precor AM731) | 0 dB (No motor drive noise) | 45 - 52 dB | 55 - 62 dB | Bearing roll, footpad slap, fan resistance |
| Indoor Cycle (Peloton Bike+) | 0 dB | 40 - 48 dB | 50 - 58 dB | Magnetic resistance hum, chain/belt whir |
| Air Bike (Assault Fitness AirBike Elite) | 0 dB | 55 - 65 dB | 75 - 85 dB | High-velocity air displacement (fan noise) |
| Rowing Machine (Concept2 RowErg) | 0 dB | 50 - 60 dB | 65 - 75 dB | Air baffles, chain rattle, seat roller track |
Note: Decibel readings are logarithmic. A 10 dB increase represents a doubling in perceived loudness to the human ear. Data aligns with acoustic testing frameworks outlined by the National Institute for Occupational Safety and Health (NIOSH).
Troubleshooting Post-Installation Resonance and Squeaks
Even with a perfect initial setup, cardio machines settle. After your first 30 days of use, perform this acoustic maintenance checklist to eliminate emerging noise issues.
1. The Belt Tracking Squeak
If you hear a rhythmic 75 dB squeaking sound that matches your stride, the running belt is likely drifting and rubbing against the interior of the plastic side rail guards. Consult your Life Fitness treadmill manual for the rear roller adjustment protocol. Usually, a quarter-turn of the left or right rear adjustment bolt with a 3/4-inch hex wrench will re-center the belt. Never over-tension the belt to fix tracking; excessive tension will destroy the front drive roller bearings, resulting in a costly $400+ repair and a permanent grinding noise.
2. Motor Hood Rattle
The vibration from thousands of footstrikes will inevitably loosen the sheet metal screws securing the motor hood. Every 90 days, power down the machine, remove the hood, and apply a single drop of medium-strength threadlocker (like Loctite 243) to the screws before re-tightening. This prevents metal-on-metal resonance.
3. Drive Belt Tension
If you hear a slipping or slapping sound immediately upon startup or during heavy incline walking, the poly-v drive belt connecting the motor to the front roller may be loose. Most commercial units require a tension deflection of exactly 1/2 inch when pressed with moderate thumb pressure at the midpoint between the motor pulley and the roller pulley.
Measuring Your Own Acoustic Footprint
Do not rely on guesswork when setting up a gym in a multi-story home or apartment. Use your smartphone to establish a baseline. Download a calibrated sound level meter app, such as the NIOSH Sound Level Meter app (available on iOS).
Testing Protocol: Place the phone on a tripod at ear level (approx. 5 feet high) in the center of the room. Run the treadmill at 3.0 mph, 6.0 mph, and 9.0 mph. Record the peak dB at each speed. Then, place the phone on the floor in the room directly below the treadmill to measure structure-borne impact noise. If the downstairs reading exceeds 55 dB, you must upgrade your acoustic matting or install a floating subfloor.
Frequently Asked Questions
Do I really need to follow the clearance requirements in the Life Fitness treadmill manual?
Yes. The manual mandates a minimum of 20 inches on each side and 30 inches behind the treadmill. Beyond safety (preventing you from being trapped against a wall if you fall), inadequate rear clearance creates an acoustic echo chamber. The exhaust fan on the motor hood pushes air backward; if it hits a wall 10 inches away, the airflow turbulence will increase the machine's ambient noise by 3 to 5 dB.
Which cardio machine is the quietest for apartment living?
Magnetic resistance indoor cycles (like the Peloton Bike+ or Keiser M3i) are the undisputed champions of quiet operation. Because they lack impact (no footstrikes) and use silent magnetic eddy currents for resistance rather than physical friction pads or air fans, they rarely exceed 50 dB even during all-out sprints, making them virtually undetectable through shared apartment walls.
Can I use a treadmill on the second floor of my house without causing ceiling damage?
Modern floor joists (typically 2x10s spaced 16 inches on center) are structurally rated to support the dynamic load of a runner. The issue is not structural failure, but deflection and noise. To minimize the transfer of kinetic energy to the ceiling below, use a high-density 3/8-inch rubber mat and position the treadmill directly over a load-bearing wall or perpendicular to the joists to distribute the impact across as many joists as possible.
More gear to consider
All reviews
Donate Treadmill Salvation Army: Compact Cardio Upgrade Budget Guide

Curved Manual vs Motorized Treadmill: Setup Guide

2026 Compact Portable Cardio: Reviewing Treadmill Nudes

Air Bike vs Assault Bike: How to Burn 500 Calories on Treadmill in 30 Minutes

Belt Maintenance for Your Daily Treadmill Walking Workout Routine