
Treadmill Exercises to Lose Weight: Belt Care & Space Layouts
Discover how space optimization and proper belt maintenance keep your machine running smoothly for effective treadmill exercises to lose weight.

The Intersection of Home Gym Layouts and Treadmill Longevity
When designing a home gym, space optimization is usually the top priority. However, in the rush to maximize square footage, many fitness enthusiasts wedge their cardio equipment into tight corners, inadvertently sabotaging their ability to perform routine maintenance. If you are committing to rigorous treadmill exercises to lose weight, a sudden motor burnout or a snapped walking belt will instantly derail your progress. Proper spatial clearance is not just a safety requirement; it is a fundamental prerequisite for treadmill belt maintenance and lubrication.
In 2026, modern treadmills like the Sole F80 or the NordicTrack Commercial series feature advanced phenolic resin-coated decks and heavy-duty motors. Yet, these machines still rely on a microscopic layer of 100% silicone lubricant between the belt and the deck to minimize friction. If your home gym layout prevents you from accessing the sides and rear of the machine, you cannot properly lubricate the belt, inspect the roller tension, or clear dust from the motor hood. This guide bridges the gap between interior space optimization and the mechanical realities of treadmill upkeep.
The Spatial Clearance Matrix for Maintenance Access
According to Consumer Reports treadmill buying guidelines and ASTM safety standards, spatial clearance is non-negotiable. But beyond safety, specific dimensions are required to physically perform belt lubrication and alignment. You must design your gym layout to accommodate the 'Maintenance Triangle'—the physical space your body and tools require to service the machine.
| Clearance Zone | Minimum Dimension | Maintenance Function | Consequence of Inadequate Space |
|---|---|---|---|
| Left Side | 24 Inches | Access to belt tension bolts and lubrication injection | Inability to loosen rollers or apply silicone evenly |
| Right Side | 24 Inches | Motor hood access, belt tracking adjustments | Dust accumulation, overheating, inaccessible electronics |
| Rear | 36 Inches | Safety fall zone, rear roller access, power cord management | Inability to test belt tracking from behind, safety hazards |
| Overhead | 12 Inches | Upright frame clearance, folding mechanism operation | Damage to ceiling drywall, restricted folding hinge movement |
Friction, Motor Amp Draw, and Your Weight Loss Routine
Why does a poorly placed treadmill matter for your fitness goals? It comes down to friction and amp draw. When a treadmill belt lacks proper lubrication, the kinetic friction between the belt and the wooden/MDF deck increases exponentially. The drive motor must work harder to pull the belt under your body weight, causing the electrical amp draw to spike.
For example, a well-lubricated Sole F80 (3.5 CHP motor) typically draws between 3 to 5 amps at a walking speed of 3.0 mph. If the belt is dry due to neglected maintenance—a common issue when the machine is shoved against a wall and impossible to reach—the amp draw can spike to 12 or 14 amps. This triggers the machine's thermal breaker, shutting it down mid-workout. Over time, this sustained high amp draw degrades the motor windings and fries the lower control board. Consistency is the bedrock of effective treadmill exercises to lose weight; a dead motor means zero consistency.
Warning: The Aerosol Silicone Trap
Never use aerosol silicone sprays (like standard WD-40 Specialist Silicone) on a treadmill belt. The propellants and petroleum distillates in aerosols will dissolve the chemical bonding of the belt's underside and ruin the deck's phenolic coating. Always use 100% pure liquid silicone specifically formulated for fitness equipment, typically applied via a squeeze bottle with an extended nozzle tube.
Step-by-Step Belt Lubrication in a Space-Optimized Gym
Assuming you have allocated the proper 24-inch side clearances in your layout, here is the exact procedure for lubricating a standard manual-lube treadmill belt. This process takes approximately 15 minutes and should be performed every 150 to 200 miles of use, or every three months for active users.
- Power Down and Secure: Unplug the treadmill from the wall outlet. Never perform belt maintenance while the machine is plugged in, even if the console is off.
- Test the Belt Tension: Reach into the center of the belt on the side. You should be able to lift the belt exactly 2 to 3 inches off the deck. If it is tighter, you will need to loosen the rear rollers.
- Loosen the Rear Rollers: Using a 3/8-inch or 1/2-inch hex wrench (depending on your model), turn the left and right rear roller adjustment bolts counter-clockwise by exactly 3 quarter-turns each. This creates the gap needed for the lubricant.
- Apply the Lubricant: Lift the edge of the belt and insert the nozzle of your 100% liquid silicone bottle. Squeeze exactly 0.5 ounces of silicone in a zig-zag pattern from the center to the edge. Repeat on the opposite side for a total of 1 ounce.
- Retighten and Distribute: Turn the rear roller bolts clockwise by the exact 3 quarter-turns you previously loosened. Plug the machine in, set the speed to 2.0 mph, and walk on the treadmill for 3 minutes to distribute the silicone evenly across the deck.
- Verify Tracking: Stand behind the machine (utilizing your 36-inch rear clearance) and observe the belt for 60 seconds. If it drifts left or right, make micro-adjustments (quarter-turns) to the rear bolts to center it.
Folding Treadmills: Layout Hacks for Compact Spaces
For those dealing with severe spatial constraints, folding treadmills like the Horizon T202 or the ProForm Pro 9000 are popular choices. However, folding mechanisms introduce unique maintenance challenges. When folded, the deck rests against the upright console mast, which can trap moisture and dust against the belt if the room lacks proper climate control.
Layout Hack: If you must fold your treadmill after every session, position the machine so that the hydraulic folding latch faces the open room, not the wall. This ensures you can easily release the deck, lower it slowly, and perform your bi-weekly visual inspections of the belt edges for fraying without having to maneuver the entire 200-pound machine out of a corner. Furthermore, ensure the ceiling height in your designated folding zone is at least 8 feet to accommodate the upright mast clearance.
Diagnosing Belt Friction Without Tools
You do not always need an ammeter to diagnose a dry belt. Utilizing sensory feedback during your treadmill exercises to lose weight can alert you to maintenance needs before a catastrophic failure occurs:
- The Sluggish Start: If you feel a slight hesitation or 'stutter' in the belt exactly when your foot strikes the deck at walking speeds, the static friction is too high. The motor is struggling to overcome the initial grip of the dry belt.
- The Heat Test: After a 30-minute incline workout, safely stop the machine, unplug it, and carefully slide your hand under the belt near the center of the deck. If the deck is hot to the touch (exceeding 110°F), friction is generating excess thermal energy. The belt requires immediate lubrication.
- Olfactory Cues: A faint smell of ozone or burning dust near the motor hood indicates the motor is overheating due to excessive mechanical resistance from the deck.
The True Cost of Neglected Belt Care
Allocating 24 inches of lateral space in your home gym might mean sacrificing a piece of furniture or altering your room's flow. But when you analyze the financial impact of neglecting treadmill maintenance, the spatial compromise is highly cost-effective. Below is a breakdown of potential expenses based on 2026 average repair and replacement costs.
| Maintenance Item / Failure Point | Average Cost | Frequency |
|---|---|---|
| 100% Silicone Liquid Lubricant (8 oz bottle) | $12.00 | Lasts 2-3 years |
| Premature Belt and Deck Replacement | $180.00 - $280.00 | Every 2 years (if dry) |
| Lower Control Board Replacement (Fried by amp spikes) | $150.00 - $350.00 | Unplanned failure |
| Drive Motor Burnout and Labor | $450.00 - $700.00 | Unplanned failure |
Final Thoughts on Space and Sustainability
Achieving your fitness goals requires more than just showing up; it requires an environment that supports the equipment you rely on. By integrating the Maintenance Triangle into your home gym's floor plan, you ensure that your machine remains accessible, serviceable, and safe. When you remove the physical barriers to routine belt lubrication, you protect your investment and guarantee that your daily treadmill exercises to lose weight remain uninterrupted, effective, and mechanically sound for years to come. Consult your specific manufacturer's official support documentation for model-specific bolt sizes and lubrication intervals, and design your space accordingly.
More gear to consider
All reviews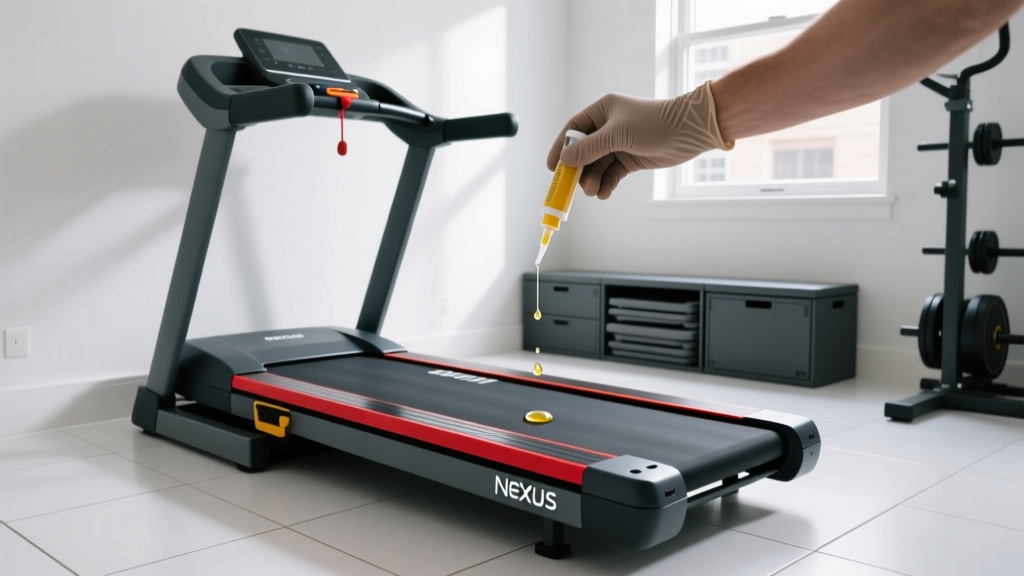
Nexus Treadmill Belt Maintenance in Small Space Layouts

Air Bike vs Assault Bike: WalkingPad X25 Treadmill Market Shift

Lionsgate The Long Walk Treadmill vs Upright & Spin Bikes

Nordstrom Treadmill Trends & Expert Belt Lubrication Guide

Stair Climber vs Treadmill for Lower Belly Fat: Beginner Guide
