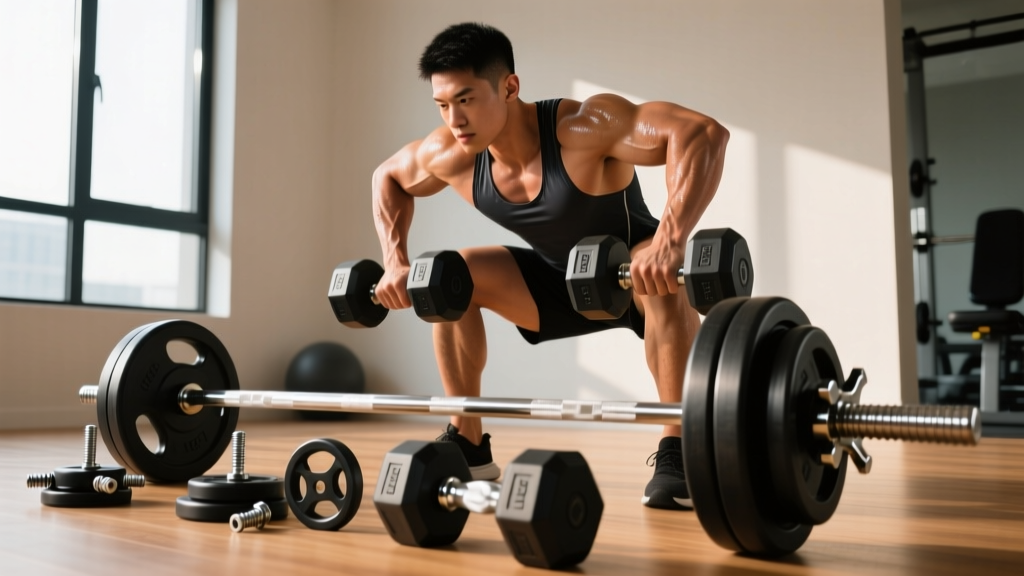
How to Train Forearms With Dumbbells & Barbell Collar Types
Learn how to train forearms with dumbbells for a stronger grip, then master barbell safety with our beginner's comparison of collar and clamp types.

Building a crushing grip and maintaining a safe home gym environment are two sides of the same coin. As a beginner stepping into the free weights section in 2026, you will quickly realize that your hands and forearms are the primary point of contact with every piece of iron you lift. If your grip fails, the lift fails. Furthermore, as your forearm strength increases and you move from dumbbells to heavy barbell compounds, securing your plates with the right clamps becomes a non-negotiable safety requirement.
This beginner-friendly, step-by-step guide will first teach you how to train forearms with dumbbells to build foundational grip strength. Then, we will transition into a comprehensive barbell collar and clamp types comparison, ensuring you know exactly how to secure your Olympic barbells as your lifts get heavier.
Phase 1: How to Train Forearms With Dumbbells (Step-by-Step)
The forearm is a complex network of flexors, extensors, and stabilizers. According to kinesiology data from ExRx.net, targeting the brachioradialis and the wrist flexors requires varied angles and sustained time-under-tension. Here is your beginner step-by-step protocol using standard hex or urethane dumbbells.
Step 1: Dumbbell Wrist Curls (Flexor Focus)
- Setup: Sit on a bench and rest your forearms on your thighs, letting your wrists and hands hang just past your knees, palms facing up.
- Execution: Holding a 10 to 15 lb dumbbell (beginners should start light to protect the delicate wrist tendons), allow the weight to roll down to your fingertips.
- The Curl: Curl your fingers back into your palm, then flex your wrist upward as high as possible. Squeeze for one second at the top.
- Volume: 3 sets of 15-20 repetitions. The high rep range ensures adequate blood flow and connective tissue conditioning.
Step 2: Reverse Dumbbell Curls (Extensor & Brachioradialis)
- Setup: Stand tall with a dumbbell in each hand, palms facing your thighs (pronated grip).
- Execution: Keep your elbows pinned to your sides. Curl the weights upward toward your shoulders without rotating your wrists.
- Pro-Tip: Using thicker-handled dumbbells, like the REP Fitness Urethane Dumbbells (which feature a 34mm handle diameter compared to the standard 32mm), will drastically increase the activation of the brachioradialis.
- Volume: 3 sets of 10-12 repetitions.
Step 3: Heavy Farmer's Holds (Static Grip Endurance)
- Setup: Grab the heaviest dumbbells you can safely hold (typically 40 to 70 lbs per hand for beginners).
- Execution: Stand tall, roll your shoulders back, and simply hold the weights at your sides. Do not use lifting straps.
- Timing: Hold for 45 to 60 seconds. Rest for 90 seconds and repeat for 3 total sets.
Phase 2: Why Grip Strength Demands Proper Barbell Security
As your dumbbell forearm training pays off, your overall lifting capacity will surge. You will inevitably transition to barbell squats, bench presses, and Olympic lifts. This brings us to a critical piece of free weight equipment that beginners often overlook: barbell collars and clamps.
A strong grip allows you to control the barbell, but it cannot prevent weight plates from sliding off the sleeves during dynamic movements or asymmetrical loading. Using the wrong collar can result in catastrophic plate shifts, altering your center of gravity mid-lift. Let us break down the primary collar types available in 2026 so you can match your clamp to your training style.
Barbell Collar and Clamp Types: A Beginner's Comparison
All modern Olympic barbells feature 2-inch (50mm) diameter sleeves. The collars you purchase must be specifically designed for this 50mm standard. Here is a deep dive into the four main categories of barbell clamps.
1. Spring Collars (The Budget Standard)
Spring collars are the most ubiquitous clamps in commercial gyms. They consist of a steel coil that you compress via wire handles to slide onto the barbell sleeve.
Real-World Example: The Rogue Spring Collar (priced around $15.00 per pair) uses high-tensile steel.
The Verdict: While cheap and fast to use, spring collars lose their tension over time. They are highly susceptible to sliding off during heavy drops or high-vibration movements like barbell curls. They are best reserved for light bench pressing or strict isolation movements.
2. Clamp / Lock-Jaw Collars (The Home Gym Favorite)
Clamp collars use a mechanical lever and a high-friction polymer pad to lock onto the sleeve.
Real-World Example: The Lock-Jaw Pro Olympic Collar (approximately $34.95) is constructed from glass-reinforced nylon with a TPU (thermoplastic polyurethane) grip pad.
The Verdict: These offer immense lateral holding force (often rated for over 1,000 lbs of lateral pressure). They are incredibly secure for deadlifts and squats, though the rigid plastic body can occasionally crack if violently dropped onto concrete flooring from overhead.
3. Spinlock Collars (The Threaded Classic)
Spinlocks feature an internally threaded aluminum or steel ring that screws onto the threaded end of the barbell sleeve.
The Verdict: These provide a vice-like, immovable grip that is completely immune to lateral shifting. However, they are painfully slow to remove and re-rack. Furthermore, if gym chalk gets embedded in the threads, the collar can seize up, requiring a wire brush and WD-40 to free. They are ideal for dedicated bench press stations where you rarely change the weight, but terrible for circuit training.
4. Quick-Release Lever Collars (The Premium Choice)
Often seen in competitive powerlifting and Olympic weightlifting, these collars use an aluminum cam-lever mechanism to clamp down on the sleeve.
Real-World Example: The Eleiko Quick Release Collar (retailing around $95.00+).
The Verdict: They offer the perfect balance of lightning-fast application and elite-level security. The machined aluminum construction ensures they survive thousands of heavy barbell drops. The high price point is the only barrier for beginners.
Comparison Matrix: Which Collar Should You Buy?
| Collar Type | Avg. Price (Pair) | Security Rating | Speed to Apply | Best Use Case |
|---|---|---|---|---|
| Spring Collar | $10 - $20 | Low | Very Fast | Light Isolation, Bench Press |
| Clamp (Lock-Jaw) | $30 - $45 | High | Fast | Heavy Squats, Deadlifts |
| Spinlock | $25 - $40 | Maximum | Very Slow | Static Bench Press Setups |
| Quick-Release Lever | $85 - $120 | Very High | Instant | Olympic Lifts, Powerlifting |
Step-by-Step: Properly Securing Your Barbell
Even the best clamp will fail if applied incorrectly. Follow these steps every time you load the bar:
- Wipe the Sleeve: Use a towel to wipe away sweat, chalk, and rust from the barbell sleeve. Polymer grip pads (like those on clamp collars) will slide right off chalky metal.
- Push Plates Tight: Physically push the weight plates toward the center of the barbell to eliminate any gaps.
- Seat the Collar Flush: Slide the collar onto the sleeve until it physically touches the outer face of the weight plate. Do not leave a half-inch gap.
- Engage the Lock: Snap the lever or clamp shut. For lever collars, the handle should snap past the center-point to create a locked, flush seal against the sleeve.
Expert Troubleshooting & Edge Cases
- The 'Worn Sleeve' Problem: Older gym barbells often have sleeves that have been polished smooth by years of friction. Spring collars will fail immediately on these bars. Always upgrade to a TPU-padded clamp collar or a quick-release lever when dealing with smooth, worn steel.
- Bumper Plate Bouncing: If you are dropping bumper plates from overhead (e.g., CrossFit or Olympic lifting), the kinetic shockwave travels laterally. Spring collars will literally fly off the bar. You must use competition-grade quick-release collars or heavy-duty clamps to absorb the shock.
- Asymmetrical Loading: When performing landmine exercises or unilateral rotational work, the weight is entirely on one side of the bar. The torque applied to the sleeve is immense. Always use a spinlock or heavy-duty clamp on the loaded side, and consider adding a collar to the empty side simply to prevent the barbell from sliding out of the landmine base due to imbalance.
Final Thoughts on Grip and Gear
Mastering how to train forearms with dumbbells gives you the physical capacity to handle heavy iron safely. However, physical strength must be paired with mechanical security. By investing in the right barbell collar—moving past cheap spring clips and embracing the holding power of modern clamp or lever collars—you ensure that your hard-earned grip strength is never wasted by a preventable equipment failure. Start with the dumbbell protocol, upgrade your clamps, and lift with total confidence.
More gear to consider
All reviews
Cast Iron vs Competition Kettlebells: Maintenance & Dumbbell Floors

Olympic Barbell Setup: Weight, Knurling & Barbell Rows with Dumbbells
2026 Market Shift: EZ vs Straight Bar Beyond 10 kg Dumbbells

Home Setup for Dumbbell Bench Exercises Using Neoprene Weights

2026 Olympic Barbell Knurling Guide & Dumbbell Marches
