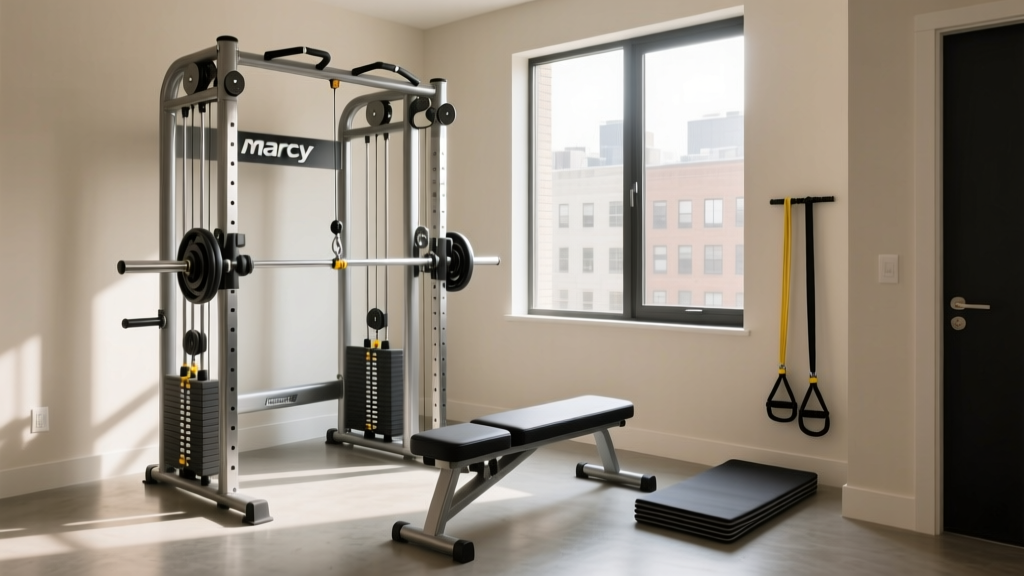
Maximizing Micro-Spaces: The TLV006 Home Gym & Foldable Layouts
Discover how to optimize micro-spaces with the TLV006 home gym. Explore layout blueprints, clearance metrics, and foldable equipment design strategies.

The paradigm of residential fitness has shifted dramatically. As urban living spaces shrink and remote work solidifies its permanent footprint in 2026, the traditional 4-post power rack is increasingly being replaced by high-density, foldable engineering. At the forefront of this spatial revolution is the TLV006 home gym, a wall-mounted, foldable functional trainer that redefines how we approach layout design in micro-environments. But owning compact equipment is only half the battle; designing a room that accommodates its kinetic envelope without feeling claustrophobic requires precise spatial planning.
This guide breaks down the exact measurements, architectural considerations, and layout blueprints required to integrate the TLV006 and similar foldable systems into apartments, spare bedrooms, and narrow garages.
Spatial Anatomy: Storage Footprint vs. Kinetic Envelope
When designing around foldable equipment, the most common mistake is planning for the 'storage footprint' rather than the 'kinetic envelope.' The kinetic envelope includes the machine's deployed depth, the user's maximum limb extension, and the necessary egress pathways for safety.
TLV006 Pro-Series Dimensional Data
- Folded Footprint: 14" D x 48" W x 82" H (Approx. 4.6 sq. ft.)
- Deployed Footprint: 68" D x 48" W (Approx. 22.6 sq. ft.)
- Maximum Cable Extension: 84" per pulley
- Unit Weight: 410 lbs (Requires structural load-bearing wall)
- Price Range: $2,850 - $3,200 (depending on integrated weight stack upgrades)
According to Mayo Clinic's guidelines on home fitness environments, you must maintain a minimum of 36 inches of clearance on all active sides of a resistance machine to prevent joint hyperextension injuries against walls or furniture. For the TLV006, this means your active room depth must be at least 104 inches (68" machine depth + 36" user clearance) when deployed.
Step-by-Step Layout Blueprinting for Micro-Rooms
Integrating a heavy, foldable unit into a 10x10 or 12x12 room requires a phased approach to layout design.
Phase 1: Wall Selection and Load Path Analysis
The TLV006 generates up to 400 lbs of dynamic lateral force during heavy lat pulldowns or seated rows. You cannot mount this to standard 1/2" drywall using toggle bolts.
- Locate Structural Studs: Identify wood or metal studs spaced at 16" or 24" on-center (OC).
- The Backer Board Solution: If your wall studs do not align with the TLV006's 32" mounting bracket, install a 3/4" structural plywood backer board, lag-bolted directly into at least three studs, then mount the gym to the plywood using 3/8" x 3" hex lag screws.
- Concrete Alternative: For basement or garage installations, use 3/8" wedge anchors drilled 3.5" deep into cured concrete (minimum 3000 PSI).
Phase 2: Zoning the Flooring Transition
In a multi-use room (like a home office/gym hybrid), you don't want 3/4" rubber mats covering the entire floor. Instead, use a transition strip to create a dedicated 'Active Zone.' Place a 5x7 ft high-density EVA or vulcanized rubber mat precisely where the TLV006 deploys. Use an aluminum T-molding transition strip to bridge the rubber mat and your existing hardwood or luxury vinyl plank (LVP). This protects the subfloor from dropped dumbbells while keeping the rest of the room aesthetically clean.
Comparison Matrix: Foldable vs. Fixed Compact Racks
How does the TLV006 layout compare to other popular small-space solutions? The table below highlights the spatial trade-offs.
| Equipment Type | Active Sq. Footage | Folded Sq. Footage | Best Room Type |
|---|---|---|---|
| TLV006 Foldable Trainer | 22.6 sq. ft. | 4.6 sq. ft. | Apartments, Offices, Studios |
| PRx Profile Squat Stand | 32 sq. ft. | 8 sq. ft. | Garages, Basements |
| Standard 4-Post Half Rack | 48 sq. ft. | 48 sq. ft. (Fixed) | Dedicated Spare Rooms |
Environmental Controls: Illusion and Airflow
Space optimization isn't just about physical dimensions; it's about psychological space and environmental comfort. The American Council on Exercise (ACE) frequently highlights the importance of environmental factors in maintaining long-term workout adherence, especially in confined areas.
Strategic Mirror Placement
Mirrors double the perceived depth of a room, but placing them incorrectly around a foldable gym is a disaster. Never place a mirror on the wall directly opposite the TLV006's folding path. If the locking pin fails or the unit is bumped while folding, it will shatter the glass. Instead, mount floor-to-ceiling mirrors on the adjacent perpendicular walls. This allows you to check your form during lateral movements while reflecting light to make the micro-room feel expansive.
Micro-Room Ventilation (CFM Requirements)
A 10x10 room with an 8-foot ceiling holds 800 cubic feet of air. During intense hypertrophy training, a single user can raise the ambient room temperature by 4-6 degrees and spike humidity through respiration and sweat. To prevent the room from feeling stifling and to protect the TLV006's internal polyurethane belts from humidity-induced stretch, install a wall-mounted exhaust fan rated for at least 110 CFM (Cubic Feet per Minute), or use a smart tower fan positioned in the corner to create a cross-breeze toward an open doorway.
Edge Cases and Installation Failure Modes
Even the best layout designs fail if the physical installation ignores real-world edge cases. Here are the most common failure modes observed with heavy foldable home gyms:
⚠️ Warning: The Metal Stud Dilemma
Many modern condos and apartments use 25-gauge metal studs instead of wood. Standard lag screws will strip out of metal studs under the dynamic load of a 200-lb cable row. If you are installing the TLV006 in a condo with metal studs, you must use snap-toggle anchors rated for 250+ lbs of shear force per bolt, or open the drywall to install structural wood blocking between the metal studs before patching and painting.
Cable Track Friction and Maintenance
In basement setups, ambient humidity often exceeds 60%. The TLV006 utilizes a nylon-pulley and aircraft-cable system. When foldable arms are locked in the vertical (stored) position for weeks at a time, the cables can settle and develop micro-kinks.
- Preventative Maintenance: Deploy the arms and cycle the weight stack through its full range of motion at least once a week, even on rest days.
- Lubrication: Apply a dry PTFE (Teflon) spray to the guide rods every 6 months. Avoid wet silicone sprays, which attract dust and create an abrasive paste that degrades the linear bearings.
Final Layout Checklist
Before finalizing your compact gym layout, run through this National Strength and Conditioning Association (NSCA) inspired facility safety checklist:
- [ ] Verified wall stud spacing and installed backer board if necessary.
- [ ] Confirmed 36" minimum egress on the left, right, and front of the deployed unit.
- [ ] Installed localized rubber flooring with a flush transition strip.
- [ ] Positioned mirrors on perpendicular walls to avoid collision zones.
- [ ] Established a cross-ventilation airflow path (minimum 110 CFM).
- [ ] Tested the dual-action folding safety locks with zero load before first use.
By treating the TLV006 home gym not just as a piece of equipment, but as an architectural element that dictates the flow of your room, you can achieve a commercial-grade training environment in less than 50 square feet of total living space.
More gear to consider
All reviews
Impex Powerhouse Home Gym: Electrical Safety & Setup Mistakes
2026 Garage Home Gym Inspiration: Electrical & Safety Trends

Vectra 1850 Home Gym: Weight Selection & Space Layout
Building a Shared The Rock Home Gym: A Couple's Step-by-Step Guide

Weatherproofing Outdoor Home Workout Gyms: Full Setup Guide