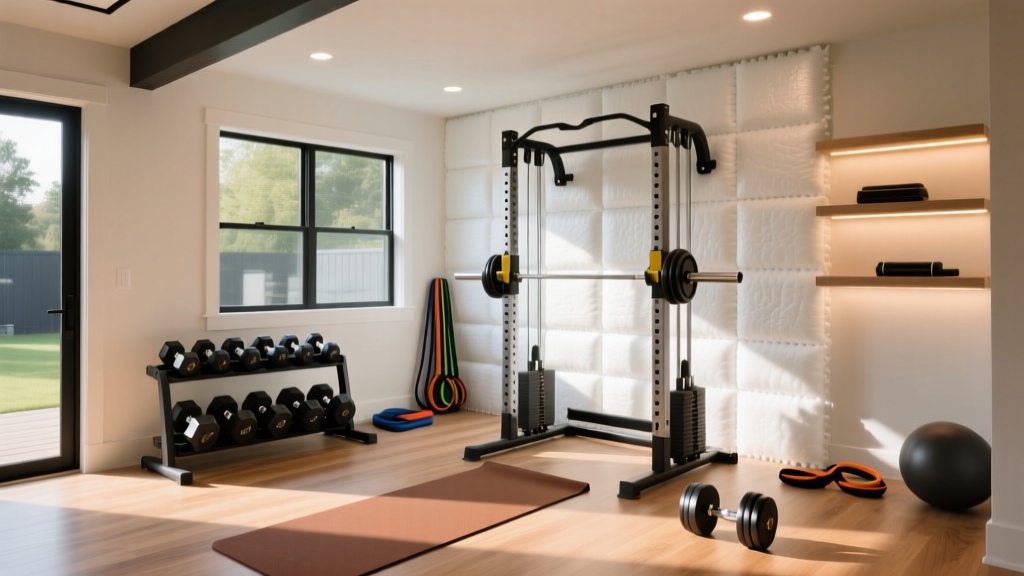
Building a Strength Gym: Layout, Gear, and Home Gym Ceiling Fan Setup
Build the ultimate strength training gym. This walkthrough covers power rack placement, rubber flooring, and installing the perfect home gym ceiling fan.

The Blueprint: Zoning Your Strength Training Space
Configuring a dedicated strength training gym requires more than just dropping a power rack onto concrete. A proper layout optimizes the biomechanics of your lifts, protects your subfloor, and manages the intense thermal output generated during heavy hypertrophy and strength blocks. When planning a 200-to-400-square-foot garage or basement gym, you must divide the space into distinct operational zones.
The Hot Zone is your primary lifting area. This space houses your power rack, deadlift platform, and bench. It requires maximum overhead clearance and the heaviest flooring protection. The Cold Zone encompasses your dumbbell racks, cable machines, and cardio equipment. Finally, the Transition Zone is where you manage recovery, mobility, and environmental controls—which brings us to a critical, often overlooked component of gym design: airflow.
⚠️ Critical Clearance Warning: Before purchasing any overhead equipment, measure your ceiling height at multiple points. Garage floors often slope toward the door for drainage, meaning your ceiling height can vary by up to 2 inches across a 20-foot span. Always base your overhead calculations on the lowest point of the ceiling.Flooring and Foundation: Protecting Your Subfloor
For strength training, standard foam puzzle mats are useless. They compress under heavy loads, destabilizing your footing during squats and deadlifts. You need 3/4-inch (19mm) vulcanized rubber mats. Unlike crumb rubber, vulcanized rubber is dense, shock-absorbent, and crucially, does not off-gas volatile organic compounds (VOCs) in enclosed spaces. According to the EPA's guidelines on indoor air quality, minimizing VOC sources in poorly ventilated areas is essential for respiratory health, especially when your breathing rate increases exponentially during heavy sets.
- Material: 100% Vulcanized Rubber (e.g., Horse Stall Mats from Tractor Supply Co., typically $55-$65 per 4x6 ft mat).
- Subfloor Prep: Clean concrete, seal with a silane-siloxane penetrating sealer to prevent moisture wicking, and lay a 6-mil polyethylene vapor barrier if in a basement.
- Seam Management: Use double-sided carpet tape or specialized rubber floor adhesive at the seams to prevent the mats from creeping apart during lateral movements or sled pushes.
The Airflow Imperative: Choosing a Home Gym Ceiling Fan
Strength training elevates your core temperature and heart rate, triggering heavy perspiration to cool the body. In a stagnant room, the air quickly becomes saturated with humidity and heat, leading to premature central nervous system (CNS) fatigue and degraded grip strength. Installing a high-performance home gym ceiling fan is non-negotiable for maintaining peak output.
Standard bedroom ceiling fans move roughly 3,000 to 4,000 CFM (Cubic Feet per Minute). This is woefully inadequate for a gym. You need a fan capable of 7,000 to 10,000+ CFM to create a wind-chill effect across a large, open floor plan. Furthermore, the motor must be a BLDC (Brushless Direct Current) motor. BLDC motors are energy-efficient, generate less heat, and operate quietly, ensuring you can hear your coaching cues or music without mechanical hum.
'Proper air velocity across the skin is just as critical as ambient temperature. A high-CFM fan creates an evaporative cooling effect that can make a 75°F garage feel like 68°F, directly impacting your perceived exertion during heavy compound lifts.' — Principles adapted from ASHRAE ventilation and thermal comfort standards.
2026 Home Gym Ceiling Fan Comparison Matrix
| Model | Blade Span | Max CFM | Motor Type | Est. Price (2026) |
|---|---|---|---|---|
| Big Ass Fans Haiku H | 84 inches | 9,800 | BLDC Smart | $1,600 - $1,800 |
| Minka-Aire Xtreme H2O | 84 inches | 8,500 | DC Motor | $650 - $750 |
| Hunter Industrial Pro | 60 inches | 7,200 | AC Industrial | $350 - $400 |
| Modern Forms Smart Fan | 72 inches | 8,100 | BLDC Smart | $800 - $900 |
Step-by-Step Ceiling Fan Installation for High Ceilings
Installing a heavy, high-CFM home gym ceiling fan requires strict adherence to structural and electrical safety. The vibration from moving 8,000+ CFM of air can loosen improper mounts over time, creating a severe hazard. The Electrical Safety Foundation International (ESFI) emphasizes that standard ceiling electrical boxes are not rated to support the dynamic weight and torque of large ceiling fans.
- Locate and Expose the Joists: Use a stud finder to locate the ceiling joists. Cut a 4-inch hole in the drywall at the desired center point of your lifting zone.
- Install a Fan-Rated Saf-T-Brace: Insert a metal, fan-rated brace box (like the Arlington Industries FB900) through the hole. Twist the brace until the spiked ends bite deeply into the adjacent wooden joists. This provides lateral stability that a standard plastic box lacks.
- Wire with Heavy-Gauge Cable: Ensure your circuit is a dedicated 15-amp or 20-amp line. Use 14-gauge or 12-gauge Romex wire, securing all wire nuts with electrical tape to prevent vibration-induced loosening.
- Calculate the Downrod Length: This is the most critical step for a strength gym. The fan blades must be at least 7 feet off the floor for safety, but you must also account for barbell clearance (see below).
- Secure the Motor Housing: Mount the hanger ball into the bracket groove, ensuring the alignment pin is seated. A misaligned pin will cause catastrophic wobbling at high speeds.
The Barbell Clearance Equation: Avoiding Blade Strikes
The most common failure mode in garage gym fan installations is striking the fan blades with a barbell during overhead presses, snatches, or jerks. Let us run the exact math to ensure your home gym ceiling fan does not become a $1,000 casualty.
Clearance Calculation Framework
- Standard Olympic Barbell Length: 86 inches (7'2").
- Lifter Height + Arm Length: Assume a 6-foot tall lifter (72 inches) with 30 inches of arm extension overhead = 102 inches.
- Plate Radius: Standard 45lb bumper plates add 17.5 inches of radius to the bar ends.
- Total Overhead Strike Zone: 102 inches (hands) + 17.5 inches (plate radius) = 119.5 inches (approx. 10 feet).
The Verdict: If your ceiling is 10 feet (120 inches) or lower, you cannot safely hang a fan with a downrod directly over the rack. You must use a flush-mount 'hugger' fan positioned outside the direct barbell path, or rely on high-velocity wall-mounted fans. If your ceiling is 12 to 14 feet, use a downrod that places the blades at exactly 125 inches (10'5") from the floor, keeping them safely above the strike zone while maintaining optimal airflow.
Equipment Placement: Rack, Bench, and Cable Integration
With the flooring down and the home gym ceiling fan secured, position your power rack. Bolt a 90-inch or 108-inch rack (like the Rogue RM-6 Monster Rack) directly into the concrete using 3/8-inch wedge anchors or sleeve anchors. Place the rack so the center of the barbell aligns with the direct downdraft of your ceiling fan. This ensures that during your most taxing sets—heavy squats and deadlifts—the evaporative cooling effect is concentrated exactly where your body generates the most heat.
Position your adjustable FID (Flat/Incline/Decline) bench and dumbbell rack in the Cold Zone, angled toward the fan but out of the barbell's drop zone. If you are integrating a cable crossover attachment, ensure the pulleys do not interfere with the fan's airflow cone. Airflow disruption from tall vertical structures can create 'dead zones' of stagnant air in the corners of your gym.
Final Walkthrough and Safety Checks
Before loading the barbell, perform a final environmental and structural audit:
- Fan Wobble Test: Run the fan at maximum speed for 15 minutes. Observe the motor housing. Any wobble greater than 1/4 inch requires re-balancing the blades using the included clipping kit.
- Lighting Integration: Ensure your LED shop lights (aim for 5000K daylight color temperature, 10,000+ lumens total) do not cast flickering shadows through the spinning fan blades, which can cause visual distraction during heavy lifts.
- Emergency Stop: Install a smart switch or keep the fan's physical remote tethered to your rack's uprights so you can kill the fan instantly if a lifting strap or resistance band gets caught in the airflow.
By meticulously planning your floor zones, investing in vulcanized rubber, and engineering the perfect home gym ceiling fan setup, you transform a raw concrete box into a high-performance strength facility capable of supporting elite-level training for years to come.
More gear to consider
All reviews
2026 Garage Gym Setup: Ventilation & Home Gym Organizer Rack Trends

Marcy MWM 990 150 Stack Home Gym: Couples Setup Review

The Beginner's Home Gym Configurator and Floor Plan Guide

Bowflex PR3000 Home Gym & The Essential Beginner Starter Kit

Space-Optimized Beginner Home Gym Starter Kit and Kids Home Gym Layout