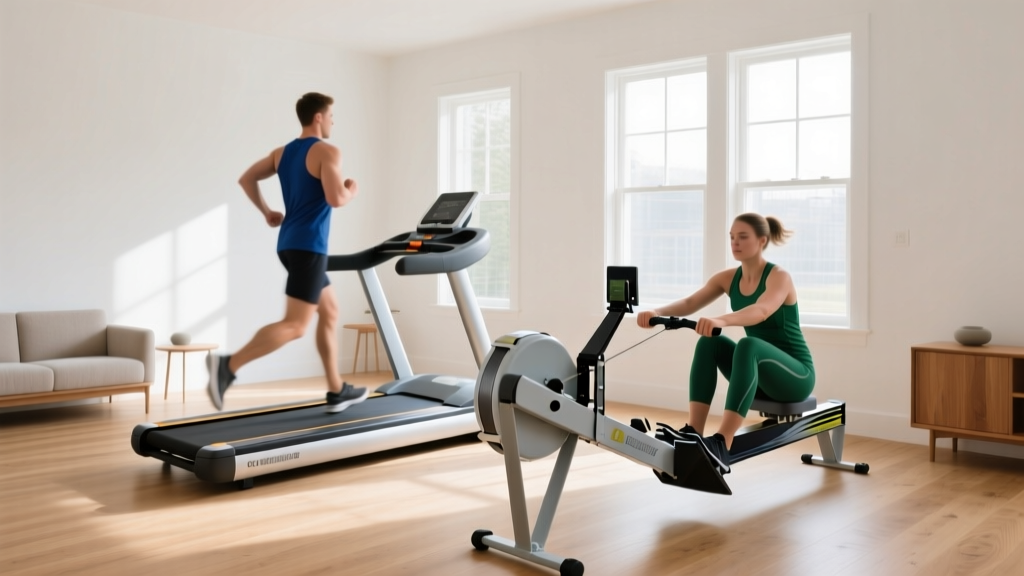
Space Treadmill vs Rower: Setup, Buying & Technique Guide
Deciding between a space treadmill and a rowing machine? Read our complete setup walkthrough, buying guide, and rowing technique tips for small homes.

When outfitting a micro-apartment or a compact home gym, the search for the perfect cardio equipment usually narrows down to two popular choices: a foldable space treadmill (often a walking pad or ultra-compact folding model) and a stowable rowing machine. While a space treadmill is excellent for low-impact steps and under-desk walking, it completely neglects the upper body and core. In 2026, fitness enthusiasts and biomechanics experts increasingly favor the rowing machine for its unparalleled ability to engage 86% of the body's musculature while still offering vertical, closet-friendly storage.
This comprehensive guide will help you decide between the two, provide a complete rowing machine buying guide, and deliver a step-by-step setup and installation walkthrough so you can assemble your new rower safely and start mastering proper technique immediately.
The Small-Space Cardio Dilemma: Space Treadmill vs. Rower
Before committing to a purchase, it is crucial to understand how these two machines operate within a constrained floor plan. A space treadmill typically slides under a sofa, but a high-quality rower can be stood on its end or separated into two pieces, taking up barely more floor space than a dining chair.
| Feature | Compact Space Treadmill | Stowable Rowing Machine |
|---|---|---|
| Footprint (In Use) | ~15 sq ft | ~16 sq ft (approx. 8' x 2') |
| Storage Footprint | ~4 sq ft (Under bed/sofa) | ~2.5 sq ft (Standing upright) |
| Muscle Engagement | Lower body only | Full body (Legs, Core, Back, Arms) |
| Noise Level | 50-65 dB (Motor/Belt) | 40-80 dB (Depends on drive type) |
| Avg. Price Range (2026) | $300 - $1,200 | $250 - $2,500 |
Rowing Machine Buying Guide: Choosing Your Drive Type
If you decide that the full-body benefits outweigh the under-sofa convenience of a space treadmill, your next step is selecting the right rowing machine. The market is dominated by four drive mechanisms, each with distinct spatial and acoustic profiles.
1. Air Resistance (The Gold Standard)
Air rowers use a flywheel with fan blades. The harder you pull, the more resistance is generated. The Concept2 RowErg (priced around $990) remains the undisputed champion for durability and accurate performance tracking. Drawback: They are loud (often exceeding 75 dB), which can be disruptive in apartments with thin walls.
2. Magnetic Resistance (The Quiet Contender)
Magnetic rowers use electromagnets to brake the flywheel. They are virtually silent (under 50 dB), making them ideal for shared living spaces or early-morning workouts. High-end models like the Hydrow or NordicTrack RW900 offer immersive screens, though they are heavier and harder to move when not in use.
3. Water Resistance (The Aesthetic Choice)
Water rowers, such as the WaterRower Oak series ($1,595+), use a paddle spinning in a polycarbonate tank. They produce a soothing, realistic 'whoosh' sound and look like premium furniture. However, they require periodic water purification tablets and cannot be folded, only stood upright.
4. Hydraulic Resistance (The Budget Option)
Hydraulic rowers use pistons attached to the handlebars. They are the most compact and cheapest (under $250) but offer a jerky stroke that fails to replicate the smooth, continuous pull of air or magnetic models. We generally advise against these for serious training.
Expert Tip: If your primary goal is space-saving without sacrificing workout quality, look for a magnetic rower with a folding rail hinge. These models fold in half vertically, reducing their length from 85 inches to roughly 42 inches, allowing them to fit into standard coat closets.Complete Setup and Installation Walkthrough
Most premium rowing machines arrive partially assembled, but the final setup requires precision to ensure the rail is perfectly level. A misaligned rail will cause the seat carriage to wobble and degrade the wheel bearings over time. Below is a universal walkthrough based on standard dual-rail and single-rail rowing machines.
Step 1: Unboxing and Hardware Inventory
Rowers are heavy (often 60 to 150 lbs). Do not attempt to lift the main flywheel assembly alone. Cut the box straps and carefully roll the front frame assembly out of the cardboard. Locate the hardware blister pack. You will typically need:
- 4x M8 x 40mm Hex Bolts (for rail joining)
- 2x M10 x 60mm Carriage Bolts (for rear stabilizer)
- 1x 15mm Hex Wrench and 1x Phillips Head Screwdriver
Step 2: Joining the Rail Assembly
This is the most critical step. If your rower ships with a two-piece rail (common with Concept2 and many magnetic models):
- Place the front rail assembly on a soft surface (use the cardboard box to prevent scratching your floor).
- Align the rear rail section with the front section. Ensure the internal seat track grooves match perfectly.
- Slide the steel joining plate underneath the seam.
- Insert the four M8 hex bolts. Do not fully tighten them yet. Thread them to about 80% tightness.
- Run the seat carriage back and forth across the seam. If it catches or clicks, loosen the bolts, realign the track by a fraction of a millimeter, and retighten.
- Once the carriage glides seamlessly, fully torque the bolts.
Step 3: Attaching the Monitor Arm and Routing Cables
Attach the monitor arm to the front frame using the provided M6 bolts. Carefully route the sensor cable through the designated plastic clips along the arm. Ensure the cable has enough slack so that it does not pull taut when the monitor is tilted toward the user. Plug the cable into the rear of the display unit until you hear a firm click.
Step 4: Leveling the Stabilizers
Attach the rear foot stabilizer. Most home floors are uneven. Use a standard carpenter's level placed horizontally across the main rail. Adjust the threaded rubber footpads on the rear stabilizer until the bubble is perfectly centered. This prevents the machine from 'walking' across your floor during high-intensity sprints.
Mastering Rowing Technique: The 4-Phase Stroke
Unlike a space treadmill where you simply walk or run, rowing requires technical proficiency to avoid lower back pain and maximize caloric output. According to British Rowing's technique guide, the stroke is broken down into four distinct phases. A common beginner mistake is pulling primarily with the arms; in reality, 60% of the power comes from the legs, 30% from the core, and only 10% from the arms.
1. The Catch
Slide forward on the rail until your shins are completely vertical. Your knees should be stacked directly over your ankles. Hinge forward from the hips (not the lower back) so your torso is at an 11 o'clock angle. Arms should be fully extended, gripping the handle loosely.
2. The Drive
This is the power phase. Push explosively through your heels. Do not pull with your arms yet. Your arms act merely as hooks connecting your torso to the handle. Once your legs are nearly straight, swing your torso back to a 1 o'clock position, and finally, draw the handle into your lower ribcage.
3. The Finish
At the end of the drive, your legs are fully extended, your core is braced, and the handle is resting just below your chest. Your elbows should be drawn back and relaxed.
4. The Recovery
The recovery is the resting phase and should take twice as long as the drive (a 1:2 ratio). Extend your arms forward first, hinge your torso back to 11 o'clock, and only then bend your knees to slide back to the Catch position.
'The most frequent error we see in home gym users is rushing the slide. The recovery should be a controlled, patient glide back to the catch. If you hear the seat wheels slamming into the front bumper, you are rushing the slide and bleeding kinetic energy.' — Biomechanics insights from the ACE Fitness Exercise Library.
Space-Saving Storage and Daily Maintenance
To maintain your machine and keep your living space functional:
- Daily: Wipe down the rail and handle with a mild, non-abrasive cleaner. Sweat contains salts that will rapidly corrode the steel rail and degrade the seat wheels.
- Weekly: Inspect the bungee cord (on air/magnetic rowers) for fraying. A snapped bungee cord during a sprint can cause the handle to recoil violently.
- Storage: If using a foldable model, ensure the locking pin is fully engaged before lifting the rear rail into the vertical position. For models that separate (like the Concept2), store the front frame on its casters in a closet, and lean the rear rail against a wall using a wall-mount hook.
Final Verdict
While a space treadmill has its place for passive movement and under-desk walking, a rowing machine offers a vastly superior, time-efficient cardiovascular and strength stimulus. By selecting the right drive type for your noise tolerance, carefully executing the rail assembly, and adhering to the 1:2 stroke ratio, you can build an elite-tier home gym in less than 16 square feet of floor space.
More gear to consider
All reviews
Wellfit vs Deer Run Treadmill: 2026 Under Desk Office Review

Folding Epic A30T Treadmill Review: Small Space Care & Longevity

DeerRun CT05 Treadmill: Setup Walkthrough & Feature Comparison

NordicTrack T Series 10 Treadmill Belt Maintenance & 2026 Trends
Compact Portable Cardio Options vs. Underwater Treadmill for Dogs
