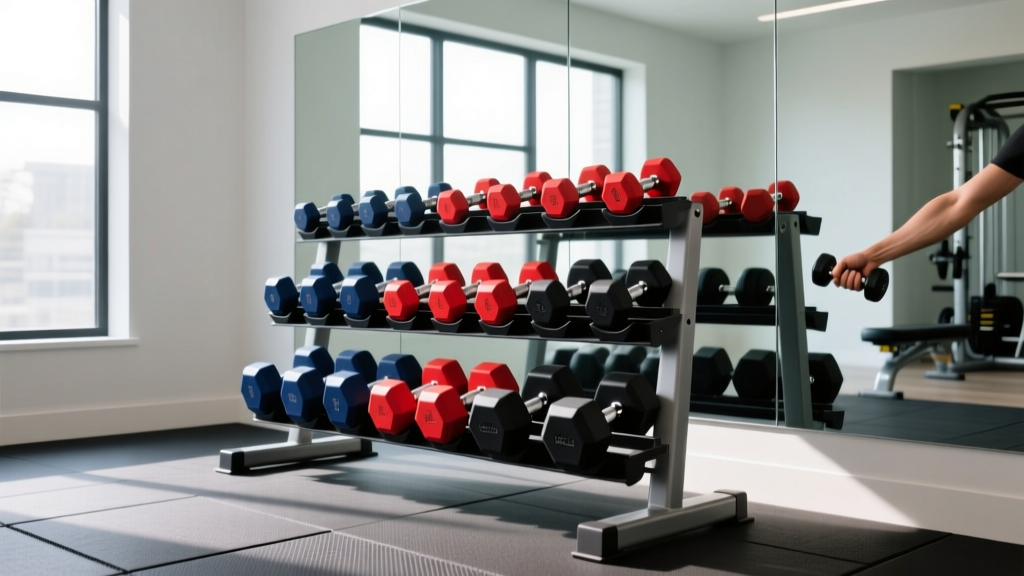
Space-Saving Dumbbell Racks for Your Dumbbell Leg Workout
Discover space-saving dumbbell racks and layout tips to maximize floor space, ensuring safe and efficient movement for your heavy dumbbell leg workout.

The Spatial Conflict: Heavy Iron vs. Dynamic Movement
Designing a functional home gym in a limited footprint requires balancing two opposing forces: the dense storage requirements of heavy free weights and the expansive clearance needed for dynamic human movement. Nowhere is this tension more apparent than when planning the layout for a dumbbell leg workout. Lower body training demands significant linear and lateral space, yet the equipment required—often ranging from 20 lb to 100 lb pairs—requires robust, heavy-duty storage solutions that consume valuable square footage.
According to facility layout guidelines published by the National Strength and Conditioning Association (NSCA), active lifting zones must maintain a minimum of 36 inches of clearance from stored equipment to prevent tripping hazards and allow for emergency weight dumping. When your dumbbell leg workout includes exercises like walking lunges, Bulgarian split squats, and Romanian deadlifts (RDLs), that 36-inch rule quickly becomes the bare minimum. In 2026, with home gym footprints shrinking and equipment weights increasing, optimizing your dumbbell rack placement is no longer just an organizational preference—it is a biomechanical and safety necessity.
The Geometry of Leg Day: Calculating Your Clearance Zone
Before selecting a rack, you must map the spatial demands of your specific training regimen. A standard upper-body dumbbell routine can often be confined to a 4x4 foot bench area. A comprehensive lower-body session, however, expands that footprint exponentially.
- Goblet Squats & Sumo Deadlifts: Require a static 4x4 foot stance zone, plus 18 inches of lateral clearance for elbow tracking and weight dumping.
- Dumbbell RDLs: Require a 4x6 foot zone to accommodate the posterior hinge and the forward travel path of the dumbbells.
- Walking Lunges: Demand a linear path of at least 8 to 10 feet, completely free of protruding rack legs or low-tier shelves.
- Bulgarian Split Squats: Require a 6x6 foot area to account for the bench, the rear foot elevation, and the forward knee travel.
Expert Layout Insight: The "Drop Zone" Radius
When executing a heavy dumbbell leg workout, muscular failure often results in dropping the weights. Never position a storage rack directly behind or immediately adjacent to your primary drop zone. Dropped 80 lb hex dumbbells can easily glance off rubber flooring and strike the steel uprights of a nearby rack, causing severe damage to the rack's powder coating, the dumbbell's urethane casing, or your own shins.
Rack Typology: Footprint vs. Capacity Analysis
Choosing the right storage unit hinges on your total weight inventory and your available floor space. Below is a 2026 market analysis of the three primary dumbbell rack configurations, optimized for space-constrained environments.
| Rack Configuration | Footprint (Sq Ft) | Max Capacity | 2026 Price Range | Best Application |
|---|---|---|---|---|
| 3-Tier Horizontal (e.g., Rogue 3-Tier) | ~6.8 sq ft (43" x 23") | 1,000+ lbs | $295 - $350 | Full sets (5-50 lbs); Wall-hugging layouts |
| A-Frame (e.g., CAP Barbell SD-8002) | ~4.3 sq ft (25" x 25") | 200 - 300 lbs | $85 - $120 | Light/Medium sets; Corner placements |
| Vertical Tree (e.g., Titan Fitness) | ~2.2 sq ft (20" diameter) | 400 - 600 lbs | $149 - $199 | Neoprene/Urethane hex sets; Tight alcoves |
The Horizontal Advantage for Leg Day
While the Vertical Tree offers the smallest footprint, it presents a unique hazard for lower-body training. Bending down to retrieve a 70 lb dumbbell from the bottom peg of a vertical tree requires a deep hinge and a twisting motion under load—a recipe for lumbar strain before your actual workout even begins. For athletes prioritizing a heavy dumbbell leg workout, the 3-Tier Horizontal Rack is vastly superior. It allows you to step up to the rack, maintain a neutral spine, and deadlift the weight off the tier in a controlled, linear path. Furthermore, horizontal racks can be pushed flush against a wall, completely eliminating the "dead space" behind the unit.
Strategic Layout Blueprints: The Perimeter Flow Strategy
To maximize the central floor area for your dumbbell leg workout, abandon the traditional "center-stage" equipment placement. Instead, adopt the Perimeter Flow Strategy. This involves anchoring all high-density storage to the room's outer boundaries, creating an unobstructed central arena.
"Ergonomic flow in a home gym dictates that equipment retrieval should never cross the primary plane of movement. If you are performing walking lunges down the center of the room, your dumbbell rack must be positioned on the lateral starting line, allowing you to pick up the weights, step into the lane, and execute the movement without navigating around steel uprights."
— Adapted from principles by the American Council on Exercise (ACE) regarding home fitness environment safety.
Wall-Mounted vs. Freestanding Considerations
If your floor space is critically limited, wall-mounted dumbbell shelves (such as the Rogue Wall-Mount Dumbbell Shelves) reduce the floor footprint to absolute zero. However, this requires drilling into structural studs. Standard 1/2" lag bolts into 2x4 wooden studs can support roughly 200 lbs of shear force per bolt. A fully loaded wall shelf holding 150 lbs of iron is safe, but you must ensure the dynamic force of pulling heavy dumbbells off the shelf does not gradually loosen the hardware over time.
Edge Cases: Point Loads and Flooring Dynamics
A frequently overlooked aspect of space optimization is the structural impact of the rack itself. A 3-tier horizontal rack loaded with 800 lbs of cast iron concentrates that weight into four small steel feet. This creates a massive point load.
- Concrete Slabs (Garages/Basements): Can easily handle the point load. Place the rack directly on the concrete, using a thin rubber mat only to prevent the steel feet from vibrating and "walking" during weight retrieval.
- Second-Floor Joists (Bedrooms/Offices): Standard residential floor joists are rated for 40 lbs per square foot of live load. An 800 lb rack occupying 6.8 sq ft exerts nearly 117 lbs per square foot. Solution: Place a thick, high-density 3/4" horse-stall mat under the rack to distribute the point load across a wider area of the subfloor, and position the rack directly over a load-bearing wall or perpendicular to the joist span.
Troubleshooting Common Layout Failures
Even with the right equipment, poor spatial planning can derail your training. Here is how to fix the most common layout errors that impede a dumbbell leg workout:
- The "Pinch Point" Error: Placing a squat rack and a dumbbell rack on adjacent walls, leaving only 24 inches of walking space between them. Fix: Maintain a minimum 36-inch transit corridor. If impossible, stagger the equipment on opposite ends of the room.
- The Shadow Zone: Positioning the dumbbell rack in a poorly lit corner, forcing you to squint at weight stamps when selecting your working sets for RDLs. Fix: Install a cheap, motion-sensor LED strip light directly under the lip of each horizontal tier.
- The Symmetry Trap: Storing dumbbells in strict numerical order without considering usage frequency. Fix: For leg day, your heaviest pairs (for RDLs and Goblet Squats) should be stored at waist height (Tier 2) to minimize spinal flexion during pickup. Lighter pairs (for lateral raises or calf raises) can go on the bottom or top tiers.
Final Verdict: Designing for the Long Haul
Optimizing your home gym for a demanding dumbbell leg workout is an exercise in spatial geometry as much as it is in physical conditioning. By selecting a 3-tier horizontal rack to preserve your lower back during weight retrieval, enforcing strict 36-inch clearance perimeters, and respecting the point-load dynamics of your flooring, you create an environment that supports heavy, unencumbered training. In 2026, the smartest home gyms aren't necessarily the largest—they are the ones where every square inch is engineered for performance and safety.
More gear to consider
All reviews
Power Rack vs Squat Rack vs Stand for Overhead Dumbbell Tricep Press
Troubleshooting Dumbbell Deadlifts: Olympic Barbell Weight & Knurling Guide
Upper Body Dumbbell Workout Gear: Rubber Hex vs Urethane Value Guide

Dumbbell Rack Storage: Budgeting for Your Dumbbell Bench Lunge Setup

2026 Dumbbell Rack Trends: Good Mornings Exercise With Dumbbells