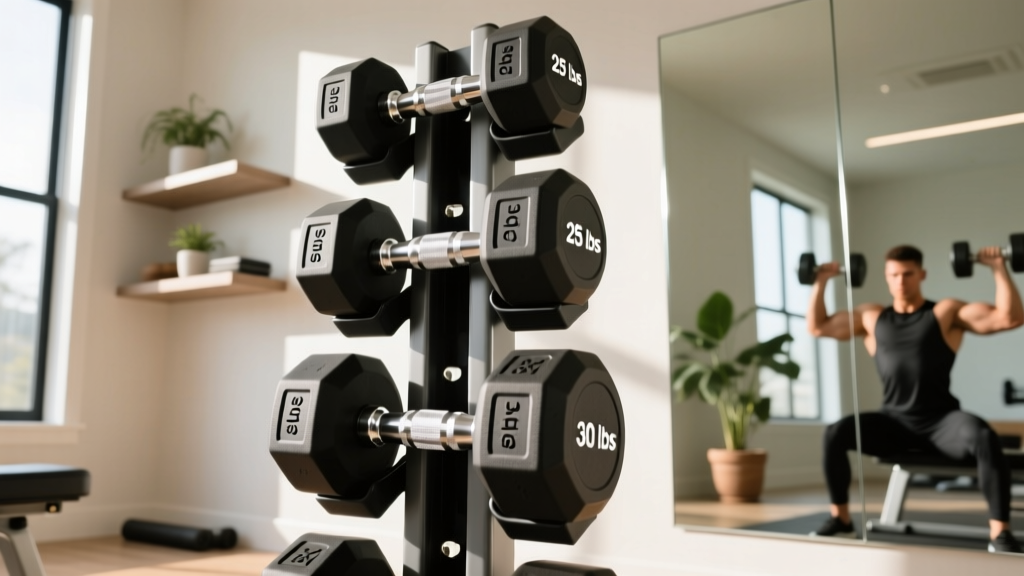
Single Arm Dumbbell Shoulder Press: Rack Storage & Maintenance Tips
Optimize your dumbbell rack storage and maintenance for heavy single arm dumbbell shoulder press workouts. Learn gear longevity and safety tips.

The Hidden Biomechanical Toll of Unilateral Pressing on Gym Gear
When athletes think about the single arm dumbbell shoulder press, they usually focus on core stability, unilateral strength imbalances, and central nervous system (CNS) fatigue. However, as a senior equipment reviewer, I look at the biomechanical toll this movement takes on your free weights and storage infrastructure. According to the National Strength and Conditioning Association (NSCA), unilateral training introduces significant rotational forces and asymmetric loading patterns. When you apply this to a 90 lb or 100 lb dumbbell, the physics of unracking and reracking become a major point of failure for both the equipment and the storage rack.
Unlike a bilateral movement where weight is distributed evenly across both hands and the rack shelf, executing a heavy single arm dumbbell shoulder press requires you to dead-stop, clean, and press a massive load with one side of your body. The torsional torque applied to the dumbbell handle during a one-handed clean, combined with the awkward angle at which the weight is often shoved back onto the rack, leads to accelerated knurling wear, handle fatigue, and rack shelf deformation. If you are training heavy unilateral movements in 2026, your storage and maintenance protocols must evolve to match the physical demands of the lift.
Evaluating Storage Racks for Asymmetric Loads
Not all dumbbell racks are engineered to withstand the repetitive, asymmetric abuse of heavy single-arm work. The two dominant storage solutions in commercial and high-end home gyms are the horizontal 3-tier rack and the vertical A-frame rack. Choosing the right one dictates how safely you can unrack your weights for a single arm dumbbell shoulder press.
Horizontal 3-Tier vs. Vertical A-Frame
| Feature | Horizontal 3-Tier (e.g., Rep Fitness SR-4000) | Vertical A-Frame (e.g., Rogue Vertical Rack) |
|---|---|---|
| Steel Gauge | 11-Gauge Steel Shelves | 2x2 or 3x3 11-Gauge Uprights |
| Max Shelf Load | ~800 lbs per tier (evenly distributed) | ~1,200 lbs total (lower center of gravity) |
| Unrack Ergonomics | Requires bending and twisting for bottom tiers | Waist-level access; ideal for one-handed heavy pulls |
| Footprint | Wide (approx. 44' x 22') | Compact (approx. 30' x 24') |
| Best For | Full sets (5-120 lbs) | Heavy sets (50-150 lbs) & Unilateral Pressing |
For athletes routinely performing the single arm dumbbell shoulder press with loads exceeding 70 lbs, vertical A-frame racks are vastly superior. They allow you to approach the dumbbell from a standing or half-kneeling position, grip the handle with a neutral wrist, and deadlift the weight directly upward without the spinal flexion and twisting required to pull a 100 lb dumbbell off the bottom tier of a horizontal rack.
The Safe Unrack and Rerack Protocol
Equipment longevity isn't just about buying premium gear; it is about how you handle it. The vast majority of dumbbell handle bends and rack shelf lip deformations occur during the reracking phase of a fatigued set. Follow this strict protocol to protect your investment:
- The Approach: Stand square to the vertical rack or the specific tier of your horizontal rack. Do not approach at an angle.
- The Grip & Lift: Chalk your hand, grip the knurling fully, and hinge at the hips. Drive through the floor to bring the dumbbell to your shoulder. Never 'curl' a heavy dumbbell into position for a single arm dumbbell shoulder press; this places lateral bending stress on the handle.
- The Descent (Reracking): After your set, do not drop the dumbbell onto the shelf from chest height. Lower it under control to your hip.
- The Placement: Guide the dumbbell head onto the shelf lip first, then slide it back. Ensure the hex heads are fully seated against the backstop before releasing your grip.
- The Release: Let go of the handle smoothly. Dropping the handle onto the metal shelf edge from even two inches away, repeatedly, will eventually cause the chrome plating to flake and the knurling to blunt.
Hardware and Weld Maintenance
Heavy unilateral lifting creates micro-vibrations and asymmetric stress on rack joints. A rack that holds 500 lbs of static weight can still fail if the hardware loosens over time due to the dynamic slamming of heavy dumbbells.
Quarterly Hardware Audits
Every three months, perform a structural audit on your dumbbell storage rack. Focus on the following:
- Bolt Torque: Most premium racks use M10 or M12 hex bolts for shelf assembly. Use a torque wrench to ensure these are tightened to 40-50 Nm. Over-tightening can strip the threads on the receiving nut welds, while under-tightening allows shelf wobble.
- Weld Inspection: Wipe down the gussets (the triangular metal supports under the shelves) with a microfiber cloth. Look for 'rust blooming' or hairline orange streaks. This is the first sign of weld fatigue and micro-fracturing caused by uneven load distribution.
- Shelf Lip Deformation: Run your hand along the front lip of the rack shelves. If you feel deep gouges or a downward bend in the steel, your reracking protocol needs correction, or you need to install rubber U-channel edge protectors.
Dumbbell Material Care: Urethane vs. Virgin Rubber
The environment where you store your dumbbells dictates their lifespan. In 2026, premium urethane dumbbells cost between $3.50 and $4.50 per pound, while high-quality virgin rubber sits around $2.00 to $2.50 per pound. Protecting these materials is critical.
⚠️ Chemical Warning: Urethane Degradation
Never use bleach, ammonia, or alcohol-based disinfectants on urethane dumbbells. These harsh chemicals break down the polyurethane molecular bonds, leading to sticky surfaces and eventual crumbling. According to equipment maintenance guides from Garage Gym Reviews, a simple pH-neutral dish soap mixed with warm water, applied via a microfiber cloth, is the only safe way to remove sweat acidity and chalk buildup from premium dumbbell heads.
For the handles, sweat is the ultimate enemy. The acidic pH of human sweat accelerates oxidation on chrome and zinc-plated handles. After a heavy session of single arm dumbbell shoulder presses, take a wire brush (brass, not steel, to avoid damaging the knurl peaks) and brush out the chalk and dead skin from the knurling. Wipe the handle down with a light coat of 3-in-One oil or a specialized barbell rust-preventative spray to seal the pores of the metal.
Troubleshooting Common Storage Failures
Even with meticulous care, heavy free weights experience wear. Here is how to troubleshoot and address the most common issues associated with heavy unilateral storage:
- Spinning Handles: If the handle of your dumbbell spins independently of the head during the clean phase of your single arm dumbbell shoulder press, the internal retaining ring or bolt has failed. Fix: For bolt-head dumbbells, use a hex key to tighten the internal assembly bolt. If it is a press-fit or welded handle, the unit is structurally compromised and must be retired to prevent catastrophic failure mid-press.
- Rack Sway: If your 3-tier horizontal rack sways when you pull a heavy dumbbell from the top tier, the cross-bracing is insufficient. Fix: Retrofit the rear of the rack with diagonal steel strapping or upgrade to a rack featuring 7-gauge steel uprights rather than 11-gauge.
- Head Separation: Cheap cast-iron dumbbells encased in rubber often suffer from head separation, where the metal core pulls away from the rubber casing due to the lateral force of being dropped onto a rack. Fix: This cannot be repaired safely. Upgrade to solid cast-iron with a zinc coating, or premium urethane where the head is mechanically locked or poured directly around a forged steel handle.
Final Thoughts on Gear Longevity
Mastering the single arm dumbbell shoulder press requires immense physical strength, but preserving the equipment that makes the lift possible requires discipline and knowledge. As highlighted by strength experts at BarBend, treating your home or commercial gym equipment with the same respect as a calibrated barbell will ensure your gear survives decades of heavy, asymmetric abuse. Invest in a vertical rack for heavy unilateral work, adhere to a strict reracking protocol, and stay on top of your quarterly hardware torque checks. Your shoulders—and your wallet—will thank you.
More gear to consider
All reviews
Single Arm Dumbbell Triceps Extensions & Barbell Collar Clamp Guide

Rubber Hex vs Urethane: Are 40 lb Dumbbells Worth the Upgrade?

Redefining the Definition of Dumbbell: Nuobell vs PowerBlock (2026)

Olympic vs Standard Plates Setup & Rear Delt Pulls Dumbbell Guide

How to Work Out Chest With Dumbbells: Loadable Plate Maintenance
