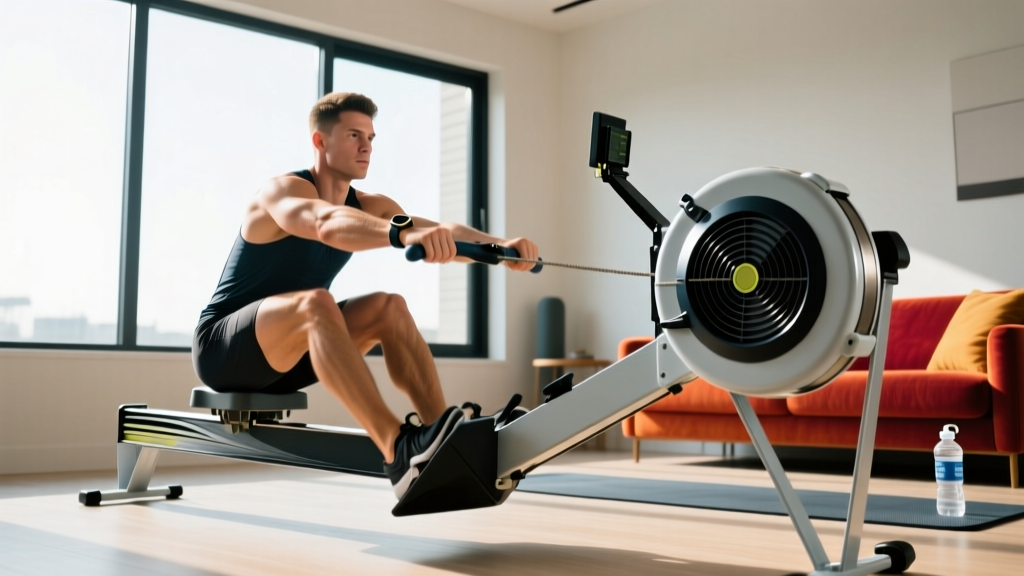
Rowing Machine Technique: Avoid the Shrimp on Treadmill Government Study Trap
Avoid the shrimp on treadmill government study trap. Master rowing machine technique, troubleshoot form errors, and buy the right 2026 ergometer.

You might recall the viral outrage over a 'shrimp on treadmill government' study—a real, taxpayer-funded research project where scientists placed crustaceans on a miniature treadmill to study stress responses and aquatic locomotion. While the internet rightfully mocked it as bureaucratic absurdity, it perfectly illustrates a core principle of biomechanics: forcing a body into an unnatural, poorly sequenced movement pattern results in wasted energy, high joint stress, and zero forward progress.
Tragically, 90% of beginners step onto a rowing machine and immediately replicate the 'shrimp on a treadmill' effect. They pull with their arms first, hunch their shoulders, and violently yank the handle, treating the ergometer like a medieval torture device rather than a fluid, full-body cardiovascular tool. In 2026, with advanced ergometers offering unprecedented biometric feedback, there is no excuse for this kinetic waste.
This guide will troubleshoot your rowing technique, dismantle common mechanical errors, and help you buy a machine that naturally enforces proper human biomechanics.
The 4 Biomechanical Mistakes (The 'Shrimp' Flail)
Rowing is a closed-kinetic-chain exercise. According to World Rowing, the international governing body for the sport, power transfer must follow a strict proximal-to-distal sequence. When you break this chain, you leak power and invite lumbar injury.
1. The 'Pull-First' Panic (Early Arm Bend)
The most common error is bending the elbows before the legs have fully extended. This shifts the load from your massive glutes and quads to your tiny biceps and forearms. Your arms are merely 'ropes' connecting your torso to the handle; they should not initiate the drive.
The Fix: Think 'Legs, Body, Arms' on the drive, and 'Arms, Body, Legs' on the recovery. Your elbows must remain locked until the handle passes your knees.2. The Shooting Slide
You push with your legs, but the handle doesn't move. Your torso collapses forward, and your hips shoot back. This happens when your core is disengaged, causing the force of the leg drive to be absorbed by your lower back rather than transferred to the handle.
3. Over-Compressing at the Catch
Sliding too far forward (past vertical shins) forces the hips to drop below the knees. This puts immense shear force on the lumbar spine and limits the ability to apply horizontal force. Stop the slide the moment your shins are vertical.
4. The Death Grip and Wrist Curls
Choking the handle and curling your wrists at the finish causes lateral epicondylitis (tennis elbow). You should hold the handle loosely with your fingers, not your palms, keeping your wrists perfectly flat and aligned with your forearms at the finish.
2026 Buying Guide: Ergometers That Enforce Proper Kinematics
Not all rowing machines are created equal. Some mask your inefficiencies, while others provide immediate tactile or visual feedback to correct your form. Here is how the top 2026 models stack up for technique enforcement.
| Model | Resistance Type | 2026 Price Range | Form-Correction Features |
|---|---|---|---|
| Concept2 RowErg | Air (Flywheel) | $990 - $1,350 | PM5 monitor shows force curve; air resistance naturally scales with true effort. |
| Hydrow | Electromagnetic | $2,495 | HD screen features real-time stroke-rate pacing and on-demand coach form corrections. |
| WaterRower Natural Oak | Water | $1,299 | Acoustic feedback; the 'whoosh' sound instantly reveals jerky, uneven acceleration. |
Expert Verdict: If your primary goal is pure biomechanical feedback and competitive benchmarking, the Concept2 RowErg remains the undisputed gold standard. Its force curve graph on the PM5 monitor will immediately expose the 'shooting slide' or early arm bend by showing a dip in your power application mid-stroke.
Hardware Troubleshooting: When the Machine Sabotages Your Form
Sometimes, your technique isn't the problem—the machine's setup is. Before blaming your biomechanics, check these three hardware variables.
- The Drag Factor Delusion: Beginners invariably set the damper lever to 10, assuming higher equals better. This is a massive mistake. A damper setting of 10 mimics rowing a heavy, waterlogged wooden barge, which destroys your stroke rate and forces you to muscle through the catch. According to Concept2's official guidelines, you should be rowing at a drag factor between 100-110 (women) and 110-130 (men), which simulates a sleek racing shell. How to check: On the PM5 monitor, go to More Options > Display Drag Factor, and pull 5 strokes to see your true number. Adjust the physical damper lever until you hit the 100-130 range.
- Footplate Strap Placement: If the strap crosses your toes, you will push off the balls of your feet, engaging the calves and causing heel lift. The strap must cross the widest part of your foot, securing the metatarsals to the board.
- Bungee Cord Tension: If the chain retracts sluggishly during the recovery phase, you will instinctively rush the slide to 'catch' the slack, ruining your 1:2 drive-to-recovery ratio. If the chain doesn't snap back briskly, the internal elastic bungee cord needs replacing or tensioning via the side-cage adjuster.
The 'Pick Drill' Reset Protocol
If you find yourself reverting to the chaotic 'shrimp on a treadmill' government study flail during a high-intensity interval, stop immediately. Reset your motor pattern using the Pick Drill. This isolates the sequence and rebuilds muscle memory.
- Step 1: Legs Only (20 strokes). Arms straight, torso leaning forward at 11 o'clock. Push with the legs. The handle should only move a few inches. Focus on the explosive hip hinge.
- Step 2: Legs and Body (20 strokes). Add the torso swing. Push with the legs, then swing the back to 1 o'clock. Arms remain straight.
- Step 3: Full Stroke (20 strokes). Add the arm pull at the very end of the sequence. Finish with the handle at the lower ribs, elbows drawn back, wrists flat.
Pro Tip: Record your rowing session from a lateral (side) angle using your smartphone. Compare your joint angles at the 'catch' and 'finish' positions against the Concept2 technique gallery. Visual feedback is the fastest way to cure the shooting slide.
Summary: Row Like a Human, Not a Crustacean
The infamous shrimp on treadmill government study taught us that forcing an organism into an environment and movement pattern it isn't designed for yields terrible results. The rowing machine is a beautifully engineered tool designed to work with human anatomy, not against it. By lowering your drag factor, mastering the proximal-to-distal sequence, and utilizing the Pick Drill to reset your neurology, you will transform your rowing from a stressful, disjointed flail into a powerful, rhythmic, and highly efficient cardiovascular engine.
More gear to consider
All reviews
Sore Knees After Running on Treadmill? Top Rowing Alternatives
Bike Maintenance vs. the Amazon Commercial Dad on Treadmill

Compact Portable Cardio: Hands-On Johnson Treadmill Review

Stair Climber Guide: Difference Between Walking Pad and Treadmill
Quiet Cardio: Lopifit Treadmill Walking Bicycle & Noise Comparison
