Treadmill Stops When Running? Rowing Machine Setup Guide
Frustrated that your treadmill stops when running? Discover our complete rowing machine buying, setup, and technique guide for a reliable cardio alternative.

The Mechanical Reality: Why Your Treadmill Stops When Running
There are few things more disruptive to a home gym session than when your treadmill stops when running mid-stride. As a fitness equipment technician, I see this failure mode constantly. It is rarely a random glitch; it is usually a mechanical or electrical safeguard triggering. When a treadmill belt lacks proper silicone lubrication, the friction between the belt and the wooden deck causes the drive motor to draw excessive amperage (often spiking above 15 amps). To prevent a fire hazard, the motor controller's thermal cutoff trips, abruptly halting the belt. Other culprits include a misaligned reed switch, a worn drive belt, or a failing lower control board.
If you are exhausted by the constant maintenance, belt tensioning, and electronic troubleshooting required to keep a treadmill operational, it is time to pivot. A rowing machine offers a zero-impact, full-body cardiovascular workout with a fraction of the mechanical failure points. This comprehensive guide walks you through the 2026 rowing machine buying landscape, exact installation measurements, and the biomechanics of a flawless stroke.
Expert Insight: Unlike treadmills that rely on high-torque DC motors and high-friction decks, premium rowing machines utilize air, water, or magnetic resistance. The only major moving part is the seat carriage on a steel or aluminum rail, virtually eliminating the "sudden stop" failure mode inherent to motorized cardio equipment.The 2026 Rowing Machine Buying Framework
Before unboxing and assembling, you must select the right resistance profile for your space and acoustic tolerance. The market has consolidated around three primary technologies for home use.
1. Air Resistance (The Gold Standard)
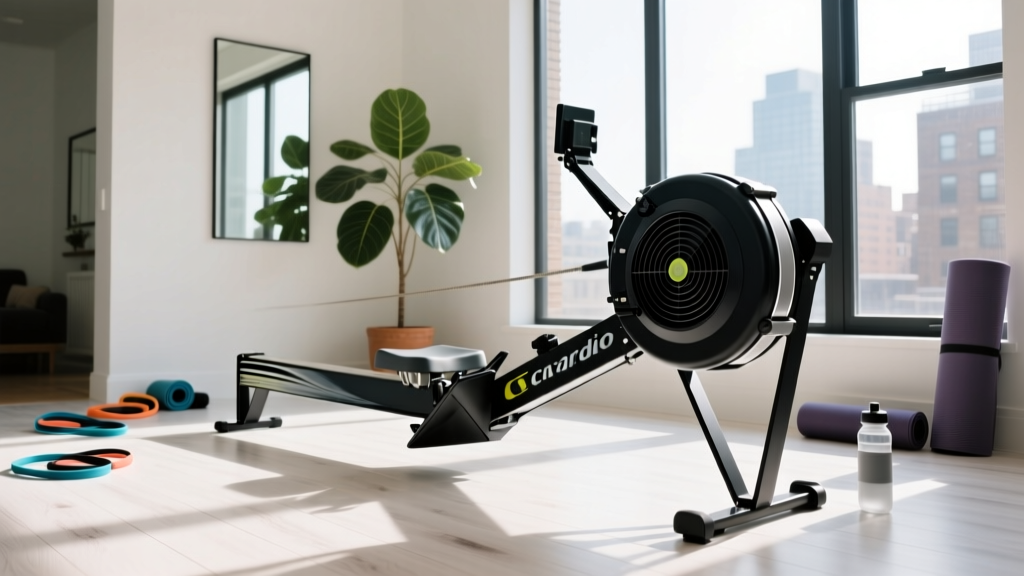
Air rowers use a flywheel with fan blades. The harder you pull, the more resistance is generated. The Concept2 RowErg (formerly Model D) remains the undisputed industry benchmark, retailing around $990. It is virtually indestructible, used by Olympic athletes, and requires minimal maintenance. The trade-off? It is loud, producing a distinct "whoosh" that can interfere with TV audio.
2. Magnetic Resistance (The Silent Operator)
Magnetic rowers use electromagnets to brake a metal flywheel. They are nearly silent and offer highly precise, programmable resistance. The Hydrow Arc ($1,495) is a top-tier 2026 option, featuring a compact footprint and an immersive 17-inch touchscreen. However, magnetic rowers lack the infinite, dynamic resistance curve of air rowers, capping out at a fixed maximum drag.
3. Water Resistance (The Aesthetic Choice)
Water rowers, like the WaterRower Natural ($1,295), use a paddle spinning in a polycarbonate water tank. They provide a soothing acoustic profile and a beautiful wood-frame aesthetic. However, they require periodic water purification tablets and lack the digital telemetry integration of air or magnetic models.
Complete Installation & Space Walkthrough
Proper setup is critical for ergonomic safety and equipment longevity. While a treadmill requires a dedicated 20-amp circuit and a massive 30-square-foot footprint, a rower is far more forgiving. Below is the step-by-step installation walkthrough for a standard air rower (using the Concept2 footprint as our baseline).
Space & Clearance Requirements
- Minimum Operating Footprint: 107 inches (L) x 33 inches (W).
- Storage Footprint: 25 inches (W) x 27 inches (D) when stood vertically.
- Ceiling Clearance: Minimum 8 feet to accommodate the monitor arm and full arm extension.
Step-by-Step Assembly Protocol
- Rail Alignment: Attach the front leg assembly to the main rail using the provided M8 hex bolts. Use a torque wrench to tighten to 15 Nm. Misalignment here causes the seat carriage to bind and derail.
- Monitor Arm Installation: Insert the monitor arm into the flywheel housing. Ensure the internal ribbon cable is not pinched. A pinched cable will result in erratic stroke-rate readings.
- Footplate Calibration: Adjust the footplates based on your shoe size. The heel cup should sit securely below your Achilles tendon. For Concept2 models, set the footplate angle to a 10-15 degree outward splay to match natural hip biomechanics and prevent knee valgus during the drive phase.
- Chain & Bungee Inspection: Before your first stroke, pull the handle to the sternum and release it slowly. The handle should return smoothly to the cage in under 1.5 seconds. If it hesitates, the internal bungee cord tension needs adjustment via the rear housing dial.
Mastering the Technique: The 4-Phase Stroke
According to the American Council on Exercise (ACE), improper rowing form is the leading cause of lumbar strain in home gym users. Rowing is not an arm exercise; it is a sequential power transfer. Memorize this 60-20-20 power distribution: 60% legs, 20% core, 20% arms.
Phase 1: The Catch
Slide forward until your shins are perfectly vertical (perpendicular to the floor). Your arms should be fully extended, shoulders relaxed, and torso hinged forward at an 11 o'clock angle. Crucial Error to Avoid: Do not compress past vertical shins. Over-compression forces the hips to tuck, placing massive shear stress on the L4-L5 lumbar discs.
Phase 2: The Drive
Initiate the movement by explosively pressing through your mid-foot and heels. Your arms remain completely straight like hooks until the handle passes your knees. Only then do you hinge the torso back to a 1 o'clock position and finally pull the handle to your lower sternum.
Phase 3: The Finish
At the back of the stroke, your legs are fully extended, torso leaned back slightly (1 o'clock), and the handle is resting just below the pectoral line. Your elbows should be drawn back, grazing your ribcage.
Phase 4: The Recovery
The recovery is the exact reverse of the drive and should take twice as long (a 1:2 stroke ratio). Extend arms first, hinge the torso forward past 12 o'clock, and only then allow the knees to bend as the seat slides forward.
"The most common novice error is 'shooting the slide'—where the legs push the seat back, but the handle doesn't move because the core and arms are disengaged. This transfers all the kinetic load directly into the lower back." — Biomechanics Analysis, Mayo Clinic Aerobic Guidelines (Source)
Maintenance Matrix: Rower vs. Treadmill
To further illustrate why transitioning away from a failing treadmill is a sound investment, review the annual maintenance requirements below.
| Maintenance Task | Motorized Treadmill | Air Rowing Machine |
|---|---|---|
| Deck/Belt Lubrication | Required every 3 months (100% silicone) | Not applicable |
| Belt Tensioning | Required annually to prevent slipping | Not applicable |
| Chain Care | N/A (Internal drive belt) | Wipe and oil with purified mineral oil every 50 hours |
| Rail Cleaning | N/A | Wipe down with isopropyl alcohol weekly to remove seat roller dust |
| Electrical Draw | High (Requires dedicated 15A-20A circuit) | Zero (Monitor runs on 2 D-cell batteries generated by flywheel) |
Setting the Damper Correctly
Many beginners set the air damper lever to 10, assuming higher is better. This is a critical mistake that mimics rowing a heavy, waterlogged boat, leading to rapid fatigue and form breakdown. For 90% of athletes, a Drag Factor between 100 and 130 (usually a damper setting of 3 to 5) perfectly simulates the hydrodynamics of a sleek racing shell on water. Access the hidden "Drag Factor" menu on your PM5 monitor to calibrate this precisely based on your local altitude and air density.
Final Verdict: Upgrading Your Cardio Setup
Dealing with a treadmill that stops when running is a symptom of an inherently high-maintenance machine design. By pivoting to a rowing machine, you eliminate motor burnout risks, reduce your equipment footprint by 40%, and engage 86% of your body's musculature per stroke. Whether you choose the indestructible Concept2 RowErg or the silent Hydrow Arc, following this precise installation and technique protocol will ensure a lifetime of uninterrupted, joint-friendly cardiovascular training.
More gear to consider
All reviews
Care: Stationary Bike Types vs NordicTrack 2450 Treadmill Old Model

Treadmill Motor HP Guide: Setup & Treadmill Belt Lube Checklist

YPOO Treadmill Motor Size Guide: HP vs CHP Explained

Elliptical vs Treadmill: Fixing Treadmill Funny Noises & Wear

ProForm Treadmill Incline Not Working? Top Portable Cardio
