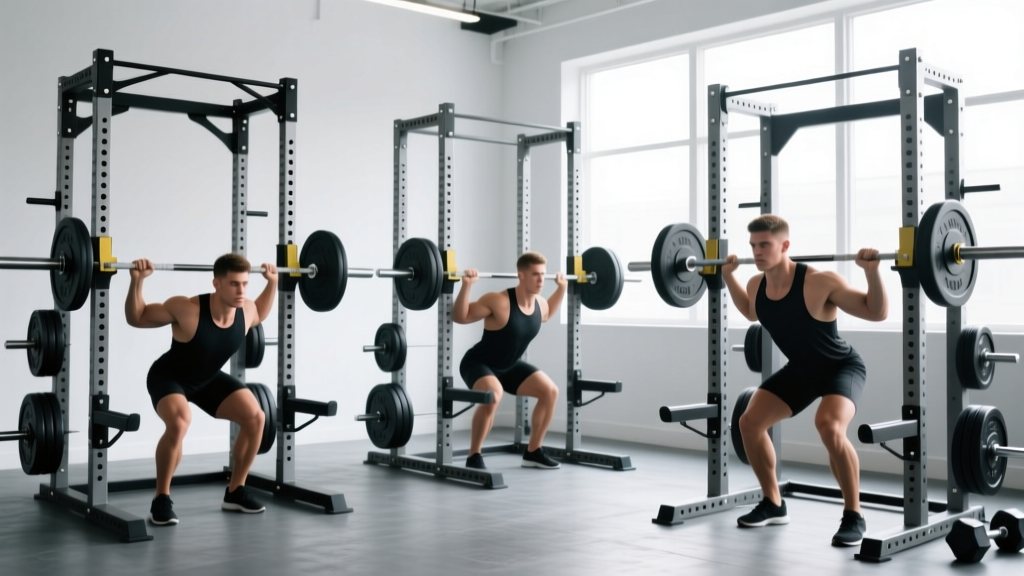
Power Rack vs Squat Rack vs Stand: RDL Workout Dumbbells Troubleshooting
Fix common RDL setup mistakes. We compare power rack vs squat rack vs squat stand for dumbbell and barbell RDLs to optimize your home gym safety.

The Hidden Danger of the RDL Setup
The Romanian Deadlift (RDL) is the undisputed king of posterior chain development. However, when integrating rdl workout dumbbells into your home gym routine, the limiting factor is rarely your hamstring strength—it is usually your grip, your lower back setup, or your equipment's safety tolerances. Many lifters assume that simply grabbing a pair of heavy hex dumbbells and hinging at the hips is enough. But without the right rack infrastructure, you risk lumbar flexion, grip failure, and even catastrophic damage to expensive adjustable equipment.
Choosing between a power rack, a squat rack, and a squat stand is not just about where you store your barbell; it is about creating a safe, biomechanically sound environment for heavy hip hinges. In this 2026 troubleshooting guide, we break down the exact failure modes of RDLs and how your rack choice can either fix or exacerbate them.
Expert Callout: According to the American Council on Exercise (ACE), the hip hinge requires maintaining a neutral spine while pushing the hips back. When your equipment forces you to compromise this position to pick up or lower weights, you are no longer training hamstrings—you are testing the tensile strength of your lumbar discs.The Biomechanics of the Pickup: Mistake #1
The most common troubleshooting issue with heavy dumbbell RDLs happens before the rep even begins. Picking up a pair of 100lb urethane hex dumbbells from the floor requires a deep squat or a compromised deadlift posture. If you are fatigued, this initial pickup often results in immediate lumbar rounding.
The Rack-Assisted Solution
A proper power rack or squat rack equipped with a specialized utility shelf or adjustable J-cups allows you to rest the dumbbells at knee height. You can then brace your core, hinge slightly, and grab the implements with a neutral spine. Squat stands, lacking crossmembers and shelving options, force you to pick the weights directly off the floor, increasing the risk of a lower-back tweak before your working set even starts.
Power Rack vs Squat Rack vs Squat Stand: The RDL Matrix
To troubleshoot your home gym setup, you must understand the structural limitations of your rack. Below is a 2026 comparison matrix tailored specifically for heavy RDL and hip-hinge workflows.
| Feature | Power Rack (e.g., Rogue RML-390F) | Squat Rack (e.g., REP PR-1100) | Squat Stand (e.g., Titan T-2) |
|---|---|---|---|
| 2026 Avg. Price | $1,300 - $1,500 | $350 - $450 | $250 - $320 |
| Upright Profile | 3x3 inch (11-gauge steel) | 2x2 inch (14-gauge steel) | 2x3 inch (Open design) |
| Footprint | 43' x 43' (Large) | 48' x 43' (Open front) | 23' x 21' (Minimal) |
| RDL Safety Pins | Yes (Pin-pipe or strap safeties) | Yes (Basic pin safeties) | No (Spotter arms only) |
| Dumbbell Storage | Excellent (Add-on shelves) | Moderate (Horn attachments) | Poor (Floor only) |
For a comprehensive breakdown of standard dumbbell RDL biomechanics and muscle targeting, refer to the exercise database at EXRX.
Troubleshooting 3 Critical RDL Equipment Failures
Failure 1: The 'Bottom-Out' Range of Motion Issue
The Mistake: Lifters descend too far, causing the 'butt wink' (lumbar flexion) because they lack the proprioception to know where their hamstring flexibility ends and their spinal erector compensation begins.
The Troubleshooting Fix: Use a power rack. Set the interior safety pin-pipes or heavy-duty nylon straps exactly one inch below your maximum safe range of motion. When the rdl workout dumbbells touch the safeties, it provides an immediate tactile 'hard stop.' This removes the guesswork from the eccentric phase and guarantees your spine remains neutral at the bottom of the hinge. Squat stands cannot offer this internal safety net.
Failure 2: Adjustable Dumbbell Drop Risks
The Mistake: Failing a rep with adjustable dumbbells (like PowerBlock Elite EXP or Nuobell 80s) and dropping them onto the floor or a rack crossmember out of frustration or fatigue.
The Troubleshooting Fix: Never drop adjustable dumbbells. The internal selector mechanisms and plastic casing will shatter, turning a $400-$800 investment into scrap metal. If you are pushing to absolute failure on RDLs, you must use a power rack with strap safeties set at mid-shin height. If you fail, you simply open your hands and let the dumbbells drop 4 inches onto the nylon straps. If you only own a squat stand, you must strictly leave 1-2 reps in the tank (RIR) to ensure you can safely guide the weights to the floor.
Failure 3: Grip Fatigue Masking Hamstring Weakness
The Mistake: Using smooth-handled or excessively thick-grip dumbbells for high-rep RDLs, causing the forearms to fail before the hamstrings are fully stimulated.
The Troubleshooting Fix: While a Rogue Monster Power Rack allows you to easily store lifting straps and chalk, the real fix is implement selection. For heavy RDLs, opt for urethane hex dumbbells with aggressive knurling and standard 35mm handles. If your rack setup forces you to use a barbell due to a lack of heavy dumbbells, ensure you are using a rack with a pull-up bar to practice hanging grip decompression between sets.
Step-by-Step: Building the Ultimate 2026 RDL Station
If you are outfitting a garage gym specifically for posterior chain work, follow this exact setup protocol:
- Anchor the Rack: Bolt your power rack or squat rack to a reinforced plywood platform. Heavy RDLs create significant horizontal shear force when you push your hips back into the uprights.
- Install Strap Safeties: Skip the metal pin-pipes. Install heavy-duty nylon safety straps in the power rack at hole 15 (approx. mid-shin height). Straps are quieter and won't damage the knurling or coating of your dumbbells if you need to bail on a set.
- Add a Utility Shelf: Mount a rear utility shelf at waist height. This allows you to stage your rdl workout dumbbells, lifting belts, and straps without bending over repeatedly between sets.
- Positioning: Stand dead-center in the rack. The uprights should be just outside your shoulders, allowing you to push your hips back and lightly graze the uprights for a tactile depth cue without throwing off your center of gravity.
Pro-Tip: If you are forced to use a squat stand due to space constraints, place a 4-inch thick stack of crash mats or horse stall mats directly behind your heels. This forces you to keep your weight in your mid-foot and prevents you from falling backward during the deepest part of the hip hinge.
Final Verdict: Which Rack Wins for RDLs?
If your primary goal is heavy, safe, and progressive overload on your rdl workout dumbbells and barbell hinges, the power rack is the undisputed winner. The ability to utilize internal safety straps as a tactile depth limiter is a non-negotiable feature for lifters pushing past 80lb dumbbells or 300lb barbell loads. While squat stands save space and money, they actively hinder your ability to safely troubleshoot the most dangerous aspects of the RDL. Invest in the infrastructure that protects your spine, and the hamstring gains will follow.
More gear to consider
All reviews
Bala Dumbbells vs Rubber Hex & Urethane: 2026 Market Trends
Budget Storage for Leg Workouts with Dumbbells: Female Guide

Neoprene Dumbbells Sizes: A Complete Home Gym Guide
Arm Workouts With Dumbbells: Urethane vs Rubber Hex 2026 Trends
Neoprene Dumbbell Setup: What Do One Arm Dumbbell Rows Work?
