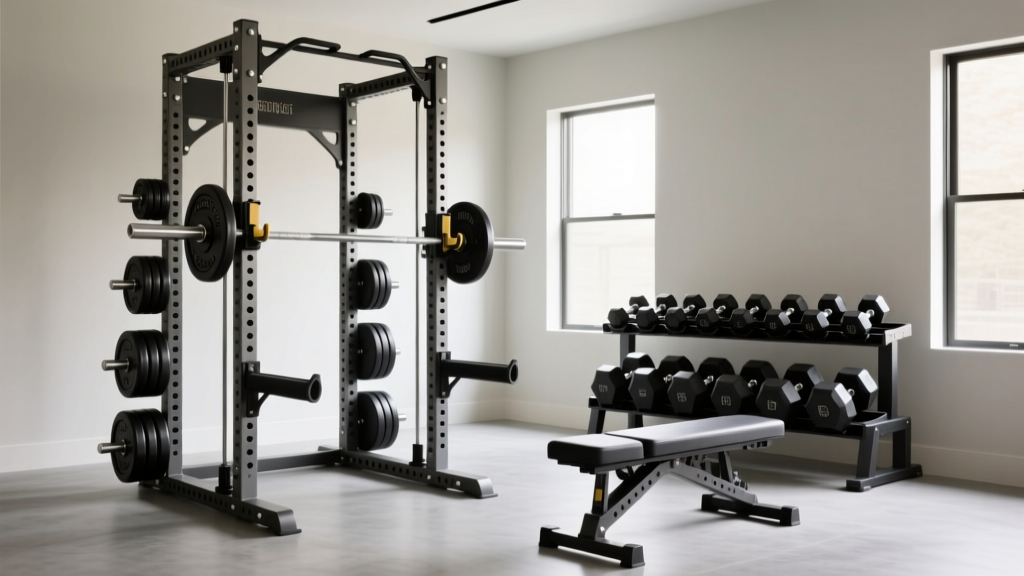
Power Rack vs Squat Stand Setup & Cast Iron Dumbbell Storage
Master your home gym installation. Compare power rack vs squat stand setups, learn bolting techniques, and safely integrate cast iron dumbbell storage.

The Architecture of Your Lift Station
Building a home gym in 2026 requires more than just ordering steel; it demands a precise understanding of spatial dynamics, load distribution, and structural anchoring. Whether you are outfitting a two-car garage or a dedicated basement studio, choosing between a full power rack, a half squat rack, and minimalist squat stands dictates the flow of your entire training space. According to facility guidelines published by the National Strength and Conditioning Association (NSCA), proper equipment spacing and anchoring are the primary factors in preventing home gym injuries and equipment failure.
Defining the Big Three
- Power Rack (Full Cage): Typically featuring a 47" x 49" footprint (like the Rogue R-3), this enclosed 11-gauge steel structure offers maximum safety for solo lifters. It utilizes four uprights and crossmembers, providing inherent stability even without bolting, though anchoring is always recommended.
- Squat Rack (Half Rack): Often featuring a 48" x 48" base with two main uprights and a rear stabilizer. Half racks require less overhead clearance and floor space but rely heavily on rear weight storage or bolt-down brackets to prevent forward tipping during failed lifts.
- Squat Stand: The most minimalist option, consisting of two independent uprights with weighted base feet (e.g., Rogue S-4). While they offer an unobstructed bar path and easy storage, they possess a high center of gravity and must be bolted to the floor to meet basic safety thresholds.
Subfloor Assessment and Anchoring Hardware
Before unboxing your rack, you must evaluate the subfloor. Most residential garages feature a concrete slab, while basement and bedroom gyms typically have wooden joist systems. The American Council on Exercise (ACE) emphasizes that dynamic loading—such as dropping a barbell or aggressively re-racking heavy weights—transfers immense kinetic energy into the floor.
⚠️ Critical Warning for Wooden Subfloors: Never bolt a squat stand directly into standard OSB or plywood subflooring without locating the underlying joists. You must use 1/2" x 4" structural lag screws driven directly into the center of 2x10 or 2x12 joists (typically spaced 16" on center). If your rack's base plates do not align with the joists, you must install a secondary layer of 3/4" tongue-and-groove plywood spanning multiple joists to distribute the shear force.For concrete slabs (minimum 3000 PSI, 4" thick), you will need a hammer drill, a 1/2" masonry bit, and 3/8" x 3" Red Head wedge anchors or sleeve anchors. Avoid using standard concrete screws (like Tapcons) for rack anchoring, as they lack the sheer strength to withstand the lateral forces generated during heavy squats or kipping pull-ups.
Step-by-Step Installation Walkthrough
- Map the Clearance Zone: Measure a 36-inch perimeter around the rack. This is your loading zone. Ensure no walls, doors, or low-hanging HVAC ducts infringe on this space, especially if you plan to use a lat pulldown attachment.
- Assemble the Base First: Construct the bottom crossmembers and base feet on a piece of cardboard to prevent scratching the steel finish. Hand-tighten all bolts initially to allow for squaring.
- Raise the Uprights: With a partner, lift the uprights into the base sockets. Use a magnetic torpedo level on two adjacent sides of each upright to ensure they are perfectly plumb (90 degrees to the floor).
- Torque the Hardware: Once plumb, tighten all structural bolts using a torque wrench. For most 11-gauge steel racks utilizing 5/8" Grade 8 hardware, the target torque is between 60 and 80 ft-lbs. Check your specific manufacturer's manual, as Rogue Fitness and REP Fitness have slightly varying tolerances.
- Drill and Anchor: Mark the floor through the base plate holes. Move the rack aside, drill your masonry holes to the specified depth (usually 1/2" deeper than the anchor length), vacuum out the concrete dust, position the rack back over the holes, insert the wedge anchors, and torque them down until the washer is flush and tight.
Spatial Planning: Integrating the Cast Iron Dumbbell Set
One of the most common setup failures in home gyms involves the mismanagement of free weight storage, specifically when integrating a heavy cast iron dumbbell set. Unlike urethane or rubber-coated options, a traditional hex cast iron dumbbell set is incredibly dense and unforgiving. A standard 5-to-50 lb cast iron set (in 5 lb increments) comprises 20 pairs, totaling 1,100 lbs of solid iron.
The Cantilever Tipping Hazard
Many lifters attempt to save floor space by mounting a weight tree directly to the side or rear of a squat stand or half rack. When you load 1,100 lbs of cast iron dumbbells onto a rack-mounted tree, you create a massive cantilevered load. If the rack is not bolted down, or if the base footprint is too small, simply pulling a 50 lb cast iron dumbbell off the top peg can shift the center of gravity past the base's tipping point, causing the entire rig to collapse forward.
The Optimal Storage Solution
For heavy cast iron dumbbell sets, abandon the rack-mounted tree. Instead, invest in a dedicated, floor-standing 3-tier A-frame dumbbell rack. Place this rack at least 24 inches away from the main lifting station's swing radius. This not only eliminates the tipping hazard but also opens up the floor space directly in front of your power rack or squat stand for heavy dumbbell floor presses and goblet squats.
| Rack Type | Avg. Footprint | Max Safe Dumbbell Tree Load | 2026 Price Range |
|---|---|---|---|
| Power Rack (Full Cage) | 47" x 49" | 800 lbs (Rear Mount) | $650 - $1,200 |
| Half Rack (Squat Rack) | 48" x 48" | 400 lbs (Rear Mount) | $450 - $850 |
| Squat Stand | 48" x 48" (Base) | 0 lbs (No Tree Recommended) | $250 - $450 |
Failure Modes and Safety Protocols
Even with premium 11-gauge steel, improper setup leads to catastrophic failure modes. The most frequent issue in 2026 home gym builds is upright deflection. If a power rack is assembled out of square (meaning the base is a parallelogram rather than a perfect rectangle), tightening the top crossmembers will introduce permanent torsional stress into the uprights. When loaded with 400+ lbs, these pre-stressed uprights can buckle or bend.
"Always measure the diagonal distance from the front-left base corner to the rear-right base corner, and compare it to the opposite diagonal. If the measurements differ by more than 1/8th of an inch, your rack is out of square. Loosen the hardware, adjust the frame, and re-measure before final torquing."
Furthermore, when utilizing squat stands, always ensure the safety spotter arms are deployed and angled slightly upward. If a lifter fails a squat and drops the barbell onto downward-angled spotter arms, the kinetic energy will slide the barbell outward, potentially rolling off the edge and causing severe injury. By angling the arms upward toward the uprights, gravity naturally forces the barbell into the safest resting position against the rack's steel pillars.
Maintenance and Ongoing Calibration
Steel expands and contracts with seasonal temperature shifts, particularly in unclimate-controlled garages. Every six months, perform a hardware audit. Use a torque wrench to check all structural bolts, paying special attention to the pull-up bar mounting hardware and the J-cup retaining pins. Wipe down your bare steel uprights with a light coat of 3-in-One oil to prevent surface oxidation, ensuring your rack remains a safe, lifelong foundation for your training.
More gear to consider
All reviews
2026 Plate Market: Bumper vs Iron & Side Lunges with Dumbbells
Urethane vs Rubber Hex Dumbbells: Care for Pronated Dumbbell Curls
Chest Workout Using Dumbbells vs Barbell: Knurling & Weight Guide
Compact Gym Layouts: Loadable Dumbbells and Dumbbell Reverse Flyes

Olympic Barbell Knurling Guide & Lying Overhead Dumbbell Pullover
