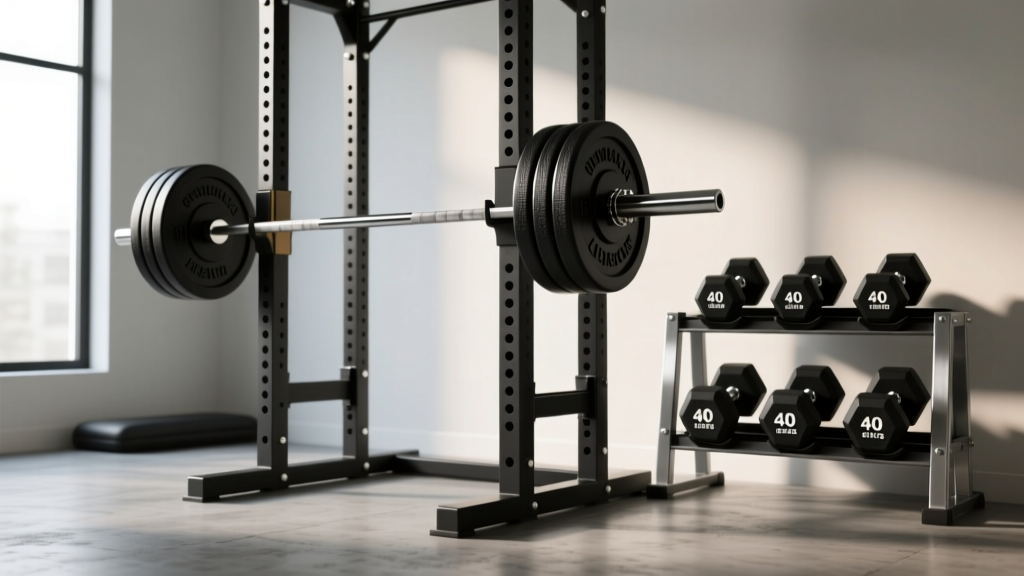
Power Rack Setup: Olympic Barbell Knurling & 40lbs Dumbbell Storage
Master your home gym setup with our walkthrough on Olympic barbell knurling, weight specs, and safely installing storage for your 40lbs dumbbell sets.

The Foundation: Selecting Your Olympic Barbell
Building a comprehensive free-weight zone in 2026 requires more than just buying the heaviest iron you can find; it demands a strategic approach to equipment selection and spatial ergonomics. Whether you are outfitting a commercial facility or a high-end garage gym, the synergy between your primary barbell, your accessory dumbbells, and your storage infrastructure dictates the safety and flow of your training space. This complete setup and installation walkthrough will guide you through the nuances of Olympic barbell weight and knurling specifications, while detailing the physical installation of a power rack system designed to house both your barbell and a dedicated 40lbs dumbbell set.
According to BarBend's comprehensive Olympic barbell guide, understanding the metallurgy and grip mechanics of your bar is the most critical purchasing decision you will make. Let us break down the exact specifications you need to look for before we move to the physical installation.
Shaft Diameter, Weight, and Tensile Strength
A standard men's Olympic barbell weighs exactly 20kg (44 lbs) and features a 28mm to 29mm shaft diameter. However, the internal steel quality—measured in tensile strength (PSI)—separates premium bars from budget options that will permanently bend under heavy squats.
- 190,000 PSI: The absolute minimum for a dedicated power bar. Good for entry-level lifters, but susceptible to whippy deformation during heavy deadlifts.
- 205,000 PSI (e.g., Rogue Ohio Power Bar, ~$395): The industry gold standard for powerlifting. Offers zero whip and exceptional rigidity.
- 215,000+ PSI (e.g., Kabuki Strength New Generation Power Bar, ~$450): Elite-tier stiffness, virtually unbendable under human loads.
For Olympic weightlifting (snatch, clean and jerk), you want a 28mm shaft with a lower tensile strength (around 190,000 PSI) to allow for the 'whip' that aids in the upward phase of the lift. Do not use a stiff 29mm power bar for heavy Olympic lifts; the lack of flex will transfer excessive shock to your wrists and elbows.
Decoding Knurling: Volcano vs. Mountain vs. Hill
Knurling is the machined pattern on the bar shaft that provides grip. As detailed in the Garage Gym Reviews knurling breakdown, the shape of the knurl dictates both comfort and security. You must choose based on your primary training modality.
| Knurl Type | Geometry & Depth | Best For | Example Model |
|---|---|---|---|
| Volcano | Peaks with deep valleys (0.020' depth) | Powerlifting, Heavy Compounds | Rogue Ohio Power Bar |
| Mountain | Flat, sharp peaks (0.035' depth) | Extreme grip needs (often tears hands) | Cheap Import Bars |
| Hill | Rounded, shallow peaks (0.015' depth) | Olympic Lifting, High Reps | Eleiko Olympic WL Bar |
If your gym focuses on heavy, low-rep strength work, the 'volcano' knurl provides maximum surface area contact without the sharp, skin-tearing edges of the 'mountain' profile. For high-volume hypertrophy or Olympic lifting, the 'hill' profile prevents callous tearing during dynamic movements.
Complementing the Barbell: Integrating the 40lbs Dumbbell
While the barbell is the king of absolute strength, unilateral accessory work is non-negotiable for injury prevention and muscle symmetry. As we move through 2026, urethane has completely overtaken traditional rubber in premium home gyms due to its zero-odor profile and superior drop resistance.
Integrating a 40lbs dumbbell set (such as the Rogue Urethane Hex Dumbbells, priced around $115 each) bridges the gap between heavy barbell compounds and isolation movements. The 40lb weight is the ultimate 'workhorse' increment for unilateral dumbbell rows, Bulgarian split squats, and heavy goblet squats. Furthermore, the hexagonal urethane heads prevent rolling, a critical safety feature when performing renegade rows or placing them on the floor during complex supersets.
Expert Insight: Never store heavy urethane dumbbells on standard wire commercial racks. The point-load stress will eventually snap the welds. Always use a dedicated A-frame or 3-tier flat steel dumbbell rack rated for at least 1,500 lbs total capacity.
Complete Installation Walkthrough: Rack and Weight Storage
Selecting the gear is only half the battle. Improper installation of a power rack and heavy weight storage is a leading cause of home gym accidents and concrete slab damage. Below is the exact, step-by-step walkthrough for anchoring your equipment safely.
Step 1: Spatial Planning and Floor Assessment
Before unboxing, map out an 8x10 foot footprint. Your power rack requires a minimum of 24 inches of clearance on all sides for loading plates and racking the barbell. The dumbbell rack should be positioned exactly 36 inches outside the rack's uprights, allowing you to grab your 40lbs dumbbell without taking more than one step outside the safety straps.
Step 2: Drilling and Anchoring the Power Rack
If you are bolting into a standard 4-inch thick residential concrete garage slab, you must use 1/2' x 3-3/4' wedge anchors. Do not use concrete screws (Tapcons); they lack the shear strength to hold a racked barbell during a failed lift.
- Position the Rack: Align the base flanges and mark the bolt holes with a lumber crayon.
- Drill the Holes: Using a hammer drill and a 1/2' carbide-tipped masonry bit, drill exactly 4 inches deep. Pro Tip: Wrap a piece of masking tape around the drill bit at the 4-inch mark to ensure you do not drill too deep and compromise the slab's integrity.
- Clear the Dust: Use a shop-vac and a wire brush to remove all concrete dust from the hole. Residual dust will reduce the holding power of the wedge anchor by up to 40%.
- Set the Anchors: Insert the wedge anchors through the rack flange, place the washer and nut, and tighten with a torque wrench to exactly 60 ft-lbs. The wedge will expand at the base of the hole, creating a permanent mechanical lock.
Step 3: Dumbbell Rack Ergonomics and Placement
When assembling your 3-tier dumbbell rack, angle the tiers at 30 degrees. This specific angle allows the lifter to grip the handle and slide the dumbbell up and out using the natural biomechanics of the shoulder joint, rather than deadlifting the weight straight up off a flat shelf. Place your heaviest pairs (like your 40lbs dumbbell set) on the bottom tier to lower the rack's center of gravity and prevent tipping.
Safety Warning: Point Loading on Concrete
Standard residential concrete has a compressive strength of 3,000 to 4,000 PSI. Dropping a loaded barbell or heavy steel dumbbells directly onto bare concrete creates 'point loading' that can cause spalling and micro-fractures. Always install 3/4-inch thick horse stall mats (vulcanized rubber) over the entire lifting zone to disperse kinetic energy.
Maintenance and Long-Term Care
Both your Olympic barbell and your dumbbell storage require routine maintenance to ensure longevity, especially in non-climate-controlled environments like garages where humidity fluctuates.
- Barbell Knurling Care: Dead skin, chalk, and sweat will pack into the valleys of your volcano knurl, leading to rust and reduced grip. Once a week, scrub the knurling with a stiff nylon brush (never use brass or steel, which will strip the zinc or cerakote finish). Follow up by applying a light coat of 3-in-One oil on a microfiber cloth and wiping down the shaft.
- Dumbbell Inspections: Every six months, inspect the welds where the steel handle meets the urethane head of your 40lbs dumbbell. Look for hairline fractures or 'rust weeping,' which indicates internal steel oxidation and structural compromise.
By understanding the intricate details of barbell knurling and executing a precise, mechanically sound installation of your rack and dumbbell storage, you create a training environment that is not only highly functional but inherently safe. For further reading on outfitting your space, consult the Rogue Fitness power rack installation specifications to verify the exact anchor requirements for your specific rig model.
More gear to consider
All reviews
Seated Dumbbell Raises: Adjustable Dumbbell Mistakes & Top Picks
Best Adjustable Weights for a Workout Routine With Dumbbells (2026)

Is a Loadable Dumbbell Weight Set Walmart's Best Value?

EZ vs Straight Bar Value: Arm Exercises With Dumbbells for Ladies

Olympic vs Standard Plates: Single Arm Dumbbell Row Bench Supported
