Rack Guide for Incline Dumbbell Form: Power vs Squat vs Stand
Compare power racks, squat racks, and squat stands to optimize your incline dumbbell form. A beginner's step-by-step guide to safe home gym setups.

The Biomechanical Bottleneck: Why Rack Choice Dictates Form
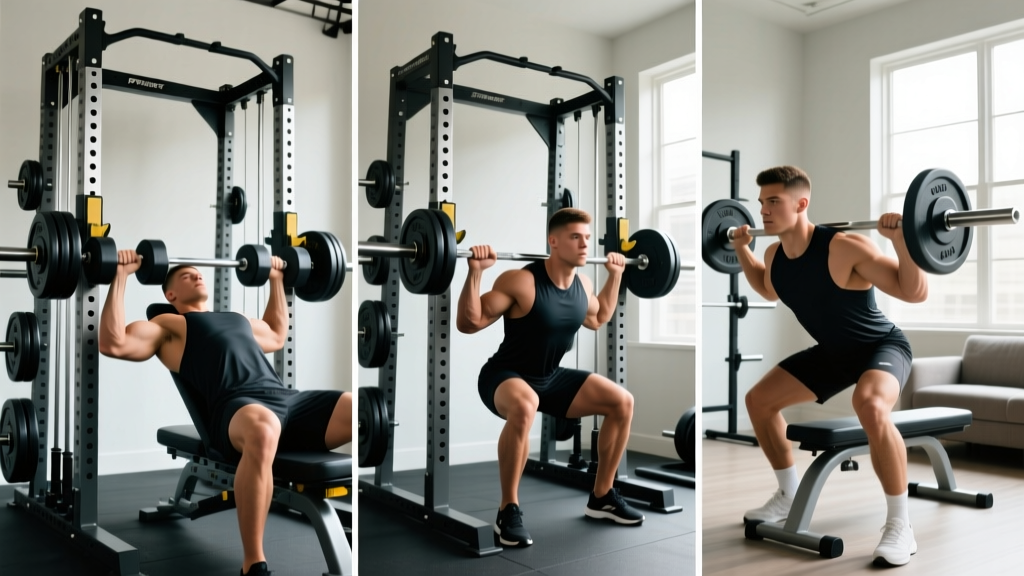
When beginners build a home gym, they typically obsess over barbell squat clearance but completely ignore how their rack footprint impacts incline dumbbell form. You can buy the best adjustable bench and premium urethane dumbbells on the market, but if your rack enclosure restricts your elbow path, your biomechanics will suffer, and your shoulder joints will pay the price.
Mastering the incline dumbbell press requires a 30-to-45-degree bench angle and a natural, unobstructed elbow flare. However, standard adjustable benches are roughly 50 inches long. If you push that bench into a fully enclosed 43-inch deep power rack, your head and upper back are trapped near the rear uprights. The result? Your elbows clip the steel posts during the eccentric phase, forcing you to tuck your arms unnaturally and shifting the load away from the clavicular pectorals.
⚠️ Beginner Warning: Never force an adjustable bench flush against the rear uprights of a deep power rack. According to Cleveland Clinic orthopedic guidelines, restricted elbow paths under heavy load force compensatory shoulder internal rotation, drastically increasing the risk of rotator cuff impingement and labral tears.In this step-by-step guide, we will compare power racks, squat racks (half racks), and squat stands specifically through the lens of upper chest development, helping you choose the right 2026 equipment for flawless incline dumbbell form.
Step 1: Decoding the Big Three (2026 Market Comparison)
Before you can perfect your technique, you must understand the physical boundaries of your equipment. Here is how the three main rack categories stack up regarding footprint, bench clearance, and pricing.
| Rack Category | 2026 Model Benchmark | Internal Depth | Incline Dumbbell Suitability | Base Price Range |
|---|---|---|---|---|
| Power Rack | Rogue R-3 (3x3 Steel) | 43 inches | Poor to Fair (Requires precise bench alignment; high risk of elbow clipping) | $695 - $850 |
| Squat Rack (Half Rack) | Titan Fitness T-3 Series | 24 inches | Excellent (Open front allows bench to protrude; natural elbow clearance) | $449 - $550 |
| Squat Stand | REP Fitness PR-1500 | N/A (Open) | Maximum Freedom (Zero enclosure constraints; ideal for strict form) | $249 - $299 |
Step 2: Matching Your Rack to Your Training Goals
The Power Rack Dilemma: Maximum Safety, Minimum Clearance
A full power rack is the undisputed king of heavy barbell squats and rack pulls. However, for dumbbell pressing, the 43-inch depth of standard models like the Rogue R-3 or PRx Profile creates a spatial conflict. To maintain proper incline dumbbell form, the bench must be pulled forward so the user's shoulders are near the front uprights. This leaves the rear of the bench unsupported and can cause lighter racks to tip if you drop a heavy dumbbell onto the edge of the pad.
The Squat Rack (Half Rack): The Biomechanical Sweet Spot
Half racks, which feature two main uprights and a rear stabilizer bar, are the gold standard for hybrid lifters. Because the front is entirely open, you can slide your adjustable bench in and out with ease. Your head and shoulders remain completely unobstructed, allowing you to focus entirely on the clavicular pec activation and scapular retraction required for the movement, without spatial anxiety.
The Squat Stand: Ultimate Freedom on a Budget
Squat stands consist of two independent uprights. They offer zero physical barriers, meaning your incline dumbbell form will never be compromised by steel posts. The trade-off? Stability and safety. Squat stands have a much lower overall weight capacity and rely heavily on floor bolting or massive rear spotter arms to prevent forward tipping when re-racking heavy dumbbells.
Step 3: Configuring Your Setup for Perfect Form
Once you have selected your rack type, follow this exact step-by-step physical configuration to guarantee optimal mechanics.
- Establish the Drop Zone: Position your adjustable bench so that when you are lying back at a 30-degree incline, your eyes are directly in line with the front uprights (or the center of the squat stands). This ensures your torso is in the 'safe zone' for dropping weights.
- Dial in the Incline Angle: While many commercial benches lock into a 45-degree angle, this often recruits too much anterior deltoid. Set your bench to the first or second notch (roughly 30 degrees). This is the biomechanical sweet spot for upper chest hypertrophy.
- Set the Spotter Arms (Crucial for Dumbbells): Unlike a barbell, you cannot simply rest dumbbells on safety pins. Set your spotter arms just below your ribcage level. If you fail a rep, you will drop the dumbbells laterally to the floor, but the arms will catch the bench or your torso if you lose balance.
- Check Elbow Clearance: Perform a dry run with empty hands. Retract your scapula, plant your feet, and simulate the pressing motion. Your elbows should naturally track at a 45-to-60-degree angle from your torso. If you feel the need to tuck your elbows to avoid hitting a rack post, move the bench forward immediately.
Pro Tip for 2026 Home Gyms: If you are locked into a 43-inch deep power rack and cannot change your equipment, invest in a shorter, specialized pressing bench (around 42 inches long) rather than a standard 50-inch utility bench. This keeps your torso centered in the rack while preserving vital elbow clearance.
Step 4: Executing the Movement Safely
With your rack and bench properly configured, it is time to execute. Proper incline dumbbell form is less about pushing the weight up and more about controlling the eccentric stretch.
- The Kick-Off: Clean the dumbbells to your shoulders one at a time using your knees. Do not attempt to swing heavy dumbbells (e.g., 70+ lbs) into position while already leaning back on an incline.
- Scapular Anchoring: Pinch your shoulder blades together and drive them into the bench pad. This creates a stable shelf and protects the rotator cuff.
- The Eccentric Phase: Lower the weights slowly over 2-3 seconds. Stop when the dumbbells are level with your upper chest. Going too deep on an incline stretches the bicep tendon and shoulder capsule under load, a common cause of pec minor strains.
- The Press: Drive the weights up and slightly inward, stopping just short of clanking the dumbbells together at the top to maintain constant tension on the upper pecs.
Final Verdict: Which Rack Should You Choose?
If your primary goal is heavy barbell powerlifting, and dumbbell pressing is just an accessory, buy a Power Rack and learn to carefully position your bench. If you are a bodybuilder, hypertrophy-focused lifter, or someone who prioritizes upper chest development and joint longevity, a Squat Rack (Half Rack) offers the perfect blend of open-front clearance and heavy-duty safety. Finally, if you are in a small apartment or garage with strict spatial limits and lighter dumbbells (under 50 lbs), Squat Stands will give you the unobstructed freedom you need to master your incline dumbbell form without breaking the bank.
More gear to consider
All reviews
Top Neoprene Dumbbells for Home Use & Dumbbell Hex Press (2026)
Rubber Hex vs Urethane Dumbbells for the Dumbbell Renegade Row
Dumbbell Squats for Glutes: Top Adjustable Dumbbell Reviews

Power Rack vs Squat Rack vs Stand for Your Dumbbell Arm Workout Plan
Cast Iron vs Competition Kettlebells for Plank Dumbbell Drags